Building a window seat from wood with plans
Building a window seat from wood can be a rewarding DIY project that adds both functionality and aesthetic appeal to your home.
Here’s a general overview of the steps involved in building a wooden window seat:
Materials and Tools You’ll Need:
- Plywood or solid wood boards for the seat and frame
- Lumber for the support structure
- Screws, nails, or dowels for assembly
- Measuring tape, level, and square
- Saw (circular saw, miter saw, or table saw)
- Drill and bits
- Wood glue
- Sandpaper or a sander
- Paint, stain, or finish of your choice
- Upholstery materials (if desired)

Building a window seat from wood
Step-by-Step Guide:
- Measure and Plan: Measure the dimensions of the window area where you want to install the window seat. Consider the height, depth, and width of the seat, as well as the height of the backrest (if you plan to have one). Sketch out your design and calculate the amount of wood you’ll need.
- Gather Materials: Purchase the necessary materials based on your measurements and design. Choose a wood type that matches your home’s aesthetic and your woodworking skills.
- Build the Frame: Construct the base frame of the window seat using 2×4 or 2×6 lumber. Attach the frame to the wall studs using screws or brackets. Make sure it’s level and securely anchored.
- Add Support Braces: Install vertical supports underneath the frame for added stability. These will also serve as attachment points for the front-facing panel of the seat.
- Build the Seat: Cut your plywood or solid wood boards to the dimensions of the seat. Attach these boards to the top of the frame using screws or dowels. Make sure the seat is level and securely attached.
- Create the Backrest (Optional): If you’re adding a backrest, measure and cut the appropriate wood pieces. Attach them to the back of the seat frame securely. The angle of the backrest should be comfortable for sitting.
- Finish the Edges: Use additional wood trim to cover any exposed edges of the plywood or boards. This provides a polished look and can also help prevent splinters.
- Sand and Finish: Sand all surfaces of the window seat to smooth out any rough edges or surfaces. You can then apply paint, stain, or a finish of your choice to protect the wood and enhance its appearance.
- Upholstery (Optional): If you want a cushioned seat, you can add foam padding and fabric upholstery. Measure and cut the foam to fit the seat, and then cover it with the fabric of your choice. Attach the fabric using a staple gun.
- Install Hardware (Optional): Depending on your design, you might want to add decorative hardware like handles or knobs to the front of the seat.
- Final Touches: Once everything is assembled, take a final look to ensure all parts are secure and well-finished.
Remember that safety is important when working with tools and materials. Take necessary precautions, such as wearing safety glasses and using appropriate ventilation when applying finishes. If you’re not experienced with woodworking, it might be helpful to consult tutorials, guides, or even seek assistance from someone with woodworking experience.

Building a window seat from wood
Certainly, let’s continue with the remaining steps of building a window seat from wood:
- Mount the Seat: Carefully lift the finished window seat into place on top of the base frame. Make sure it fits snugly and rests securely on the supports. Use screws to attach the seat to the frame from underneath, ensuring a sturdy connection.
- Check Stability and Levelness: Test the stability of the window seat by sitting on it and applying a bit of pressure. Ensure that it doesn’t wobble or shift. Additionally, use a level to check that the seat is perfectly horizontal both front-to-back and side-to-side.
- Touch Up and Final Adjustments: Inspect the entire window seat for any exposed screws, rough edges, or other imperfections. Make any necessary touch-ups to the finish or edges. If the seat isn’t level, you may need to adjust the supports or shim the base frame as needed.
- Accessorize: Personalize your window seat with cushions, throw pillows, and other decor items that match your home’s style. This is your opportunity to add comfort and visual appeal.
- Maintain and Enjoy: Regularly clean and maintain your window seat to keep it looking its best. Dust, wipe, or vacuum the seat and cushions as needed. Be cautious with spills and moisture, especially if you’ve applied a finish that’s not fully waterproof.
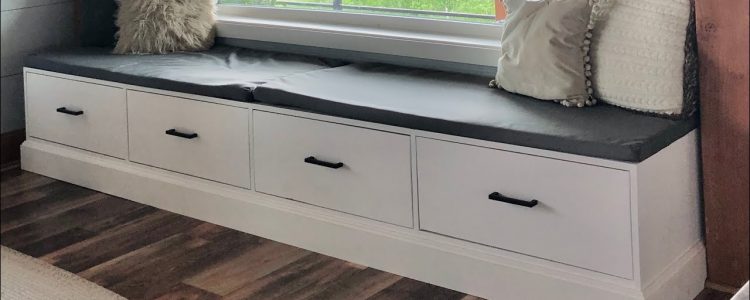
- Adapt for Storage (Optional): If you’d like to maximize functionality, consider adding storage space beneath the window seat. This can be achieved by incorporating drawers or hinged lids that open to reveal hidden storage compartments.
- Share Your Work: Proudly share your creation with friends and family. Your DIY window seat will not only enhance your living space but also serve as a testament to your craftsmanship.
Remember that every window seat project is unique, and adjustments might be necessary based on your specific space and preferences. If you’re new to woodworking, take your time and work methodically. Don’t hesitate to ask for advice from experienced DIYers, watch tutorials, or consult woodworking forums if you encounter any challenges.
Building a window seat can be a gratifying project that adds character to your home while providing a cozy spot to relax, read, or enjoy the view. Enjoy the process and the end result!
Building a window seat from wood
Of course, let’s continue with more detailed steps and considerations for building a window seat from wood:
- Safety Precautions: Safety should always be a priority. When using power tools, wear appropriate protective gear like safety goggles, ear protection, and gloves. Keep the work area well-lit and organized to prevent accidents.
- Precise Measurements: Accurate measurements are crucial for a successful project. Use a tape measure, straight edge, and level to ensure your cuts and placements are precise. Remember the old adage: “Measure twice, cut once.”
- Joinery Techniques: Depending on your woodworking skills, you might use various joinery techniques like butt joints, dado joints, or lap joints. Each method has its advantages and considerations, so choose the one that suits your skill level and the project’s requirements.
- Finishing Options: When finishing the wood, consider the look you want to achieve. Stain can enhance the natural wood grain, while paint can provide a uniform color. Polyurethane or varnish adds a protective layer. Make sure to apply finishes in a well-ventilated area and follow the manufacturer’s instructions.
- Weight Capacity: Keep in mind the weight capacity of your window seat. If it’s intended for sitting or storage, ensure that the materials and supports can bear the expected load without sagging or breaking.
- Ventilation and Air Flow: If the window seat covers a radiator or heating vent, ensure there’s sufficient space for proper air circulation. Blocking vents can lead to heating or cooling inefficiencies.
- Electrical Outlets: If your window seat covers electrical outlets, make sure they remain accessible. Consider integrating outlets into the design or leaving a gap in the seat for access.
- Sanding Techniques: Sand all surfaces smoothly to avoid splinters and create a polished finish. Start with a coarse grit sandpaper and progressively move to finer grits for a smooth result. Sand in the direction of the wood grain to avoid scratching the surface.
- Cushion Comfort: If you’re adding cushions or upholstery, ensure that the foam is of the appropriate density for comfort. Test the seat with cushions before finalizing the project to make sure it’s enjoyable to sit on.
- Permits and Regulations: Depending on your location and the scope of your project, you might need to obtain permits or adhere to building regulations. Check with your local authorities to ensure compliance.
- Maintenance Plan: Wood is a natural material that can be affected by changes in humidity and temperature. Have a maintenance plan in place, such as periodic re-finishing, to keep your window seat looking its best over time.
- Learn and Improve: As with any DIY project, there might be challenges along the way. Embrace these challenges as learning opportunities. Each project you undertake can help you improve your woodworking skills and problem-solving abilities.
Remember that building a window seat requires patience, attention to detail, and a willingness to adapt as needed. It’s a project that can bring a lot of joy and satisfaction as you transform a simple space into a functional and inviting feature of your home. Enjoy the process and take pride in your craftsmanship!
Building a window seat from wood
Certainly, here are some additional steps and tips to guide you through the process of building a window seat from wood:
- Sealing and Insulation (Optional): If your window seat will be exposed to the outdoors or if you live in a cold climate, consider adding insulation to the seat area to prevent drafts. Seal any gaps or cracks to ensure the space remains cozy.
- Integrated Shelving: To further maximize the functionality of your window seat, consider incorporating built-in shelves or cubbies beneath the seat. This provides additional storage space for books, magazines, or other items.
- Matching the Style: Design your window seat to match the existing decor of the room. Choose a color scheme, finish, and design elements that complement the overall aesthetic.
- Modular Design: If you anticipate moving or redesigning your space in the future, consider designing the window seat in a modular way. This allows for easier disassembly and reassembly if needed.
- Cable Management: If you plan to use the window seat as a workspace, include cable management solutions for electronic devices. This could involve discreet holes for cords or even built-in charging stations.
- Experiment with Design: While traditional rectangular window seats are common, don’t be afraid to get creative with the design. Curved edges, asymmetrical shapes, or intricate woodwork can add uniqueness to your project.
- Local Wood Sources: Whenever possible, consider using locally sourced wood. Local wood can add character and a sense of connection to your region.
- Collaboration and Help: Don’t hesitate to seek assistance from friends or family members, especially during steps that require heavy lifting or precise measurements. An extra set of hands can make the process smoother.
- Detailed Sketches and Plans: Create detailed sketches and plans before you start cutting wood. This will help you visualize the final product and identify any potential issues before they arise.
- Environmental Considerations: If you’re concerned about the environmental impact, choose sustainably sourced wood or consider using reclaimed wood from old furniture or buildings.
- Budgeting: Before you begin, outline a budget for the project. This will help you manage costs and choose materials and finishes that align with your financial plan.
- Post-Construction Cleaning: After the window seat is built, thoroughly clean the area to remove any sawdust, debris, or adhesive residue. This will ensure a clean and inviting space.
- Longevity and Durability: If you’re looking for long-lasting durability, invest in high-quality wood and hardware. Properly constructed, finished, and maintained, your window seat can last for many years.
- Document Your Process: Consider taking photos or keeping a journal of the project as it progresses. It can be rewarding to look back on your journey from start to finish.
Remember, building a window seat is not just about the end product—it’s about the experience of creating something with your own hands. Embrace the challenges and celebrate the successes along the way. Enjoy the process of transforming raw materials into a functional and beautiful addition to your home.
Building a window seat from wood
Absolutely, here are some more steps and tips to continue guiding you through the process of building a window seat from wood:
- Pre-Assembly Finishing: Before assembling the window seat components, finish the individual pieces (such as the seat, backrest, and frame) with paint, stain, or other finishes. This can make it easier to reach all the nooks and crannies and achieve a uniform finish.
- Test Fitment: Before attaching pieces permanently, perform a test fitment to ensure everything aligns properly. This can help you catch any discrepancies or errors in measurements before they become more difficult to correct.
- Counter-Sinking Screws: When attaching wood pieces with screws, consider using a countersink bit to create a recessed hole for the screw heads. This allows you to fill the holes with wood filler, creating a smooth surface for finishing.
- Use Wood Clamps: Wood clamps are essential for holding pieces in place while glue dries or while you’re fastening components together. They help ensure tight and accurate joints.
- Router for Decorative Edges: If you want to add a decorative touch, consider using a router with different bits to create decorative edges on the seat or frame. This can add visual interest and a professional finish.
- Check for Level and Plumb: Throughout the construction process, frequently check that your window seat is level (horizontally) and plumb (vertically). This attention to detail will result in a well-balanced and visually appealing final product.
- Avoid Over-Tightening Screws: When using screws to attach components, be cautious not to over-tighten them, as this can strip the wood or cause cracking.
- Patience with Wood Glue: If you’re using wood glue, follow the manufacturer’s recommended drying time before moving or putting weight on the glued pieces. Rushing this step can compromise the integrity of the joint.
- Consider Maintenance Access: If your window seat is built against a wall, think about how you’ll access the space behind it for maintenance, such as cleaning or repairs.
- Hiding Screw Heads: To create a clean and professional look, consider using wood plugs to hide screw heads. These can be sanded and finished to blend seamlessly with the wood.
- Mock Assembly: Before permanently attaching the backrest or any other parts, do a mock assembly to ensure that everything fits as expected. This gives you a chance to make any necessary adjustments.
- Practice Patience: Woodworking requires patience and attention to detail. Take your time to ensure that each step is done accurately, and don’t rush the process.
- Learn from Mistakes: Mistakes are a natural part of any DIY project. Instead of getting discouraged, view them as opportunities to learn and improve your skills.
- Share Your Success: Once your window seat is complete, share your achievement with friends and family. You might inspire others to take on their own woodworking projects.
- Enjoy the Fruits of Your Labor: After completing the construction, take time to relax and enjoy your new window seat. Whether it’s for reading, daydreaming, or simply soaking in the view, your creation is now a functional and beautiful addition to your home.
Building a window seat from wood is not just about the destination—it’s about the journey. Embrace the process, learn as you go, and take pride in the skills you develop along the way. Your window seat will be a testament to your creativity, craftsmanship, and dedication.
Building a window seat from wood
Certainly! Here’s a simplified plan to build a basic wooden window seat with storage:
Materials Needed:
- Plywood or solid wood boards for seat and frame
- 2×4 or 2×6 lumber for support
- Screws and nails
- Wood glue
- Sandpaper
- Paint or stain
- Cushion foam (if desired)
- Fabric for upholstery (if desired)
Tools Needed:
- Measuring tape
- Level
- Circular saw or miter saw
- Drill and drill bits
- Screwdriver
- Hammer
- Sanding block or sander
Plan:
- Measure and Plan: Measure the width, height, and depth of the window area. Determine the height you want for the seat and backrest, as well as the size of the storage compartment.
- Build the Base Frame:
- Cut 2×4 lumber for the base frame sides and front.
- Assemble the frame using screws and wood glue.
- Attach the frame to the wall studs using brackets.
- Add Support Braces:
- Attach vertical 2×4 pieces under the frame for support and as attachment points.
- Ensure they’re evenly spaced and securely attached.
- Seat Platform:
- Cut plywood or wood boards to the dimensions of the seat.
- Attach the seat to the top of the base frame using screws and wood glue.
- Backrest:
- Cut plywood or boards for the backrest.
- Attach the backrest vertically to the back of the seat using screws and glue.
- Front Facing:
- Cut plywood or boards for the front facing of the storage area.
- Attach the front facing to the support braces using hinges so it can be lifted for storage access.
- Finishing:
- Sand all edges and surfaces to smooth out rough areas.
- Apply paint or stain to the wood pieces following manufacturer’s instructions.
- If desired, cut foam to fit the seat and upholster it with fabric.
- Assembly:
- Attach the backrest securely to the back of the seat.
- Attach the cushioned seat to the base frame using screws.
- Final Touches:
- Attach a handle or knob to the front facing for easy lifting.
- Double-check all screws, joints, and connections for stability.
Remember, this plan is a basic outline, and you can adjust the dimensions, design, and features based on your preferences and the space available. Always prioritize safety and take your time to ensure accurate measurements and proper construction. If you’re not familiar with woodworking, consider seeking guidance from someone experienced or consulting detailed woodworking plans.


