Successful small wood projects for beginners rely on timber with a stabilized Moisture Content (MC) between 8% and 12%. Utilizing species like Poplar or Soft Maple ensures high machinability and joint stability.
Project Blueprint Details
Stop guessing measurements. Get the exact cut lists and 3D diagrams to finish this project without mistakes.
ACCESS COMPLETE PROJECT VAULT >>Disclaimer: I may receive a small commission if you choose to download professional blueprints through links in this guide. This supports the creation of these technical resources at no extra cost to you.
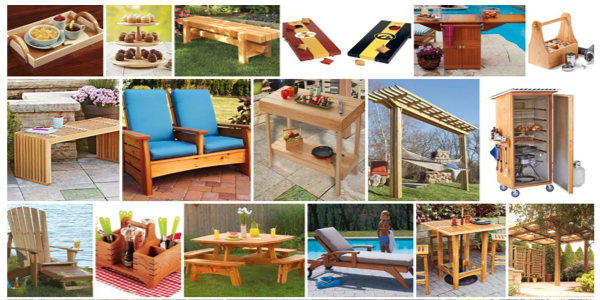
The Reality of Small Wood Projects for Beginners
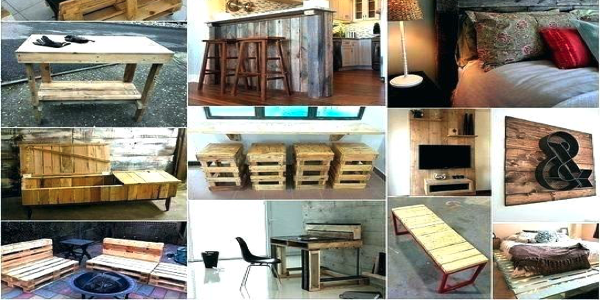
When searching for small wood projects for beginners, you are often met with tutorials that ignore basic physics. I recently saw a project fail because wet pallet wood was used for a desktop organizer. As the wood dried in a heated office, the joints literally exploded because the Moisture Content (MC) was too high.
If you want your projects to last, treat them with the same respect as a dining table. Wood is a living material. Ignoring environmental factors like humidity—especially in fluctuating climates—will lead to warping or “cupping.”
Choosing the Right Lumber: Hardness vs. Workability
Selection is the first hurdle. Many beginners reach for White Oak because it looks great, but with a Janka hardness of 1,360 lbf, it is incredibly difficult to work with hand tools. For a successful start, I recommend FSC-certified Poplar or Pine.
- FSC-certified Poplar: With a Janka rating of 540 lbf, it is the “sweet spot.” It takes paint well and is easy to saw.
- FSC-certified Pine: A budget-friendly alternative, though the resin can gum up your blades quickly.
Tool Calibration: Accuracy is Key
Accuracy is often lost before the first cut. A $1000 saw is useless if your $20 square is bent. Before starting, calibrate your tools and ensure your blades are at a dead 90-degree angle. Following professionally drafted woodworking plans is the smartest way to ensure structural soundness.

Precision Joinery and Shear Strength Management
One of the most common mistakes in small wood projects for beginners is over-reliance on simple butt joints and screws. While fast, they offer little resistance to the natural movement of wood. We focus on Shear Strength—the capacity of a joint to resist internal sliding forces.
For small projects, a “Rabbet” or “Dado” joint increases the surface area for glue bonding by up to 50%. When combined with high-quality D3-rated PVA glue, the bond becomes stronger than the wood fibers themselves.
Material Performance Comparison
Use this table to select the right wood based on technical performance rather than just price.
| Wood Species | Janka Hardness | Machinability | Best Use Case |
|---|---|---|---|
| Western White Pine | 380 lbf | Excellent | Decorative boxes, basic shelving |
| FSC Poplar | 540 lbf | High | Painted furniture, organizers |
| European Beech | 1,300 lbf | Moderate | Cutting boards, tool handles |
| Black Walnut | 1,010 lbf | Good | Gift items, jewelry boxes |
| White Oak | 1,360 lbf | Low (Hard) | Outdoor projects, heavy trays |
Managing Grain Direction and Expansion
Wood expands and contracts across the grain, but almost never along its length. If you glue two pieces “cross-grain” without allowing for movement, the wood will eventually split. Professional woodworking plans always account for this with “floating” panels or elongated holes.
Mastering the Cut: Accuracy and Safety
Most frustration in small wood projects for beginners stems from “chasing the line.” You make a cut, it’s a millimeter off, you try to correct it, and suddenly the board is too short. The secret to professional-standard accuracy is the “Stop Block.”
Instead of measuring and marking every single piece—which introduces a cumulative error—set a physical stop on your miter saw or cross-cut sled. This ensures every component is identical down to the micron. Tight-fitting joints significantly maximize the shear strength of the final assembly.
Cross-Cutting vs. Ripping: A Technical Distinction
Understanding how to approach wood fibers is critical for a clean finish:
- Ripping: Cutting parallel to the grain. Requires a blade with fewer teeth (large gullets) to clear long fibers.
- Cross-cutting: Cutting across the grain. Requires a high tooth-count blade to prevent “tear-out” or splintering.
Pro Tip: Use a “zero-clearance insert” or a sacrificial piece of scrap wood behind your cut. This supports the fibers at the exit point, ensuring a crisp edge that requires minimal sanding.
Managing the “Internal Stress” of Lumber
Even wood with a perfect Moisture Content (MC) of 10% contains internal tension. When you rip a board, you release that tension, which can cause the wood to “banana” or curve. To mitigate this, always rough-cut your pieces slightly oversized, let them “rest” in your shop for 24 hours, and then perform final dimensioning.
For projects designed with these tolerances in mind, our expert-level woodworking blueprints include specific instructions on wood preparation and stress management.
Long-term Stability and Environmental Context
Wood is hygroscopic; it constantly exchanges moisture with the air. A professional build anticipates environmental shifts by using mechanical fasteners or joinery that allows for movement. I once saw a bedside table split because the maker glued “breadboard ends” shut—when the wood tried to shrink in winter, it had nowhere to go but to crack.
Troubleshooting Common Beginner Hurdles
- Loose Joints: Never just fill a gap with glue; it’s not a structural filler. Instead, glue a thin shaving of the same wood species onto the tenon and re-cut for a “piston fit.”
- Hardware Alignment: When installing hinges, use a self-centering drill bit (Vix bit). Even a 0.5mm deviation will cause a lid to sit crooked.
Technical FAQ for Aspiring Makers
Which glue is best for small interior projects? A D3-rated PVA glue is the industry standard. It offers a long “open time” (approx. 10 minutes), allowing you to adjust clamps without panic.
How do I know if my wood is dry enough? Invest in a pin-style moisture meter. For indoor furniture, aim for an MC of 8% to 10%. If buying from a big-box store, let the wood acclimate in your shop for two weeks.
Is FSC-certified wood necessary? Beyond ethics, FSC-certified timber often undergoes more rigorous drying processes, resulting in more stable lumber with fewer hidden stresses.
Conclusion: Turning Blueprints into Legacy
Woodworking is a journey from frustration to flow. By respecting material hardness and mastering the physics of wood movement, you transcend the “hobbyist” label. Don’t settle for projects that warp or fail within a year.

Did you find the right project for your shop? If you are looking for more inspiration, check out our other resources:
🛠️ More Woodworking Plans & Workshop Inspiration
Heavy Duty: Build a professional heavy duty woodworking workbench
Main Guide: Check out all our expert Woodworking Workbench Plans
Category Archive: Discover more workbench building guides
Affordable Build: Step-by-step guide for cheap 2×4 woodworking workbench plans
For Beginners: Start today with easy beginner workbench plans
