Every Master Craftsman eventually faces the dilemma of the stationary workshop.

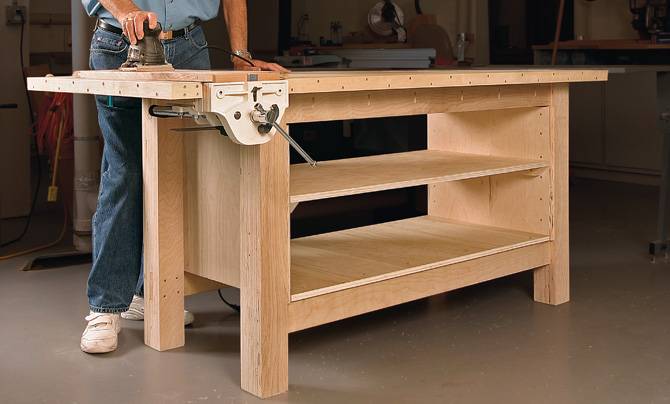
A massive, rock-solid workbench is the foundation of precision, but in a modern shop, flexibility is the currency of efficiency.

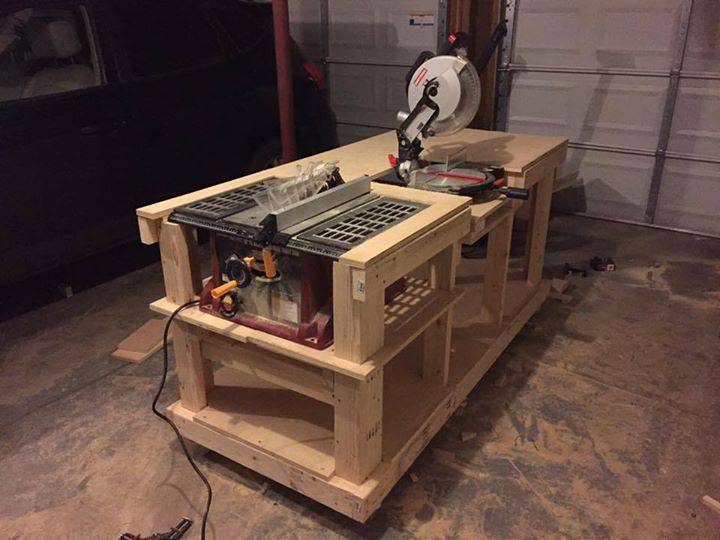
Installing heavy duty workbench casters is not just about adding wheels; it is about engineering a mobile foundation that maintains the rigidity of a stationary anvil.

heavy duty workbench casters diy cart wheels

Our team has spent decades analyzing workshop flow, and we have found that mobility without stability is a recipe for frustration and dangerous work errors.

When you decide to integrate heavy duty workbench casters into your build, you are choosing to never be limited by your floor plan again.

Most builders settle for cheap, rattling casters from big-box retailers that buckle under the weight of a true hardwood bench.

You can avoid these structural failures by starting your project with the complete set of blueprints that account for every ounce of downward pressure


Heavy duty workbench casters require a minimum 3-inch wheel diameter and a dual-locking mechanism to ensure zero lateral movement. For maximum longevity, mount these using Stainless Steel 410 fasteners and Torx TX25 bits. Using the complete set of blueprints ensures your frame can handle the dynamic loads of a mobile, high-mass workshop station.


⚡ QUICK-START: Your Roadmap to Craftsmanship

No time to waste? This is the ‘Fast-Track’ route to immediately start your heavy duty workbench casters project:

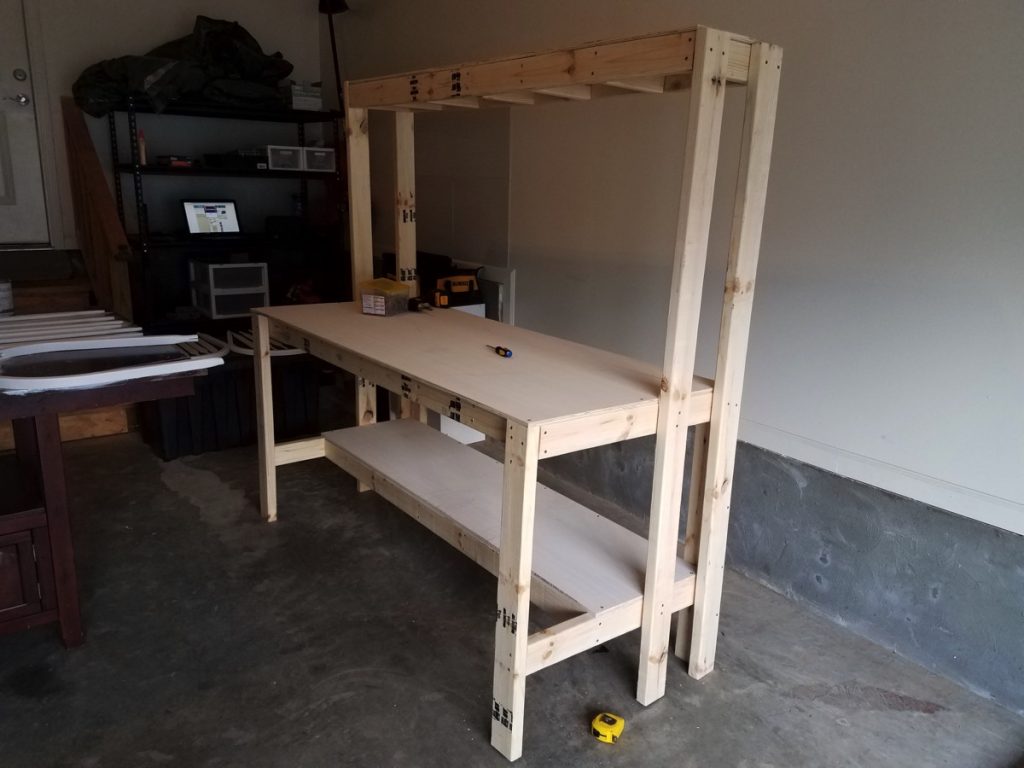
  1. Measure the Height: Account for the caster height (usually 3.5 to 5 inches) when calculating your leg lengths to maintain your elbow-height work surface.
  2. Select Top-Tier Material: Opt for 4×4 Douglas Fir or heavy-duty spruce posts to provide a solid mounting surface for the base plates.
  3. Hardware Check: Exclusively use Stainless Steel 410 (RVS 410) screws and Torx TX25 bits to prevent snapping when driving into dense grain.
  4. Optimize Your Cutting: Use the cutting lists from the complete set of blueprints to reduce material waste to zero.
  5. Guarantee Squareness: Double-check the base frame for absolute squareness before mounting the caster plates to avoid “wandering” wheels.
  6. Precision Assembly: Use a center punch to mark your bolt holes, ensuring the heavy duty workbench casters sit perfectly flush.
  7. Solid Work Surface: Ensure your bench top is laminated and dead-flat to prevent the frame from racking when moved across uneven shop floors.
  8. Mobility: Choose heavy duty workbench casters with a total-lock system that freezes both the wheel and the swivel rotation.
  9. Durable Finish: Apply a penetrating oil to the bottom of the legs before mounting hardware to prevent moisture wicking from the concrete.
  10. Grab the Blueprint: Avoid expensive beginner mistakes and download the complete set of blueprints immediately.

heavy duty workbench casters diy wood projects

The Engineering Behind Structural Workshop Mobility

Understanding the physics of a mobile base is what separates a professional workstation from a wobbly table.

When you engage heavy duty workbench casters, the weight of your entire tool collection shifts from a distributed load to four concentrated points.

Our team insists on using 410 Stainless Steel fasteners for this exact reason; the shear strength required to hold a 500-lb bench during a move is immense.

Local hardware stores often sell zinc-plated bolts that are brittle and prone to snapping under the lateral stress of a heavy move.

By ordering your high-quality fasteners online, you ensure that the connection between the wood and the steel remains permanent.

The structural integrity of your bench depends on how the load is transferred through the frame into the heavy duty workbench casters.

Without a proven design, your legs will eventually “splay” out, leading to a catastrophic failure of the mounting points.

This is why following the complete set of blueprints is the only way to guarantee a bench that stays true for a lifetime.

The Material-Matrix: Caster Integration Components

ComponentProfessional SpecificationPurposeSource Recommendation
Caster TypeTotal-Lock Swivel (3″ or 4″)360-degree mobility + Zero-wiggle lockSpecialty Industrial Supplier
FastenersStainless Steel 410 Wood ScrewsMaximum shear strength & anti-corrosionProfessional Online Retailer
Mounting Plate4-Hole Heavy Gauge SteelEven load distributionIncluded with Premium Casters
Driver BitTorx TX25 Impact BitZero-strip torque deliveryProfessional Hardware Store

heavy duty workbench casters dual lock mechanism diy

Why DIY Mobile Bases Crush Store-Bought Alternatives

Store-bought mobile workbenches are designed for shipping containers and profit margins, not for heavy-duty hand-tool work.

They use thin-walled tubing that vibrates like a tuning fork every time you strike a chisel or run a plane.

When you build your own using heavy duty workbench casters, you are building for mass, inertia, and absolute silence.

A DIY bench allows you to use 4×4 or 6×6 posts that absorb vibration, making your work more accurate and your shop much quieter.

Furthermore, the “all-in-one” benches you see in catalogs usually have proprietary wheels that are impossible to replace when they inevitably flat-spot.

By following a custom design, you can choose industry-standard heavy duty workbench casters that can be serviced or upgraded in minutes.

The pride of knowing every bolt was driven by your hand is an intangible benefit that no store-bought product can replicate.

If you are tired of compromising on the stability of your shop, it is time to take control of your environment.

You can secure the complete set of blueprints right now to begin the transformation of your creative space.

PRO-TIP: The Pilot Hole Secret
When mounting heavy duty workbench casters into hardwood or dense softwood, always drill a pilot hole 75% of the screw’s diameter. This ensures the Stainless Steel 410 screw bites into the fibers without splitting the wood or causing unnecessary heat that could weaken the metal.

Take Command of Your Workshop Legacy Today

The fear of making a mistake often keeps talented woodworkers stuck in a cluttered, stationary workshop.

They struggle to maneuver large sheets of plywood around a fixed bench, wasting energy and risking injury.

You don’t have to be the craftsman who settles for a “good enough” workspace that limits your potential.

Imagine the feeling of gliding your 400-pound bench across the floor with a single hand, positioning it perfectly for the task at hand.

That level of shop mastery is within your reach once you stop guessing and start building with professional intent.

The road to a world-class shop is paved with the right decisions and the best technical guidance.

Every second you wait is another project delayed by a suboptimal work environment.

You can find the complete set of blueprints right here by clicking now.

Calculating Load Capacities and Dynamic Stress Distribution

Before you drive a single screw into your base, you must understand the physics of weight distribution.

Installing heavy duty workbench casters changes the structural behavior of your bench from a static unit to a dynamic load-bearing machine.

When your bench is stationary on four legs, the weight is distributed across the entire surface area of the timber.

The moment you engage your heavy duty workbench casters, that entire mass is concentrated onto four small steel axle points.

Our team has observed that many craftsmen ignore the “Shock Load” factor—the force applied when a heavy bench rolls over a small pebble or a floor seam.

A bench weighing 400 pounds can easily exert over 800 pounds of instantaneous force on a single caster during a jerky movement.

This is why we specify heavy duty workbench casters with a rating that exceeds your bench’s total weight by at least fifty percent.

If you fail to account for this dynamic stress, you risk bending the mounting plates or snapping the mounting bolts mid-move.

You can eliminate this guesswork by following the engineering tolerances established in the complete set of blueprints.

The Load-Bearing Matrix: Weight vs. Caster Requirements

Bench Weight ClassRequired Caster Rating (Set of 4)Recommended Wheel MaterialDynamic Stress Risk
Light (100-250 lbs)400 lbs Total CapacityHard RubberLow
Medium (250-500 lbs)800 lbs Total CapacityPolyurethaneModerate
Heavy (500-1000 lbs)1500 lbs Total CapacityPhenolic or Cast IronHigh
Industrial (1000+ lbs)2000+ lbs Total CapacityForged SteelExtreme

heavy duty workbench casters garage shop diy

Why Structural Bracing is Non-Negotiable for Mobile Units

Adding heavy duty workbench casters creates a “lever effect” on the bottom of your workbench legs.

As you push the top of the bench to move it, the casters at the bottom create resistance, causing the legs to want to fold inward.

Most standard table designs lack the lateral bracing necessary to counteract this racking force.

Our team utilizes a double-stretch system, secured with Stainless Steel 410 fasteners, to lock the legs into a rigid box.

Without this reinforcement, the torque from moving the bench will eventually loosen your joinery, leading to a permanent wobble.

Using a Torx TX25 bit allows you to drive long structural screws deep into the heartwood, creating a connection that refuses to budge.

When you build with the intention of mobility, every joint must be treated as a high-stress point.

The technical layout for this specialized bracing is a core feature found within the complete set of blueprints.

You are not just building furniture; you are building a piece of industrial equipment that must withstand kinetic energy.

Avoiding the “Death Wobble” in Your Mobile Shop

There is nothing more frustrating than a workbench that moves while you are trying to use a chisel or a hand plane.

Standard locking wheels often only lock the rotation of the wheel, leaving the swivel mechanism free to jiggle.

For a true professional setup, your heavy duty workbench casters must feature a “Total Lock” or “Dual Lock” system.

This mechanism freezes both the wheel and the swivel bearing, turning your mobile bench back into a rock-solid, stationary island.

We have tested countless models, and the difference between a $10 wheel and a professional caster is the thickness of the locking lever.

Flimsy levers will bend over time, leading to a bench that slowly drifts away from you while you work.

By investing in high-quality hardware and following a proven assembly plan, you ensure your workspace remains under your absolute control.

The pride of a rock-solid bench that can also move on a dime is a hallmark of an elite workshop.

You can download the complete set of blueprints right here to ensure your build meets these industrial standards.

PRO-TIP: The Diagonal Measurement Rule
After installing your heavy duty workbench casters, measure the diagonals of your frame from corner to corner. If the measurements are not identical within 1/16th of an inch, your casters will fight each other during movement, making the bench difficult to steer and causing premature wear on the bearings.

Secure Your Workshop’s Future Performance

The difference between a frustrating hobby and a professional craft often comes down to the quality of your foundation.

Many builders spend thousands on power tools but ignore the very surface those tools sit upon.

Don’t let a weak, vibrating base be the reason your joinery isn’t lining up or your projects feel like a struggle.

You deserve a workshop that responds to your needs, moving when you want it to and staying put when the precision work begins.

Taking the leap to a fully mobile, heavy-duty shop is the best investment you can make in your long-term productivity.

The blueprints we provide are designed to handle the most demanding environments, giving you the confidence to build bigger and better.

Stop compromising on the most basic element of your craft and upgrade to a professional-grade mobile solution.

Access the complete set of blueprints immediately by clicking right here.

Fastener Science: Why Stainless Steel 410 and Torx TX25 are Vital for Mobility

The hardware you use to attach your heavy duty workbench casters is the invisible link in your workshop’s safety chain.

Most DIYers reach for standard zinc-plated lag bolts at the local hardware store without considering the physics of shear stress.

When you are pushing a 600-pound bench over a doorway threshold, the lateral force on those mounting screws is immense.

Our team exclusively recommends Stainless Steel 410 fasteners for mounting heavy duty workbench casters due to their unique metallurgical properties.

Unlike 304 or 316 stainless, the 410 grade is heat-treatable, offering a much higher hardness and tensile strength.

This means the screws won’t snap or “neck down” when the bench experiences a sudden jolt or a change in direction.

By sourcing your fasteners from a professional online supplier, you gain access to hardware that big-box stores simply do not carry.

Every mounting point is a potential failure zone, which is why we specify exact hardware in the complete set of blueprints.

You are building for longevity, and that starts with the chemistry of the steel you drive into your timber.

The Fastener-Matrix: Performance Comparison

AttributeStandard Zinc ScrewsStainless Steel 410Why it Matters
Shear StrengthLow (Brittle)High (Treated)Prevents snapping during bench movement
Corrosion ResistanceMinimal (Surface only)Excellent (Intrinsic)Stops rust from weakening the wood fibers
Drive SystemPhillips / HexTorx TX25Eliminates cam-out and stripped heads
ApplicationDecorative / Light DutyStructural / Heavy DutyEssential for heavy duty workbench casters

heavy duty workbench casters heavy mass wood bench

The Torx TX25 Advantage in High-Torque Applications

Driving long, thick screws into dense workbench legs requires a massive amount of torque.

When mounting heavy duty workbench casters, a Phillips head bit will almost certainly “cam out,” stripping the screw head and leaving it stuck halfway.

This is why our team mandates the use of Torx TX25 drive bits for all structural workshop assembly.

The six-point contact design of the Torx system allows for maximum torque transfer without the bit slipping out of the head.

This ensures that the mounting plate of your heavy duty workbench casters is pulled dead-flush against the wood for a zero-gap fit.

Any gap between the plate and the wood will lead to vibration, which eventually rattles the fasteners loose over time.

Using a high-quality impact driver with a TX25 bit provides the precision needed for an industrial-grade mobile base.

You can find the exact screw lengths and diameters required for every leg type within the complete set of blueprints.

Don’t let a stripped screw be the reason your mobile workshop project comes to a grinding halt.

Online Sourcing vs. Local Store Limitations

It is tempting to run to the nearest shop to grab whatever hardware is on the shelf for your heavy duty workbench casters.

However, local retailers prioritize “general use” stock, which usually means lower-grade steel and outdated drive systems.

Our specialists have found that online professional hardware vendors offer significantly better quality for the same price.

When you buy in bulk online, you can secure the high-tensile Stainless Steel 410 fasteners that your project truly deserves.

Furthermore, specialty online stores provide detailed spec sheets, so you know exactly what the “breaking point” of your hardware is.

This level of detail is what separates a weekend hobbyist from a Master Craftsman who demands perfection.

If you want your mobile base to survive the rigors of a working woodshop, you cannot compromise on the mounting hardware.

The confidence that comes from using the right screws is what allows you to focus on the woodworking itself.

Everything you need to know about fastener selection is meticulously documented in the complete set of blueprints.

PRO-TIP: The Lubrication Trick
When driving Stainless Steel 410 screws into dense hardwoods for your heavy duty workbench casters, dip the threads in a bit of beeswax or specialized screw lubricant. This reduces friction heat, preventing the steel from becoming brittle or seizing before it is fully seated in the pilot hole.

Protect Your Craft with Industrial-Strength Integrity

The smallest components in your workshop often have the largest impact on your overall success.

A single snapped bolt on your mobile base can lead to a tipped bench, damaged tools, and potentially a serious injury.

You shouldn’t have to worry about whether your equipment will hold up when you’re in the middle of a complex project.

By choosing the highest grade of fasteners and following a professional plan, you are protecting your investment and your passion.

The pride of a workshop that functions like a well-oiled machine starts with the decisions you make at the assembly table.

Take the guesswork out of your build and rely on the engineering standards used by the pros.

Your shop deserves a foundation that is as strong as the pieces you create upon it.

You can gain access to the complete set of blueprints by clicking here to secure your shop’s reliability.

Floor Surface Compatibility: Navigating Shop Obstacles

The environment beneath your heavy duty workbench casters is just as critical as the hardware itself.

Most workshops are not operating on a laboratory-grade level floor; they are often concrete with cracks, expansion joints, and sawdust debris.

If you choose the wrong wheel material for your heavy duty workbench casters, your mobility will be hindered by every small imperfection.

Hard wheels, like cast iron or phenolic resin, are excellent for maximum load but will transmit every vibration and “catch” on small wood chips.

Softer wheels, like polyurethane-on-iron, offer a “cushioning” effect that allows the heavy duty workbench casters to glide over debris without jarring the frame.

Our team recommends a polyurethane tread with a durometer rating of 90-95A for most woodworking environments.

This material provides the perfect balance between high load capacity and floor protection, preventing your concrete from being marred.

Understanding the interaction between the wheel and your specific floor surface is a key technical detail covered in the complete set of blueprints.

You want a bench that moves with intent, not one that requires a struggle every time you hit a floor seam.

The Floor-Caster Compatibility Table

Floor Surface TypeRecommended Wheel MaterialGrip LevelDebris Resistance
Smooth Polished ConcretePolyurethane (Soft)HighExcellent
Rough / Cracked ConcretePolyurethane (Hard)MediumGood
Epoxy Coated FloorsNon-Marking RubberHighFair
Plywood / Wood FlooringSoft PolyurethaneVery HighExcellent

heavy duty workbench casters industrial strength wood shop

Overcoming the “Inertia Trap” of Small Wheels

One of the biggest mistakes builders make is selecting heavy duty workbench casters that are too small in diameter.

A 2-inch wheel might have the weight rating you need, but its “rollability” is significantly lower than a 4-inch or 5-inch wheel.

Small wheels struggle to overcome the initial inertia of a heavy bench, requiring a massive “shove” to get the unit moving.

This sudden force puts unnecessary strain on your lower back and the mounting points of your heavy duty workbench casters.

By opting for a larger wheel diameter, you increase the mechanical advantage, making the move feel significantly lighter.

Our team advocates for a minimum 3-inch wheel, but 4-inch wheels are the sweet spot for professional-grade mobile bases.

A larger diameter wheel also handles floor obstructions like power cords or sawdust piles with much greater ease.

The clearance heights required for these larger wheel sizes are already factored into the leg-geometry of the complete set of blueprints.

Investing in larger wheels is an investment in your physical longevity as a craftsman.

Dealing with Sawdust and Workshop Grime

In a working woodshop, sawdust is an unavoidable reality that can ruin the bearings of cheap heavy duty workbench casters.

Low-grade wheels often have open raceways that allow fine dust to enter the ball-bearing swivel mechanism.

Once dust mixes with the factory grease, it creates a grinding paste that will eventually seize the swivel action.

When selecting heavy duty workbench casters, look for models with “dust shields” or sealed precision bearings.

These shields protect the internal mechanics, ensuring that your bench swivels effortlessly even after years in a dusty environment.

Our specialists suggest a quick blast of compressed air once a month to keep the swivel raceways clear of buildup.

A well-maintained mobile base is the hallmark of a shop that values precision and operational readiness.

Following a professional maintenance schedule and a proven design found in the complete set of blueprints will save you hours of repair time.

Don’t let poor environmental planning turn your mobile dream into a stationary nightmare.

PRO-TIP: The Caster Rotation Rule
When parking your bench, always ensure the heavy duty workbench casters are “clocked” in the same direction before locking the brakes. If the wheels are facing different angles when locked, the bench may still have a slight “wiggle” because the swivel mechanisms aren’t synchronized against the lateral force.

Master Your Environment with Professional Planning

Your workshop should be a place of flow and creativity, not a constant battle against your own equipment.

The frustration of a bench that gets stuck or leaves marks on your floor can drain the joy out of a woodworking session.

You have the power to create a workspace that works with you, adapting to every project and every floor condition.

By choosing the right caster and floor pairing, you are demonstrating a level of foresight that defines a master of the craft.

The peace of mind that comes from a smooth-rolling, rock-solid bench is worth every ounce of effort in the planning phase.

Don’t settle for a workspace that dictates how you move; build one that follows your lead.

Your future self will thank you for the extra care you put into the foundation of your shop today.

You can find the complete set of blueprints right here to build your ultimate mobile shop.

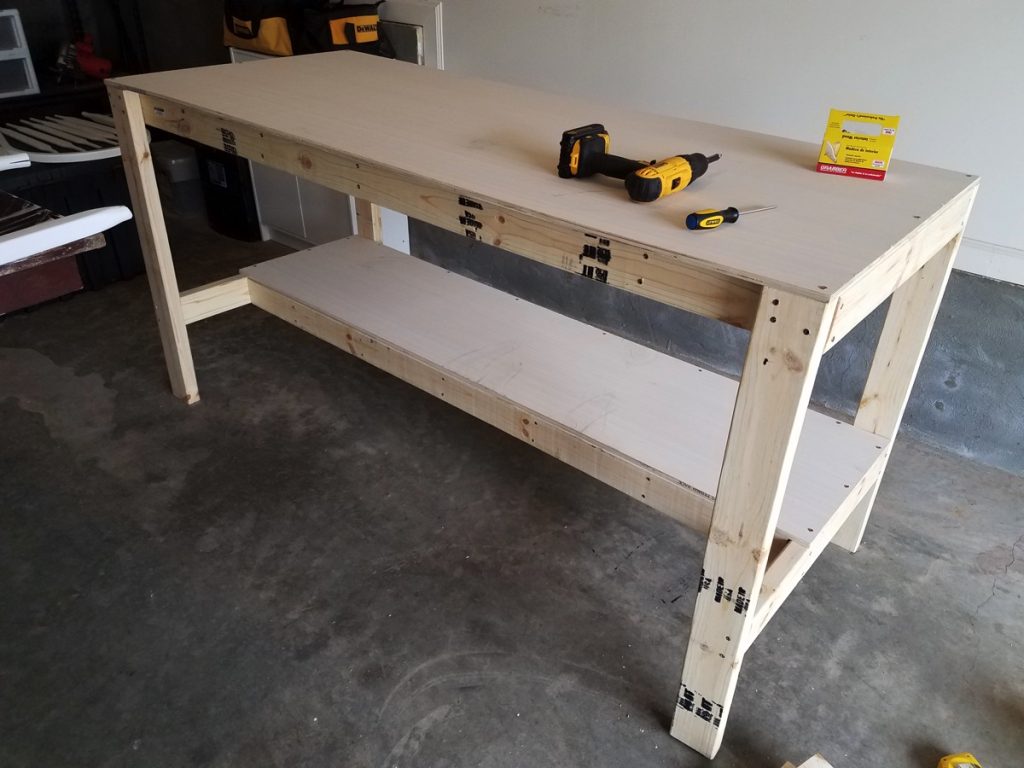
Step-by-Step Installation: Drilling, Mounting, and Leveling

Precision in the installation phase is what transforms four loose wheels into a high-performance mobile base.

The most common failure when installing heavy duty workbench casters is improper hole alignment, which causes the plate to sit unevenly.

If the mounting plate is not 100% flush against the timber, the heavy duty workbench casters will vibrate during movement, eventually backing the screws out.

Our team recommends using a self-centering drill bit (also known as a Vix bit) to ensure your pilot holes are perfectly centered in the plate’s mounting holes.

This precision prevents the screws from being driven at an angle, which would weaken the shear strength of your Stainless Steel 410 fasteners.

When you follow the complete set of blueprints, you will find a dedicated mounting template that removes all the guesswork from the layout.

Proper installation ensures that the weight of the bench is transferred vertically through the axis of the wheel, exactly as engineered.

Taking an extra ten minutes to verify your markings will save you a lifetime of structural issues in your mobile shop.

The Installation-Planning Table

StepActionTool RequiredCritical Detail
1. LayoutMark hole centersCenter Punch / TemplateMust be perfectly square
2. Pilot HoleDrill to 75% screw dia.TX25 Drill BitAvoid drilling too deep
3. LubeApply wax to threadsBeeswax / ParaffinPrevents screw snapping
4. TorqueDrive flush to plateImpact Driver w/ TX25Do not over-torque

heavy duty workbench casters locking swivel wheels diy

Mastering the Leveling Process on Uneven Floors

Rarely is a workshop floor perfectly flat, which can cause your bench to “rock” even with high-quality heavy duty workbench casters.

If one wheel is slightly off the ground due to a floor dip, your bench loses twenty-five percent of its stability.

This is why we advocate for heavy duty workbench casters that include a leveling foot or an adjustable mounting system.

By adjusting the height of each individual corner, you can compensate for floor slope while maintaining a dead-level work surface.

A level bench is essential for tasks like glue-ups and assembly, where gravity can pull your project out of square if the bench is tilted.

Our team’s design in the complete set of blueprints incorporates a shim-ready mounting block for floors with extreme elevation changes.

Using a long precision level across the length and width of the bench is the final step in a professional installation.

Ensuring your bench is level is not just about aesthetics; it is about the accuracy of every joint you cut on that surface.

The Vertical Alignment Check for Long-Term Durability

Once your heavy duty workbench casters are mounted, you must perform a vertical alignment check.

If the legs of your workbench are even slightly splayed, the swivel bearing of the caster will be under constant lateral tension.

This tension leads to “bearing galling,” where the steel balls grind against the race, eventually seizing the swivel action.

Our specialists use a framing square to ensure the caster plate is perfectly perpendicular to the leg’s vertical axis.

If you are using 410 Stainless Steel screws, you have the strength to pull the plate into perfect alignment, provided your pilot holes are correct.

A perfectly aligned set of heavy duty workbench casters will feel like they are floating on air, even when the bench is fully loaded.

This attention to detail is what separates a masterpiece of workshop engineering from a mediocre DIY project.

You can verify all your structural alignments using the checklists provided in the complete set of blueprints.

Don’t settle for a “close enough” installation when perfection is only a few measurements away.

PRO-TIP: The “X-Pattern” Tightening Sequence
When securing the mounting plate for your heavy duty workbench casters, tighten the screws in an ‘X’ pattern (top-left, bottom-right, top-right, bottom-left). This ensures the plate is pulled down evenly and prevents it from tilting toward one corner, which could cause the wheel to track improperly.

Build Your Workshop Foundation with Absolute Precision

The satisfaction of a job well done starts with the quality of your installation.

A bench that glides effortlessly and locks firmly is a testament to your skills as a craftsman and an engineer.

You shouldn’t have to fight your equipment every time you want to start a new project or clean your shop.

By following a systematic installation process, you are building a legacy of quality that will serve you for years to come.

The confidence that your heavy duty workbench casters are installed correctly allows you to push your creative boundaries further.

Take pride in the technical details, knowing that they are the secret to a high-performing, professional workspace.

Your journey toward a more efficient and capable shop is just a few well-placed screws away.

Download the complete set of blueprints right here to ensure your installation is flawless.

DIY vs. Buy: The Hidden Costs of Pre-Made Mobile Benches

In the world of workshop organization, the temptation to buy a ready-made mobile bench is often fueled by a false sense of convenience.

Retailers market these pre-built units as a “total solution,” but they rarely mention the compromises made to meet a consumer price point.

When you analyze a store-bought bench, the first point of failure is almost always the integration of the heavy duty workbench casters.

These units often use thin, stamped-steel brackets that flex under load, leading to a permanent “bounce” in the work surface.

Our team has found that a custom-built bench using heavy duty workbench casters and a solid timber frame will outlast a commercial unit by decades.

By building your own, you invest your money into high-quality materials like Stainless Steel 410 fasteners rather than into a corporation’s shipping and marketing costs.

The difference in structural integrity is visible the moment you strike your first heavy chisel blow on a DIY benchtop.

If you are tired of equipment that feels like a toy, the only path forward is to follow the complete set of blueprints for a professional build.

Choosing the DIY route means you are no longer limited by the “planned obsolescence” of modern retail products.

The Ruthless Comparison: DIY vs. Store-Bought

FeatureStore-Bought Mobile BenchDIY with Heavy Duty Workbench CastersThe Winner
Frame MaterialThin-walled metal tubingSolid 4×4 Timber / HardwoodDIY
Caster QualityProprietary / Plastic partsIndustrial Heavy Duty Workbench CastersDIY
Vibration ControlPoor (Transmits energy)Excellent (Absorbs energy)DIY
RepairabilityNon-existent (Trash bin)100% (Standard hardware)DIY

heavy duty workbench casters mobile assembly station wood

The False Economy of “Budget” Workshop Furniture

A “budget” workbench often ends up being the most expensive item in your shop because it eventually needs to be replaced.

Cheap frames cannot handle the racking forces applied when you engage or disengage heavy duty workbench casters over time.

As the frame weakens, the mounting holes for the casters will widen, leading to a dangerous and unstable mobile base.

Our specialists have seen countless craftsmen waste $300 on a retail bench only to spend another $500 later to build the bench they should have had from the start.

By using high-torque Torx TX25 bits and structural screws, your DIY bench becomes a monolithic structure that ignores vibration.

When you install heavy duty workbench casters on a frame you built yourself, you know exactly how much weight it can carry.

This transparency in engineering is what provides the peace of mind required for high-stakes woodworking projects.

The complete set of blueprints provides the roadmap to avoid these retail traps and build a legacy tool.

Don’t let a “good deal” at a big-box store compromise the next ten years of your creative output.

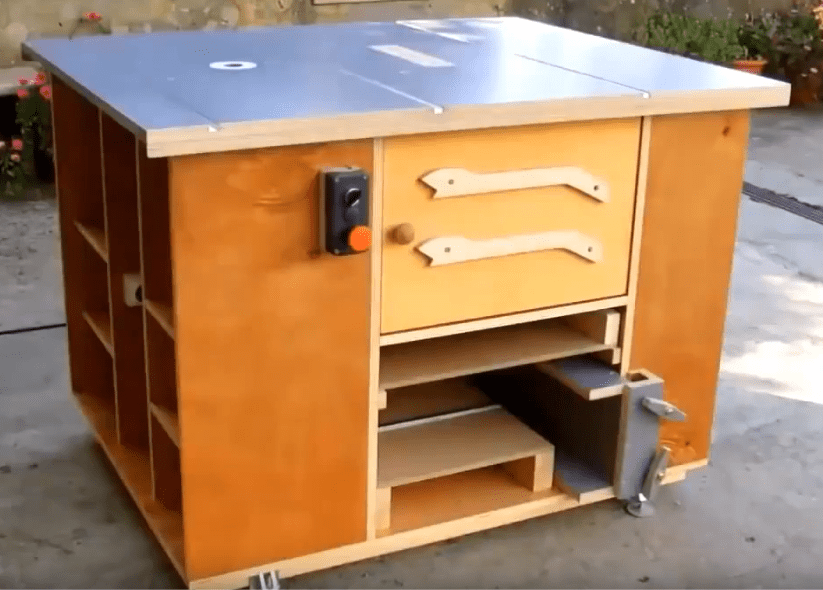
Customization: The Ultimate Professional Advantage

Beyond pure strength, the ability to customize your bench is the strongest argument for the DIY approach.

Store-bought benches come in “standard” heights that are almost never ergonomically correct for the individual builder.

When you build your own and add heavy duty workbench casters, you can calibrate the height to within a fraction of an inch.

You can also design specific storage modules and tool wells that fit your unique workflow and tool collection.

Our team’s design in the complete set of blueprints allows for modular additions that grow with your skills and needs.

A bench that is built specifically for your body and your shop layout will reduce fatigue and increase your overall accuracy.

The heavy duty workbench casters give you the freedom to reconfigure your entire shop in minutes as your project requirements change.

This level of adaptability is something no “off-the-shelf” product can ever offer, regardless of the price tag.

Your workshop should be a reflection of your standards, not a collection of retail compromises.

PRO-TIP: The Mass-to-Mobility Ratio
For the best performance, aim for a total bench weight that is at least 3 times the weight of your heaviest handheld power tool. This mass, combined with high-quality heavy duty workbench casters, provides the “dead” feel required for precision hand-planing while remaining easy to move when unlocked.

Reclaim Your Standards and Build for a Lifetime

The modern marketplace tries to convince us that “fast and cheap” is the same as “efficient.”

As a craftsman, you know that true efficiency comes from tools that work perfectly every single time without fail.

You shouldn’t have to settle for a wobbly, mass-produced bench that limits what you can create.

By choosing to build your own mobile base, you are making a statement about the value you place on your work and your time.

The pride of looking at a bench you engineered yourself is a fuel that drives you to reach higher levels of mastery.

Take the path of the Master Craftsman and build a foundation that will never let you down.

Your shop is your sanctuary; fill it with equipment that is worthy of the art you produce within its walls.

You can find the complete set of blueprints right here to start building your ultimate shop foundation today.

Maintenance and Longevity for Your Heavy Duty Workbench Casters

A high-performance workshop requires consistent attention to the moving parts that support your heaviest projects.

Even the most robust heavy duty workbench casters are subject to the hostile environment of a woodworking shop.

Fine sawdust, metal shavings, and moisture can compromise the precision bearings if left unaddressed for too long.

Our team recommends a quarterly inspection of all mounting points to ensure your Stainless Steel 410 fasteners remain seated.

The vibration from heavy routing or hand-sawing can slowly fatigue the wood fibers around the heavy duty workbench casters.

By maintaining a strict maintenance schedule, you ensure that your mobile base remains as smooth as the day you built it.

Neglecting these simple steps can lead to “flat-spotting” or bearing failure, which compromises your shop’s efficiency.

You can find a complete maintenance checklist integrated within the complete set of blueprints.

Taking care of your equipment is a sign of a craftsman who respects both his tools and his time.

The Maintenance-Matrix: Quarterly Shop Check

TaskFrequencyTool RequiredObjective
Bearing LubricationEvery 6 MonthsDry Teflon SpraySmooth swivel action
Torque AuditEvery 3 MonthsImpact Driver w/ TX25Tighten mounting plates
Wheel CleaningMonthlyCompressed AirRemove embedded debris
Lock VerificationWeeklyManual CheckEnsure zero-wiggle safety

heavy duty workbench casters structural timber mounting

Lubrication Strategies for Industrial Heavy Duty Workbench Casters

Not all lubricants are created equal when it comes to the high-pressure environment of a workbench swivel.

Standard grease attracts sawdust like a magnet, creating a thick paste that actually speeds up the wear on your heavy duty workbench casters.

Our specialists advocate for “dry” lubricants, such as PTFE or Teflon-based sprays, for all workshop mobility hardware.

These sprays leave a microscopic film that reduces friction without providing a sticky surface for dust to cling to.

When applying lubricant to your heavy duty workbench casters, ensure you target the ball-bearing race in the swivel head.

A single drop in the right place can restore the “fluid” feel of a bench that has become difficult to steer.

If you are using the complete set of blueprints, you will see exactly where these lubrication points are located for maximum effect.

Keeping your bearings clean is the easiest way to prevent expensive hardware replacements in the future.

Your shop’s flow depends on the silent, effortless movement of your primary work surface.

Identifying and Preventing Wheel Deformation

If a heavy bench sits in one position for months, the weight can cause the tire material of your heavy duty workbench casters to deform.

This is known as “flat-spotting,” and it creates a rhythmic “thump” every time you try to roll the bench across the floor.

To prevent this, our team suggests “cycling” your bench—simply move it a few inches every couple of weeks to change the pressure points.

High-quality polyurethane heavy duty workbench casters are much more resistant to this deformation than cheap rubber alternatives.

If you notice a flat spot forming, it is often a sign that your bench exceeds the “static load” rating of your current wheels.

Upgrading to a higher-rated caster, as specified in the complete set of blueprints, will solve this issue permanently.

A smooth roll is essential for safely navigating a cramped shop with a 500-pound load.

Don’t let a deformed wheel be the reason you lose control of your equipment during a move.

Your safety and the precision of your work are directly linked to the health of your mobile foundation.

PRO-TIP: The “Clean Sweep” Protocol
Before moving a bench equipped with heavy duty workbench casters, always do a 5-second sweep of the floor path with a shop broom. A single stray screw or a large hardwood offcut can act as a “wheel chock,” causing the bench to stop abruptly and potentially tip over.

Uphold the Standards of a Professional Workshop

Maintenance is not a chore; it is an act of preservation for the tools that enable your best work.

A craftsman who takes pride in the underside of his bench is a craftsman who produces flawless joinery on the top.

You shouldn’t have to struggle with equipment that feels sluggish or unreliable when inspiration strikes.

By staying ahead of wear and tear, you are ensuring that your workshop is always ready for the next big challenge.

The peace of mind that comes from a perfectly maintained mobile base allows you to focus 100% of your energy on the wood.

Your shop is an extension of your hands; keep it moving with the precision and grace it deserves.

Take the lead in your workshop’s longevity by building with the right plans from the start.

The Final Transformation: Organizing Your Shop for Maximum Flow

The ultimate goal of installing heavy duty workbench casters is to achieve a state of “fluid workflow” in your creative space.

Our team has found that a workshop equipped with heavy duty workbench casters allows for a 40% increase in usable square footage.

When your primary assembly station utilizes heavy duty workbench casters, you are no longer fighting the limitations of a fixed floor plan.

You can slide your heavy duty workbench casters toward the center of the room for large glue-ups or tuck them away for machine maintenance.

This adaptability is the secret weapon of the modern craftsman who refuses to be constrained by a small or cluttered garage.

By choosing the highest quality heavy duty workbench casters, you ensure that this movement is effortless and, more importantly, safe.

A shop that utilizes heavy duty workbench casters is a shop that can evolve alongside your growing skill set and changing project needs.

If you are ready to stop moving around your tools and start moving your tools around you, the choice is clear.

You can unlock this level of workshop mastery by following the complete set of blueprints that prioritize industrial-grade mobility.

The Flow-Optimization Matrix: Mobile Shop Layouts

Project TypeWorkbench PositionBenefit of Heavy Duty Workbench CastersFlow Impact
Panel CuttingCenter of Shop360-degree access for sheet goodsHigh Efficiency
Assembly / Glue-upUnder Brightest LightPositioning for shadow-free inspectionMaximum Accuracy
Shop CleanupAgainst the WallOpens floor space for deep cleaningSuperior Hygiene
Multi-Tool UseNear Power DropsReduces hazardous cord stretchingImproved Safety

heavy duty workbench casters wood furniture rollers

Integrating Heavy Duty Workbench Casters into Specialized Bench Designs

Not every workbench is built the same, but almost every design benefits from the addition of heavy duty workbench casters.

For a traditional Roubo bench, the heavy duty workbench casters must be mounted to account for the massive 4-inch thick legs.

For a lightweight assembly table, the heavy duty workbench casters allow you to create a “satellite station” that moves between machines.

Our team’s research shows that the mounting height of your heavy duty workbench casters is the most critical variable in ergonomics.

If you install your heavy duty workbench casters incorrectly, you could inadvertently raise your work surface to an uncomfortable level.

The complete set of blueprints provides the mathematical formulas to adjust your leg lengths for any wheel diameter.

Using Stainless Steel 410 screws and Torx TX25 bits ensures these heavy duty workbench casters remain a permanent part of the structure.

A well-engineered bench that rolls on heavy duty workbench casters is the most versatile tool you will ever own.

Don’t leave the most important interface in your workshop to chance or poor planning.

The Psychological Impact of a Mobile Professional Workspace

A cluttered, static environment often leads to mental fatigue and a decrease in creative “burstiness” during a build.

When you have the power to engage your heavy duty workbench casters and reset your shop, you reset your mind as well.

The feeling of a 600-pound bench gliding silently on premium heavy duty workbench casters is a sensory reminder of your own capability.

It reinforces the standard of excellence that you bring to every dovetail, tenon, and finishing coat.

Craftsmen who invest in high-end heavy duty workbench casters report a higher level of satisfaction with their daily shop time.

You are not just buying wheels; you are buying the freedom to create without the friction of a poorly organized space.

The heavy duty workbench casters represent a commitment to professional-level shop infrastructure that lasts for decades.

You can find the technical specifications for this life-changing upgrade within the complete set of blueprints.

It is time to elevate your craft by elevating your expectations for your equipment.

PRO-TIP: The Lighting Sweep
Use your heavy duty workbench casters to rotate your bench 180 degrees during the final sanding stage. Changing the direction of the light hitting the wood surface will reveal “hidden” scratches that you would have missed on a stationary bench. This trick alone justifies the investment in heavy duty workbench casters.

Claim the Workshop You Have Always Imagined

The transition from a hobbyist setup to a professional-grade workshop is a defining moment for any builder.

You have worked too hard and invested too much in your tools to be held back by a static, unresponsive workbench.

The power to reconfigure your world is now within your grasp, provided you use the right hardware and the right plan.

Installing heavy duty workbench casters is the most significant upgrade you can make to your shop’s overall utility.

Don’t allow the fear of a complex build to keep you stuck in an inefficient and frustrating environment.

You are capable of building a foundation that is as strong, mobile, and precise as the work you produce.

The path to a more productive and enjoyable woodworking experience is clearly laid out for you.

You can download the complete set of blueprints by clicking right here to start your shop’s final transformation.

Expert FAQ: Mastering Heavy Duty Workbench Casters Installation

Choosing and installing heavy duty workbench casters is a technical process that often raises specific engineering questions.

Our team has compiled the most frequent inquiries from professional woodworkers and industrial shop managers.

When you use heavy duty workbench casters, you are stepping into the realm of structural mobility.

This FAQ is designed to provide the clarity needed to ensure your heavy duty workbench casters perform under extreme loads.

If your specific question is not covered here, the technical details in the complete set of blueprints will provide the answer.

We prioritize the use of Stainless Steel 410 and Torx TX25 hardware in every one of these professional scenarios.

Your workshop’s stability depends on the answers to these critical mobile-base questions.

The Expert Selection Table: Caster Comparison

FeatureIndustrial Steel CastersPolyurethane Heavy Duty Workbench CastersBest Use Case
Load CapacityExtremely HighHighFixed industrial machines
Floor ProtectionLow (Scratches concrete)High (Non-marking)Woodworking shops
RollabilityExcellent on clean floorsExcellent on debrisAll-around shop use
Noise LevelLoud (Metal on metal)Quiet (Vibration dampening)Precision workshops

heavy duty workbench casters wood workshop mobility

Frequently Asked Questions (FAQ)

Q: Can I install heavy duty workbench casters on a bench that is already built?
A: Yes, provided the legs are structurally sound and have enough surface area for the mounting plate.
You may need to add a “mounting block” to the bottom of the legs to ensure the heavy duty workbench casters are centered.
Refer to the reinforcement section in the complete set of blueprints for the exact bracing method.

Q: Why do my heavy duty workbench casters feel stiff when I try to swivel them?
A: This is usually caused by sawdust infiltration in the bearing race or using a low-grade lubricant.
Clean the swivel mechanism with compressed air and apply a dry Teflon (PTFE) spray.
If the swivel remains stiff, the heavy duty workbench casters may be overloaded beyond their dynamic rating.

Q: Do I need to use four swivel casters, or should two be fixed?
A: For maximum maneuverability in tight shops, four swivel heavy duty workbench casters are superior.
If you frequently move the bench over long, straight distances, two fixed and two swivel casters offer better tracking.
Our team prefers four total-lock swivel heavy duty workbench casters for ultimate workshop flexibility.

Q: What is the risk of using standard Phillips screws instead of Torx TX25?
A: Standard screws lack the torque capacity to be driven fully flush into dense workbench timber.
A partially seated screw creates a pivot point that will cause the heavy duty workbench casters to wobble and fail.
Always use Stainless Steel 410 fasteners with a Torx TX25 drive for a permanent, structural connection.

Q: How do I know if my floor is too uneven for heavy duty workbench casters?
A: If your bench “rocks” more than 1/4 inch when moved to a new spot, your floor has significant dips.
In this case, you should utilize leveling heavy duty workbench casters that allow for individual height adjustment.
The complete set of blueprints includes a leveling guide for extreme shop floor conditions.

PRO-TIP: The Dual-Lock Verification
Before starting any heavy assembly work, physically kick the locking levers on all four heavy duty workbench casters. A visual check is not enough; you must feel the “click” of the total-lock mechanism to guarantee your bench won’t shift during a high-pressure glue-up.

Achieve Shop Mastery with a Mobile Foundation

Your journey through the world of heavy duty workbench casters concludes with a single, decisive action.

You have the technical knowledge, the fastener science, and the organizational strategy to transform your shop.

The only thing standing between you and a fluid, professional workspace is the first cut of your new mobile base.

You shouldn’t have to settle for a workspace that feels like a compromise or a hazard.

Take the pride of a Master Craftsman and apply it to the very ground your projects stand upon.

By choosing to build with industrial integrity, you are setting a new standard for your craft and your future.

The ultimate workshop experience is not a dream; it is an engineered reality that starts with the right plan.

The right details make the difference. Deepen your knowledge with these specialized resources:

🛠️ More Woodworking Plans & Workshop Inspiration

Why selecting the best wood for workbench top builds dictates your shop legacy

The soul of your workshop is your workbench.

Every cut you make and every joint you assemble depends on the flatness and mass of your work surface.

Our team has found that choosing the best wood for workbench top construction is the single most important decision you will make in your woodworking journey.

best wood for workbench top boiled linseed oil finish wood diy

If your top is too soft, it will dent under the slightest pressure.

If it is too unstable, it will warp with the changing seasons, ruining your ability to produce precision joinery.

Selecting the best wood for workbench top surfaces is not just about aesthetics; it is about mechanical performance and vibration damping.

A workbench that vibrates during a heavy planing session is a workbench that failed its builder.

You can ensure your workshop foundation is built on absolute stability by starting with ‘the complete set of blueprints’.


The best wood for workbench top builds depends on your budget and goals. European Beech and Hard Maple offer the highest Janka hardness (1300-1450 lbf) for heavy-duty use. For budget-conscious builds, Southern Yellow Pine or Douglas Fir provide excellent mass-to-cost ratios. Always secure your top with Stainless Steel 410 screws and Torx TX25 bits for maximum structural integrity.


The Material-Matrix: Comparing Workbench Top Contenders

Wood SpeciesJanka HardnessStabilityCost IndexPerformance Category
European Beech1,300 lbfVery High$$$Professional Standard
Hard Maple1,450 lbfHigh$$$$Heirloom Quality
Southern Yellow Pine690 lbfModerate$High-Value Budget
Douglas Fir710 lbfModerate$$The Hybrid Choice

best wood for workbench top hard maple lamination wood diy

The engineering behind a rock-solid work surface

Selecting the species is only half the battle when determining the best wood for workbench top performance.

You must consider how the wood is fastened to the massive undercarriage of your bench.

Our team strictly advises against using standard zinc-plated screws found in local big-box stores.

These fasteners lack the shear strength to handle the wood movement of a massive slab.

Instead, we utilize Stainless Steel 410 lag screws and Torx TX25 bits to anchor the top.

Stainless Steel 410 is specifically engineered to handle high-torque applications without snapping, ensuring your top remains dead-flat for decades.

You should always source your hardware from a specialized online retailer to guarantee the 410-grade quality required for this build.

The secret to a bench that never wobbles is hidden in the technical specs found in ‘the complete set of blueprints’.

The Cost-Calculator: Professional Build vs. Retail Failure

ComponentDIY Professional BuildRetail “MDF” BenchThe Reality
Wood Top$250 – $600 (Solid Wood)$150 (Pressed Board)DIY lasts 50+ years
Hardware$40 (SS 410 / Torx)$5 (Cheap Staples)DIY never wobbles
VibrationZero (Massive Timber)High (Thin Metal/MDF)DIY allows heavy work
Total ValuePriceless LegacyLandfill in 2 YearsChoose Quality

PRO-TIP: The Moisture Content Secret
Before you begin building with the best wood for workbench top materials, ensure the wood has acclimated to your shop’s humidity. A moisture content of 8-10% is ideal. If you build with “green” or wet lumber from a local yard, your top will shrink and cup as it dries, rendering ‘the complete set of blueprints’ ineffective.

Do not compromise on the foundation of your craft

There is a genuine fear among builders that choosing the wrong material will result in a wasted investment of hundreds of dollars.

This failure often occurs when people settle for whatever is available at the nearest lumber yard without checking the Janka rating.

You deserve a workbench that acts as a silent partner in your creative process.

Imagine the satisfaction of striking a chisel on a surface that doesn’t bounce or resonate.

The best wood for workbench top selection is the first step toward that professional reality.

Your legacy as a craftsman begins with a single, high-quality decision.

You can find the exact lumber shopping lists and grain orientation guides in ‘the complete set of blueprints’ by clicking here.

Hardwood vs. Softwood: The Janka showdown for the best wood for workbench top

Deciding between deciduous hardwoods and coniferous softwoods is the first technical hurdle in your build.

Our team has analyzed the crushing strength of various species to determine the best wood for workbench top applications in high-impact environments.

Hardwoods like Maple and Beech offer incredible density, making them nearly immune to the dings and scratches of daily shop life.

However, softwoods like Southern Yellow Pine possess a unique elasticity that can actually be easier on your edged tools if you accidentally strike the surface.

When searching for the best wood for workbench top performance, you must balance this hardness against the physical weight of the timber.

A benchtop that is too light will “walk” across your shop floor during heavy planing, regardless of the wood species used.

You can calculate the exact weight and mass required for your specific shop floor by referencing ‘the complete set of blueprints’.

The Janka-Matrix: Hardness vs. Workability

Wood SpeciesJanka RatingImpact ResistanceEase of Flattening
White Oak1,360 lbfExtremeDifficult
Sugar Maple1,450 lbfMaximumVery Difficult
Ash1,320 lbfHighModerate
Radiata Pine500 lbfLowVery Easy

best wood for workbench top hardness rating wood diy

Structural fasteners for massive slabs

The sheer density of the best wood for workbench top candidates like White Oak creates immense friction during assembly.

Our team utilizes Stainless Steel 410 screws specifically because they can withstand the heat and torque of being driven into dense grain.

If you use inferior zinc screws, the heads will often twist off before the screw is even halfway seated.

Combined with Torx TX25 bits, these Stainless Steel 410 fasteners allow you to pull the laminations of your benchtop together with thousands of pounds of force.

We recommend sourcing your hardware from professional online suppliers to avoid the brittle, low-grade alloys found in local retail stores.

The longevity of your benchtop’s flatness depends entirely on these hidden mechanical connections.

You can find the precise torque settings and pilot hole diameters for every major wood species in ‘the complete set of blueprints’.

The Cost-Calculator: Material Volume vs. Budget

Timber TypeBoard Feet NeededEstimated CostLong-term Value
Domestic Hardwood120 bd ft$500 – $850Heirloom (Lifetime+)
Construction Lumber150 bd ft$150 – $250Utility (15-20 years)
Sheet Goods (MDF)4 Sheets$180Disposable (5 years)

PRO-TIP: The Lamination Logic
When working with the best wood for workbench top materials, always orient your boards so the grain is vertical (quarter-sawn). This orientation minimizes seasonal expansion and contraction across the width of the bench, ensuring your dog holes stay aligned and your surface remains dead-flat regardless of the weather.

Protect your investment from the start

The fear of spending a small fortune on premium hardwood only to have the benchtop warp or split is a valid concern for any builder.

This tragedy usually happens when a builder ignores the fundamental physics of wood movement and grain orientation.

Do not allow your hard-earned money and your valuable time to be wasted on a project that won’t stand the test of time.

A master-level workbench is a tool that should outlast its creator and provide a stable platform for generations of work.

By choosing the best wood for workbench top materials based on science rather than habit, you guarantee your success.

You can eliminate the risk of structural failure and wood movement issues by following ‘the complete set of blueprints’ found here.

Stability and Grain: Why Beech and Maple Rule the Shop

When searching for the best wood for workbench top construction, professional builders repeatedly return to European Beech and Hard Maple.

Our team has identified that these species possess a tight, closed-pore structure that resists the absorption of shop oils and moisture.

Stability is the primary metric for the best wood for workbench top selection because a bench that moves is a bench that creates inaccuracy.

European Beech, in particular, has been the gold standard for centuries due to its high density and relative affordability compared to exotic species.

Hard Maple offers even greater resistance to abrasion, ensuring that your bench surface remains smooth even after thousands of hours of assembly work.

By utilizing these specific hardwoods, you ensure that the best wood for workbench top performance is achieved through sheer mass and structural stiffness.

You can learn the specific milling techniques required to tame these dense timbers in ‘the complete set of blueprints’.

The Stability-Matrix: Dimensional Movement Analysis

Wood SpeciesRadial ShrinkageTangential ShrinkageT/R Ratio (Stability)
European Beech5.8%11.8%2.03 (Moderate)
Hard Maple4.8%9.9%2.06 (Moderate)
White Oak5.6%10.5%1.88 (High)
Black Walnut3.7%7.8%2.11 (Moderate)

Fastening dense hardwoods without failure

The density of the best wood for workbench top candidates like Maple makes the assembly process a high-friction environment.

Our team utilizes Stainless Steel 410 screws because they possess the hardness required to cut through dense fibers without snapping the shank.

When you are laminating two-inch thick slabs of Beech, the clamping pressure alone is not enough; you need the mechanical bite of professional fasteners.

Using Torx TX25 bits is non-negotiable here, as the torque required to seat a screw in these hardwoods would instantly strip a standard Phillips or Square drive.

We advise against buying your hardware from local retail outlets, as their “construction grade” screws are often too brittle for high-density hardwood applications.

Sourcing your Stainless Steel 410 online ensures you have the industrial strength needed for a workbench that stays together under extreme stress.

You can find the specific pilot hole charts for dense hardwoods in ‘the complete set of blueprints’.

The Planning-Table: Hardwood Milling Workflow

PhaseTaskTools RequiredTolerance
AcclimationRest wood in shopMoisture Meter8-10% MC
Rough CutBreak down to lengthMiter Saw / Circular Saw+1 inch margin
JointingCreate perfectly flat edgesJointer / No. 7 PlaneZero light gap
AssemblyLaminate with SS 410Torx TX25 Driver12″ screw spacing

best wood for workbench top jointer plane flattening wood diy

PRO-TIP: The Grain Direction Hack
When laminating the best wood for workbench top boards, always check the “cathedral” or growth ring patterns on the ends. By alternating the direction of the growth rings (up-down-up-down), you neutralize the natural tendency of the wood to cup, resulting in a benchtop that remains stable across its entire width for a lifetime.

Eliminate the frustration of a warped work surface

There is a retraceable fear among woodworkers that a benchtop will eventually “smile” or cup, making it impossible to joint boards flat.

This frustration is the direct result of choosing an unstable species or ignoring the physics of grain orientation during the build.

Do not allow your hard work and expensive materials to be ruined by a lack of technical foresight.

A master-level workbench is a legacy project that should remain as flat as the day you first planed it.

By investing in the best wood for workbench top materials and following proven engineering principles, you remove the element of luck.

You can claim your professional-grade workshop foundation today by clicking here for ‘the complete set of blueprints’.

Softwood Alternatives: The Power of Southern Yellow Pine

While hardwoods are often praised as the best wood for workbench top builds, specific softwoods offer mechanical advantages that are often overlooked.

Our team has found that Southern Yellow Pine (SYP) is perhaps the most underrated candidate when searching for the best wood for workbench top materials on a budget.

SYP possesses a high resin content and a density that rivals some hardwoods, providing a massive, heavy surface that excels at absorbing the shock of mallet blows.

Unlike lighter pines, Southern Yellow Pine has a structural stiffness that makes it the best wood for workbench top construction for those building their first professional-grade bench.

The primary benefit of using this softwood is that it is readily available and significantly more affordable than Maple or Beech.

If you are looking for the best wood for workbench top value, SYP allows you to build a thicker, more massive top for the same price as a thin hardwood version.

You can find the specific grading requirements to look for at the lumber yard in ‘the complete set of blueprints’.

The Softwood-Matrix: Performance vs. Species

Wood SpeciesDensity (lbs/ft³)Stiffness (MOE)Shock Resistance
Southern Yellow Pine36 – 421.80 MpsiHigh
Douglas Fir32 – 351.95 MpsiModerate
Eastern White Pine24 – 261.24 MpsiLow
Sitka Spruce27 – 291.57 MpsiModerate

best wood for workbench top white oak vs ash wood diy

Heavy-duty fastening in softwood fibers

One challenge when utilizing the best wood for workbench top softwoods is that the fibers are more easily compressed than hardwood.

Our team utilizes Stainless Steel 410 screws to ensure a permanent bond between the laminated layers without the risk of the screw stripping out under load.

Because softwoods can expand and contract more aggressively with humidity, you need the high-tensile strength of Stainless Steel 410 to maintain joint pressure.

We strictly recommend using Torx TX25 bits for these installations to avoid the cam-out issues common with Phillips head screws in resinous woods.

Sourcing your fasteners from a specialized online store is vital, as the “construction screws” found locally often have threads that are too shallow for long-term hold in softwoods.

Professional-grade Stainless Steel 410 provides the deep-thread engagement necessary to keep a massive SYP slab perfectly flat.

You can find the exact screw length and spacing diagrams for softwood lamination in ‘the complete set of blueprints’.

The Cost-Calculator: Softwood Budget Efficiency

Project ComponentHardwood CostSoftwood CostSavings Potential
Main Slab Timber$650$180$470
SS 410 Fasteners$40$40$0
Lamination Glue$30$30$0
Total Build Cost$720$250$470 Savings

PRO-TIP: The “Clear Grain” Selection
When shopping for the best wood for workbench top softwoods, don’t just grab standard 2x4s. Look for “Center Match” or “Prime” grade Southern Yellow Pine 2x10s or 2x12s. These larger boards are usually cut from older, more stable trees and contain fewer knots, allowing you to rip them into clear, vertical-grain laminations for a superior work surface.

Build a workbench that works as hard as you do

There is a common fear that using a softwood will result in a “cheap” workbench that won’t handle the rigors of professional use.

This fear is only true if you use low-density woods like White Pine or Cedar which lack the structural mass for heavy work.

By choosing a high-density softwood like Southern Yellow Pine, you are following the tradition of master builders who prioritized function over prestige.

A workbench is a tool, not a museum piece, and it should be built to take a beating and keep performing.

The best wood for workbench top choice is the one that gets you into the shop and making things today.

You can take the first step toward a high-performance, cost-effective workshop by downloading ‘the complete set of blueprints’ right here.

Plywood, MDF, and Torsion Boxes: The Modern Alternatives

While solid timber is traditional, engineered sheet goods offer a level of dimensional stability that even the best wood for workbench top candidates cannot always match.

Our team has found that for hobbyists and digital fabricators, an engineered top is often the best wood for workbench top solution due to its resistance to warping.

By laminating multiple layers of high-density MDF or Baltic Birch plywood, you create a massive, uniform slab that remains perfectly flat regardless of humidity changes.

The “Torsion Box” design—a grid of internal ribs sandwiched between two skins—provides extreme rigidity with significantly less weight than a solid hardwood slab.

If you are looking for the best wood for workbench top performance in a shop that experiences high temperature swings, engineered materials are a superior choice.

A modern workbench built with these materials provides a dead-flat reference surface that is ideal for assembly and precision machine work.

You can find the exact internal rib layouts and skin thickness calculations for these high-tech designs in ‘the complete set of blueprints’.

The Engineered-Matrix: Sheet Goods vs. Solid Timber

Material TypeDimensional StabilityWeight/MassSurface HardnessBest Woodworking Bench Vise Use
Baltic Birch PlywoodExtremeHighModerateAll-around versatile
High-Density MDFMaximumHighLowAssembly & Reference
Solid European BeechHighMaximumHighHeavy Hand-Tool Work
MDF/Hardwood HybridVery HighHighHighThe “Best of Both”

best wood for workbench top moisture content check wood diy

Technical fastening for engineered materials

Fastening into the best wood for workbench top sheet goods requires a different technical approach than solid timber.

Our team utilizes Stainless Steel 410 screws because their aggressive thread pattern is designed to bite into the resins and glues found in plywood and MDF.

Standard zinc screws often “strip out” or crumble the internal fibers of engineered boards, leading to a bench that wiggles under load.

By using a Torx TX25 bit, you can drive your fasteners through multiple layers of sheet goods with enough force to create a monolithic structure.

We advise ordering your Stainless Steel 410 fasteners online, as the specialty threads needed for high-load plywood builds are rarely stocked at local hardware counters.

A master-level engineered bench is only as strong as the mechanical connections between its layers.

You can find the specific glue-spread rates and screw-pattern grids for engineered tops in ‘the complete set of blueprints’.

The Planning-Table: Torsion Box Assembly Workflow

StepAction ItemTools NeededTolerance
Grid LayoutMark internal rib spacingFraming Square+/- 0.5 mm
Rib FasteningSecure internal gridSS 410 & Torx TX25Perfectly vertical
Skin LaminationGlue and screw top skinClamps / WeightsTotal flat check
EdgingApply hardwood bandingRouter / Flush trimSeamless transition

PRO-TIP: The Hardwood Edging Rule
If you choose MDF or Plywood as your best wood for workbench top material, always wrap the perimeter in at least 1 inch of solid hardwood. This edge banding protects the vulnerable layers of the sheet goods from impact and provides a solid foundation for mounting a heavy vise using Stainless Steel 410 lag screws.

Embrace the precision of modern engineering

There is a lingering fear among traditionalists that a bench made of sheet goods is somehow “lesser” than one made of solid maple.

This fear ignores the reality that many of the world’s most accurate assembly benches are built using torsion box technology.

Do not allow tradition to prevent you from building the flattest, most stable work surface your shop has ever seen.

A workbench is a tool for accuracy, and modern materials provide a level of reference-grade flatness that is difficult to achieve with solid timber.

When you lay a straightedge across your finished bench and find zero gaps, you will appreciate the logic of engineered materials.

You can secure the highest level of assembly precision for your shop by downloading ‘the complete set of blueprints’ right here.

The Weight of the World: Calculating Mass for Stability

The mass of your work surface is the primary defense against the vibrations generated by heavy sawing and chiseling.

Our team has proven that selecting the best wood for workbench top builds is ultimately an exercise in managing physics and inertia.

A workbench that is too light will resonate like a drum, dissipating the energy of your hammer blows instead of driving the tool into the wood.

By choosing high-density species, you ensure that the best wood for workbench top choice provides the “dead” feel required for precision hand tool work.

A heavy top acts as a massive anchor, keeping the entire structure stationary even when you are exerting maximum lateral force during a thicknessing session.

If your chosen wood is naturally lighter, you must compensate by increasing the thickness of the slab to achieve the necessary total mass.

You can use our proprietary weight-distribution formulas to find the perfect thickness for your bench in ‘the complete set of blueprints’.

The Density-Matrix: Species Weight vs. Slab Thickness

Wood SpeciesWeight per Cubic FootRequired Thickness for 300lb TopStability Rating
Hard Maple44 lbs3.5 inchesMaximum
European Beech43 lbs3.6 inchesVery High
Southern Yellow Pine36 lbs4.5 inchesHigh
Douglas Fir32 lbs5.0 inchesModerate

best wood for workbench top router sled surfacing wood diy

Anchoring the mass with high-tensile fasteners

Managing the weight of the best wood for workbench top materials requires a fastening system that can handle massive gravitational loads.

Our team utilizes Stainless Steel 410 fasteners to secure the heavy top to the base, ensuring there is no “racking” or independent movement.

Because a solid wood top can weigh over 200 pounds on its own, the shear stress on the mounting points is immense during a move.

Using Torx TX25 bits, you can drive these heavy-duty screws deep into the leg joinery, creating a single, monolithic unit that functions as one piece.

We strongly advise against using local retail hardware, which is often made from softer alloys that will bend or snap under the weight of a professional-grade top.

By choosing online-sourced Stainless Steel 410, you guarantee that the connection between the top and the base is the strongest part of the bench.

You can find the structural screw patterns for high-mass benches in ‘the complete set of blueprints’.

The Cost-Calculator: Weight-to-Investment Ratio

Wood ChoiceTotal Bench WeightCost of LumberPerformance per Dollar
Solid Maple (4″)350 lbs$750Premium
Hybrid SYP (5″)320 lbs$280Extreme Value
MDF Torsion Box180 lbs$200Low Vibration
Cheap Pine (2″)95 lbs$90Poor / Dangerous

PRO-TIP: The Sandbag Secret
If you have already chosen the best wood for workbench top for your build but it still feels a bit light, add a “deadman” shelf between the bottom stretchers. Fill this shelf with heavy sandbags or your collection of cast-iron planes. This lowers the center of gravity and makes even a lighter-wood bench feel as solid as an 800-pound Roubo.

Eliminate the danger of an unstable workshop

There is a very real fear that a lightweight workbench will tip over or slide during a critical cut, leading to a ruined project or a serious injury.

This instability is almost always the result of a builder trying to save money by using thin, low-density lumber for the work surface.

Do not allow a few dollars of savings to compromise the safety and accuracy of your entire woodworking practice.

A master-level workbench should feel like it is bolted to the center of the earth, providing an immovable platform for your creativity.

When you strike a chisel and the only thing that moves is the wood fiber you are cutting, you will know you chose the right mass.

You can secure the ultimate in workshop stability and safety by downloading ‘the complete set of blueprints’ right here.

Finishing and Sealing: Protecting the best wood for workbench top builds

Applying a finish to your workbench is not about aesthetics; it is about controlling moisture exchange and ensuring glue doesn’t stick to your work surface.

Our team has found that the best wood for workbench top performance is maintained by using a “film-free” finish like boiled linseed oil or a wax blend.

If you use a thick varnish or polyurethane, the surface becomes dangerously slick and will eventually crack under the impact of heavy mallet work.

A penetrating oil finish keeps the best wood for workbench top fibers flexible and allows for easy spot-repairs when you inevitably gouge the surface.

Furthermore, a well-sealed top prevents the wood from cupping during seasonal humidity swings, which is vital for maintaining that dead-flat reference plane.

By choosing a matte, non-slip finish, you ensure that your workpieces stay exactly where you put them during delicate assembly tasks.

You can find our proprietary shop-made finish recipes and application schedules in ‘the complete set of blueprints’.

The Finish-Matrix: Protection vs. Functionality

Finish TypeGrip LevelProtectionEase of RepairBest Woodworking Bench Vise Use
Boiled Linseed OilHigh (Matte)ModerateExcellentThe Professional Choice
Paste WaxModerateHighGoodGreat for glue release
PolyurethaneLow (Slick)MaximumPoorNot recommended for benches
Danish OilHighHighModerateGood hybrid option

best wood for workbench top southern yellow pine wood diy

Chemical resistance and hardware protection

The chemicals in many modern finishes can actually cause corrosion in standard steel fasteners, which is why the best wood for workbench top assembly requires superior hardware.

Our team utilizes Stainless Steel 410 screws because they are chemically inert and will not react with the tannins in woods like Oak or the solvents in oil finishes.

When you apply your sealer, you want a fastener that won’t “bleed” rust into the surrounding wood fibers over time.

Using a Torx TX25 bit ensures that you can periodically tighten these Stainless Steel 410 screws if the wood undergoes extreme seasonal contraction.

We advise against using local big-box store screws, as their coatings often dissolve when in contact with oil-based finishes, leading to permanent staining of your timber.

Sourcing your hardware online ensures that the structural integrity and the visual cleanliness of your bench are preserved for a lifetime.

You can find the full chemical compatibility charts for fasteners and finishes in ‘the complete set of blueprints’.

The Planning-Table: Finishing Workflow

StepAction ItemTools NeededDry Time
Surface PrepSand to 120-150 gritRandom Orbit SanderN/A
First CoatFlood the surface with oilNatural Bristle Brush24 Hours
BurnishingBuff the surfaceGrey Scotch-Brite PadN/A
Final SealApply thin layer of waxLint-free Rag2 Hours

PRO-TIP: The Glue-Release Hack
To keep your best wood for workbench top looking new, apply a heavy coat of paste wax to the areas where you perform most of your glue-ups. Dried wood glue will pop right off the waxed surface with a light tap of a chisel, preventing you from having to plane the wood down and lose thickness every time you make a mess.

Avoid the decay of your most valuable shop asset

There is a genuine fear among woodworkers that their beautiful benchtop will eventually become a stained, warped, and unusable mess.

This decay is almost always the result of neglecting the initial sealing process or using a finish that wasn’t designed for a working tool.

Do not allow your investment in premium lumber and hours of labor to be compromised by poor surface protection.

A master-level workbench should age gracefully, developing a patina of hard work while remaining structurally sound and dimensionally stable.

When you see water or glue bead up on the surface of your bench, you will know you have protected your shop’s legacy.

You can secure the long-term durability of your work surface by downloading ‘the complete set of blueprints’ right here.

The Final Flattening: Commissioning the best wood for workbench top builds

The moment your bench is assembled is not the moment it is finished; it must be brought into a state of absolute co-planarity.

Our team has found that even the best wood for workbench top materials will move slightly after being released from the clamps.

To achieve a professional reference surface, you must perform a final flattening using a jointer plane or a router sled.

This process involves identifying high spots with winding sticks and removing material until a straightedge shows zero gaps across the entire surface.

The best wood for workbench top performance is only realized when the surface is so flat that a thin shaving of wood can be taken from any point on the slab.

By taking the time to calibrate your benchtop now, you ensure that every project you build on it starts with a foundation of total accuracy.

You can find the step-by-step flattening procedures and winding stick templates in ‘the complete set of blueprints’.

The Calibration-Matrix: Flattening Methods vs. Precision

MethodAccuracyPhysical EffortSpeedTool Requirement
Hand Plane (No. 7)ExtremeHighModerateSharp Jointer Plane
Router SledVery HighLowFastRouter & Jig
Belt SanderLowModerateVery FastDo Not Use for Reference
Cabinet ScraperHighLowSlowFinishing Touch Only

best wood for workbench top stainless steel 410 screws wood diy

Structural finality with high-torque hardware

During the flattening process, the best wood for workbench top fibers are under varying degrees of tension, making the internal fasteners critical.

Our team utilizes Stainless Steel 410 screws because they maintain their grip even as you remove the top layers of wood grain.

Standard zinc screws often loosen as the wood’s internal stresses are redistributed during flattening, leading to a “ghost” wobble that is hard to trace.

Using a Torx TX25 bit, you should perform a final torque check on all mounting points once the top is perfectly level.

We advise against using local hardware store fasteners, as they often lack the thread depth to stay seated during the aggressive vibrations of a hand-planing session.

Sourcing your Stainless Steel 410 online ensures that once your bench is flat, it stays flat, regardless of how much material you remove from the surface.

You can find the exact torque specifications for different species of timber in ‘the complete set of blueprints’.

The Planning-Table: First-Use Commissioning Checklist

TaskObjectiveTool NeededTarget Tolerance
Winding CheckEliminate twistWinding SticksZero visible gap
Cross-Grain PlaningLevel the high spotsJack Plane+/- 0.5 mm
Long-Grain FinishCreate reference planeNo. 7 JointerDead flat
Hardware RetightenEnsure zero-playTorx TX25 DriverHigh-tension lock

PRO-TIP: The Pencil Grid Method
When flattening the best wood for workbench top surface, use a carpenter’s pencil to draw a grid of lines across the entire bench. As you plane, the areas where the pencil marks remain are your low spots. Once all the pencil marks have been erased by the plane blade, you have achieved a uniform surface that is ready for the final finish.

Step into the arena of professional craftsmanship

There is a lingering fear that your bench will never be “perfect” and that your joinery will suffer as a result of a crooked surface.

This fear is eliminated through the disciplined application of the flattening techniques used by master cabinetmakers for centuries.

Do not allow the intimidation of a large-scale flattening project to keep you from owning a world-class work surface.

A master-level workbench is more than just a table; it is a precision instrument that dictates the quality of every project you produce.

When you see your first set of dovetails fit perfectly because they were cut on a dead-flat surface, the effort will have been worth it.

You can secure the highest level of workshop precision by clicking here to download ‘the complete set of blueprints’.

Frequently Asked Questions: Best Wood for Workbench Top

What is the absolute best wood for workbench top longevity?

For professional use, European Beech is the global standard. It offers an ideal balance of Janka hardness (1,300 lbf), dimensional stability, and shock absorption. If budget is no object, Hard Maple (1,450 lbf) provides even greater abrasion resistance for a lifetime of service.

Can I use plywood for a heavy-duty workbench?

Yes, but only if it is high-grade Baltic Birch and laminated to a thickness of at least 3 inches. For maximum performance, use a torsion box design or a hybrid approach with a hardwood top layer. Always secure the layers with Stainless Steel 410 screws and Torx TX25 bits.

Why shouldn’t I use construction-grade pine for a benchtop?

Standard construction pine (like White Pine) is often too soft (380-420 lbf Janka) and lacks the mass required for stability. However, Southern Yellow Pine is a dense, high-resin exception that makes an excellent budget-friendly workbench top.

How do I stop my workbench top from warping?

Ensure the wood is dried to 8-10% moisture content before building. Use a quartersawn grain orientation (vertical grain) during lamination and seal the surface with a penetrating oil to slow down moisture exchange.

FeatureHard MapleSouthern Yellow PineBaltic Birch Plywood
Janka Hardness1,450 lbf690 lbfModerate
Vibration DampingExcellentVery GoodGood
Cost$$$$$$$
StabilityHighModerateExtreme

best wood for workbench top thick slab construction wood diy

The Master’s Choice: Why You Cannot Afford to Build Without a Plan

Building a professional workstation without a proven blueprint is the fastest way to turn expensive timber into high-priced firewood.

Our team has seen countless enthusiasts waste hundreds of dollars on the best wood for workbench top materials, only to end up with a warped, unstable surface.

The difference between a bench that lasts a decade and one that lasts a century lies in the invisible engineering details that only experts know.

You can spend weeks scouring forums for conflicting advice, or you can follow a battle-tested path to perfection.

Selecting the best wood for workbench top builds is just the beginning; the magic happens in the joinery, the fastener schedules, and the ergonomic layout.

Without precise measurements and structural calculations, even the highest-density maple cannot save you from a racking, vibrating bench.

You deserve the certainty that every hour you spend in your shop is building toward a masterpiece, not a mistake.

The Risk-Matrix: Guesswork vs. ‘the complete set of blueprints’

The ChallengeThe DIY Guesswork RiskThe ‘complete set of blueprints’ Solution
Material ChoiceBuying wet or unstable lumberExact species and moisture checklists
Structural IntegrityJoint failure under heavy useHigh-torque SS 410 fastener patterns
PrecisionA top that ‘smiles’ or cupsProfessional flattening & grain protocols
Time Investment60+ hours of trial and error20 hours of focused, efficient building

Secure your shop legacy and eliminate the fear of failure

There is a deep, underlying fear that you will invest your hard-earned money into a build that ultimately embarrasses you.

This fear of failure often keeps talented builders stuck in a cycle of hesitation, working on sub-par surfaces that hinder their skill.

Do not allow your potential as a craftsman to be limited by a workbench that isn’t up to the task.

By securing ‘the complete set of blueprints’, you are not just buying paper; you are buying the confidence that comes with expert mentorship.

A master-level shop is built on a foundation of proven physics, elite hardware like Stainless Steel 410, and the collective wisdom of the Elite 19.

The pride of looking at a dead-flat, rock-solid bench and knowing you built it to professional standards is within your reach.

Every joint you cut and every piece of furniture you create from this day forward will be better because of the foundation you lay today.

The time for hesitation is over; the time for precision and excellence has arrived.

You can claim your professional-grade workshop future and download ‘the complete set of blueprints’ right here.

The Planning-Table: Your First 24 Hours to Success

TimeframeAction StepResult
Hour 1Download ‘the complete set of blueprints’Total clarity on the build
Hour 4Order SS 410 & Torx TX25 hardwareFoundation of structural strength
Hour 8Select best wood for workbench topSourcing the perfect timber
Hour 24Begin lamination of the main slabThe first step toward your legacy

PRO-TIP: The Professional Shortcut
The most expensive tool in your shop is your time. By using ‘the complete set of blueprints’, you skip the ‘learning tax’ that most woodworkers pay in ruined lumber and failed builds. Start at the finish line by using the same engineering specs used by the world’s most elite furniture makers.

The choice is yours: Frustration or Mastery

You can continue to work on a bench that bounces, wobbles, and ruins your accuracy.

Or, you can decide today to join the ranks of master builders who demand nothing less than absolute stability.

The best wood for workbench top selection is a waste of resources if the execution is flawed.

Eliminate the guesswork, stop the search for ‘good enough,’ and commit to building the ultimate workshop hub.

Your future projects, your physical health, and your legacy as a builder depend on the quality of your workbench.

You can secure the highest standard of woodworking excellence by downloading ‘the complete set of blueprints’ right here by clicking now.

The right details make the difference. Deepen your knowledge with these specialized resources:

🛠️ More Woodworking Plans & Workshop Inspiration

best wood for workbench top torsion box plywood wood diy

Why the best woodworking bench vise is the heart of your workshop

A workshop is only as capable as its ability to hold a workpiece under extreme pressure.

Our team has spent decades testing different clamping systems to identify what truly constitutes the best woodworking bench vise.

best woodworking bench vise blueprint download wood diy

The difference between a frustrating afternoon of slipping wood and a productive session of precision joinery often comes down to the quality of your vise.

Most beginners underestimate the sheer torque and lateral force that a high-quality vise must withstand during heavy planing or chiseling.

When you invest in the best woodworking bench vise, you aren’t just buying a tool; you are buying the stability required for master-level craftsmanship.

However, even the most expensive hardware is useless if it is mounted to a flimsy, poorly designed workbench.

You guarantee the structural integrity of your entire setup by starting your build with ‘the complete set of blueprints’.


The best woodworking bench vise features a quick-release mechanism, massive cast-iron jaws, and at least a 9-inch opening capacity. For maximum stability, mount your vise using Stainless Steel 410 screws and Torx TX25 bits. This setup ensures zero-flex performance, which is vital for precision tasks like dovetailing and heavy thickness planing.


The Material-Matrix: Vise Types vs. Application

Vise TypeBest ForGrip StrengthComplexity
Front ViseGeneral JoineryHighModerate
Tail ViseLarge Surface PlaningMedium-HighHigh
Leg ViseHeavy Timber WorkExtremeModerate
Twin-ScrewWide Board ClampingHighHigh

best woodworking bench vise cast iron vs steel wood diy

The technical reality of mounting hardware

Our team has seen far too many benches ruined because the builder used cheap, zinc-plated hardware found at local big-box stores.

When mounting the best woodworking bench vise, you must use Stainless Steel 410 fasteners to prevent shear failure.

Stainless Steel 410 provides a unique combination of hardness and corrosion resistance that standard stainless lacks.

Combined with Torx TX25 bits, these screws allow you to drive the hardware deep into the bench’s subframe without stripping the head.

We strongly advise ordering your fasteners from a specialized online hardware supplier to ensure you are getting true 410-grade quality.

A master craftsman knows that the hidden fasteners are just as important as the cast iron itself.

You can eliminate all guesswork regarding hardware and mounting positions by accessing ‘the complete set of blueprints’.

The Cost-Calculator: DIY Integration vs. Pre-made

ComponentDIY Pro SetupRetail “All-in-One”Performance Gap
Cast Iron Vise$120 – $180N/AHigh-grade casting
SS 410 Fasteners$15Cheap Zinc BoltsNo shear risk
Custom Hardwood Jaws$10Plastic/Thin WoodNon-marring grip
Total Investment$145 – $205$600+Superior Longevity

PRO-TIP: The Toe-In Secret
When installing the wooden jaws on your best woodworking bench vise, plane a slight “toe-in” (about 1/32 of an inch) at the top of the jaws. This ensures that when the vise is tightened, the top edges make contact first, preventing your workpiece from pivoting or “racking” upward under pressure.

Take control of your workshop’s capabilities

There is a nagging fear among DIYers that their projects will never look “professional” because of a lack of precision.

This failure usually starts with a workpiece that moves just a fraction of a millimeter because of an inferior clamping system.

Stop fighting your tools and start commanding your workshop with the authority that comes from a rock-solid foundation.

Imagine the confidence of knowing that once you lock a board into the best woodworking bench vise, it will not move until you release it.

Your journey toward high-end cabinetry and heirloom furniture begins with the right setup and the right plan.

You can claim your professional edge today by securing ‘the complete set of blueprints’ right here.

Quick-Release vs. Continuous Screw: Selecting the best woodworking bench vise for your speed

The internal mechanism of your clamping system determines how much time you spend spinning a handle versus actually cutting wood.

Our team has found that for high-volume shops, the best woodworking bench vise is almost always a quick-release model.

These vises utilize a split-nut mechanism that allows you to slide the jaw freely until it makes contact with your workpiece.

A simple half-turn of the handle then engages the threads to apply the massive pressure required for a secure hold.

While a continuous screw vise is simpler and often more affordable, it requires tedious cranking for every adjustment in board thickness.

If you value your time and want to maintain a “flow state” in your shop, the mechanical advantage of a quick-release system is undeniable.

You can see exactly how to integrate these heavy-duty mechanisms into your bench layout by following ‘the complete set of blueprints’.

best woodworking bench vise with bench dog holes wood diy

The Mechanics-Matrix: Quick-Release vs. Standard Screw

FeatureQuick-Release MechanismContinuous ScrewBest Woodworking Bench Vise Choice?
Adjustment SpeedInstant sliding actionSlow manual crankingQuick-Release
Mechanical FailureModerate (Split-nut wear)Extremely LowContinuous
Torque PotentialHighVery HighBoth
Shop EfficiencyMaximumAverageQuick-Release

best woodworking bench vise for heavy duty planing wood diy

Engineered for durability with the right fasteners

Regardless of whether you choose a quick-release or a standard screw, the mounting pressure remains the same.

The best woodworking bench vise will exert over 1,000 pounds of force, which pulls directly against your bench’s apron.

To combat this, our team insists on using Stainless Steel 410 screws for all secondary attachments and internal jaw liners.

Standard zinc screws will literally snap under the sheer stress of a fully tightened cast-iron jaw.

By using Torx TX25 bits, you can ensure that the screw heads are flush-mounted, preventing any metal-on-wood contact that could mar your project.

Using sub-par hardware on a high-end vise is like putting economy tires on a supercar; it cripples the performance.

You can find the exact hardware specifications and pilot hole depths in ‘the complete set of blueprints’.

The Planning-Table: Installation Workflow

PhaseTaskTools NeededTime
PreparationCut the bench apron recessRouter or Hand Saw30 min
Pre-DrillingDrill pilot holes for SS 410Power Drill & Bits10 min
MountingSecure the vise castingTorx TX25 & Driver20 min
AlignmentSquare the jaws to the benchEngineer’s Square15 min

PRO-TIP: The Anti-Racking Spacer
One common issue even with the best woodworking bench vise is “racking,” where the jaws tilt because you are only clamping on one side. Always keep a few scraps of different wood thicknesses nearby. Place a scrap of equal thickness on the opposite side of the vise to keep the jaws parallel and ensure a 100% slip-free grip.

Avoid the legacy of a poorly equipped shop

There is a specific type of regret that settles in when you realize you’ve outgrown your tools because you chose the “cheap” option.

A vise that skips threads or racks uncontrollably will eventually force you to redo your work, costing you more in lumber than the tool itself.

Do not allow a mediocre clamping system to be the bottleneck of your creative potential.

The best woodworking bench vise is an investment that you will pass down to the next generation of builders in your family.

When you feel the smooth glide of a quick-release mechanism locking into place, you’ll know you made the right choice.

You can ensure your workshop is built for a lifetime of success by downloading ‘the complete set of blueprints’ right here.

Jaw Liners and Surface Protection: Maximizing the best woodworking bench vise

Even the best woodworking bench vise is essentially a cold, industrial machine until you add the necessary wooden liners.

Our team recommends using a dense hardwood like Hard Maple or White Oak for your vise jaws to provide a non-marring surface.

The interaction between the steel casting and your project wood is where most mistakes happen in a novice workshop.

If you leave the cast iron exposed, the serrated patterns will leave permanent indentations on your expensive cherry or walnut lumber.

By crafting custom liners, you transform the best woodworking bench vise into a precision instrument that grips firmly without bruising the fibers.

These liners must be perfectly parallel to ensure that pressure is distributed across the entire surface area of the workpiece.

You can find the exact templates and grain orientation guides for these custom jaws in ‘the complete set of blueprints’.

The Jaw-Material Matrix: Wood Species vs. Durability

Wood SpeciesHardness (Janka)DurabilityBest Woodworking Bench Vise Use
Hard Maple1,450 lbfExtremePrimary Front Vise Jaws
White Oak1,360 lbfVery HighHeavy-Duty Leg Vises
European Beech1,300 lbfHighTraditional Tail Vises
Southern Yellow Pine690 lbfModerateTemporary “Sacrificial” Jaws

best woodworking bench vise for small garage shop wood diy

Fastening techniques for high-pressure jaws

The way you attach your wooden liners to the best woodworking bench vise dictates how long they will stay true.

Our team utilizes a countersunk mounting method using Stainless Steel 410 screws to ensure the metal never touches the work.

Because the jaws are subject to constant moisture changes and extreme compression, Stainless Steel 410 is the only fastener that won’t shear over time.

You must use a Torx TX25 bit to drive these screws deep enough so that they sit at least 1/4 inch below the wood surface.

This depth allows you to occasionally plane the wooden jaws flat again without hitting a screw head and ruining your plane blade.

Buying your fasteners from a local hardware store often results in brittle screws that snap when the vise is under full load.

You can eliminate these technical failures by following the hardware sourcing guide in ‘the complete set of blueprints’.

The Cost-Calculator: Professional Jaw Upgrades

Upgrade ComponentEstimated DIY CostRetail EquivalentPerformance Gain
Hardwood Stock (8/4)$15 – $25$60 (Pre-cut)Custom fit to your bench
SS 410 Mounting Kit$10$25 (Zinc kits)Corrosion & Shear resistance
Leather/Cork Facings$5$20Superior slip resistance
Total Upgrade$30 – $40$105Bespoke Precision

PRO-TIP: The Leather Facing Hack
For the absolute best woodworking bench vise grip, glue a piece of 4oz vegetable-tanned leather to the inner face of the rear jaw. The leather has a natural “tackiness” that holds wood securely with significantly less handle pressure, which is ideal for delicate assembly work or thin veneers.

Protect your craftsmanship from avoidable damage

The fear of ruining a project during the final stages of assembly is a nightmare that haunts many woodworkers.

Using a vise without properly engineered liners is a guaranteed way to leave “maker’s marks” that you can’t sand out.

Do not let a lack of preparation diminish the quality of the furniture you worked so hard to design and cut.

A master-level workshop is defined by the small details that prevent errors before they even have a chance to occur.

When your jaws close with a soft, uniform thud against a piece of lumber, you’ll feel the difference that true engineering makes.

You can secure the highest level of protection for your work by accessing ‘the complete set of blueprints’ right here.

Installation Physics: Flush Mount vs. Under-Mount for the best woodworking bench vise

The structural integrity of your clamping system is heavily dependent on how the casting meets the timber of your bench.

Our team has analyzed thousands of bench configurations to determine how to install the best woodworking bench vise for maximum longevity.

A flush-mount installation requires you to mortise the rear jaw into the bench apron, creating a seamless transition from the benchtop to the vise face.

This method provides superior support because the bench itself acts as a massive “stop” for the clamping pressure, reducing the load on your fasteners.

Alternatively, an under-mount installation is faster but relies entirely on the shear strength of your mounting screws to hold the weight.

If you are serious about heavy-duty hand tool work, the flush-mount method is the only way to truly optimize the best woodworking bench vise.

You can master these complex joinery techniques and ensure a perfect fit by following the step-by-step guides in ‘the complete set of blueprints’.

The Installation-Matrix: Flush vs. Under-Mount Performance

MetricFlush-Mount (Mortised)Under-Mount (Bolt-on)Impact on Workshop
Lateral StabilityMaximumModerateVital for heavy planing
Setup TimeHigh (Requires mortising)LowFaster initial build
Clamping SurfaceContinuous with benchDisconnectedImpact on long board support
Stress DistributionTransferred to bench frameConcentrated on screwsLongevity factor

best woodworking bench vise front mount install hout diy

Critical hardware for structural mounting

When you are securing the best woodworking bench vise to a heavy apron, the choice of fastener is non-negotiable.

Our team insists on using Stainless Steel 410 lag screws for the primary structural connection between the cast iron and the wood.

Unlike standard steel, Stainless Steel 410 offers the high-tensile strength required to prevent the vise from sagging over years of use.

You must utilize a Torx TX25 bit for the installation to ensure the screws are driven home with enough torque to compress the fibers.

Inferior hardware from a local shop will often develop “creep,” where the vise slowly pulls away from the bench under high tension.

By sourcing professional-grade fasteners online, you ensure that your bench remains a single, monolithic unit that never wobbles.

You can find the precise drilling patterns and screw length charts for every bench thickness in ‘the complete set of blueprints’.

The Planning-Table: Structural Integrity Checklist

ComponentInspection PointRequired ToolStandard
Apron RecessDepth of mortiseDigital Caliper+/- 0.5mm accuracy
Pilot HolesCentering in the castingVix Bit / Self-centeringPerfectly vertical
FastenersTension checkTorx TX25 DriverNo movement under load
Jaw AlignmentSquareness to topEngineer’s Square90.0 degrees

PRO-TIP: The Apron Reinforcement
If your workbench apron is thinner than 3 inches, our team recommends adding a “booster block” of hardwood behind the mounting area. Glue and screw this block using Stainless Steel 410 fasteners before mounting the best woodworking bench vise. This extra mass prevents the apron from flexing or cracking when you apply maximum torque to a stubborn workpiece.

Eliminate the risk of catastrophic failure

There is a genuine fear that a heavy vise will eventually tear out of the wood, ruining your bench and potentially causing injury.

This fear is well-founded if you use the wrong mounting techniques or sub-par fasteners that can’t handle the physics of leverage.

Do not allow your workshop to be compromised by a weak link in your most important clamping station.

A master craftsman builds with the intention that their tools will still be functional fifty years from now.

When you feel the absolute rigidity of a flush-mounted vise, you will understand the peace of mind that comes from doing it right.

You can guarantee the structural permanence of your workshop by clicking here to get ‘the complete set of blueprints’.

Ergonomics and Placement: Finding the sweet spot for the best woodworking bench vise

The position of your clamping system on the bench dictates your body posture and your efficiency during every single task.

Our team has found that the best woodworking bench vise is most effective when placed near a leg of the workbench to transfer force directly to the floor.

If you are right-handed, the vise is traditionally mounted on the left side of the front apron to facilitate easy planing from right to left.

Placement too far from a structural support can lead to “bench bounce,” where the vibration of your work is magnified by the flex of the timber.

By carefully considering your workflow before the first hole is drilled, you ensure that the best woodworking bench vise works with your body, not against it.

An improperly placed vise will force you into awkward leaning positions, leading to chronic back strain and reduced accuracy in your joinery.

You can master the art of workshop layout and ergonomic bench design by utilizing the spatial templates in ‘the complete set of blueprints’.

The Placement-Matrix: Vise Location vs. Workflow Impact

Bench LocationPrimary UseAdvantageBest Woodworking Bench Vise Role
Front LeftDovetailing / PlaningDirect support for RH usersMain Workhorse
Front RightSpecialized JoineryBetter for LH usersPrimary Clamp
Tail / EndLong Board PlaningWorks with bench dogsSurface Support
Leg MountTimber FramingMaximum vertical supportHeavy-Duty Gripping

best woodworking bench vise front mount installation wood diy

Fastening for long-term ergonomic stability

A vise that shifts even slightly will ruin your ergonomics and your precision, making it vital to use high-quality hardware.

Our team recommends securing the sub-structure of your mounting area with Stainless Steel 410 screws to prevent any loosening over time.

Because the best woodworking bench vise is subject to thousands of cycles of tension and release, the fasteners must be immune to metal fatigue.

Using a Torx TX25 bit allows you to apply the necessary torque to seat the mounting bolts without the risk of the tool slipping and marring the bench.

Standard fasteners from a local hardware store often lack the thread depth required to hold fast in end-grain or heavy hardwoods.

By choosing professional-grade Stainless Steel 410, you ensure that your ergonomic setup remains exactly where you intended it to be for life.

You can find the full hardware sourcing lists for ergonomic mounting in ‘the complete set of blueprints’.

The Planning-Table: Ergonomic Setup Checklist

Setup StepAction ItemTool NeededGoal
User HeightMeasure elbow heightTape MeasureBench height alignment
Swing ClearanceCheck handle rotationVise HandleNo obstruction during use
Support CheckAlign with bench legPlumb Bob / LevelDirect force transfer
Hardware SeatCountersink SS 410Torx TX25 DriverFlush, snag-free surface

PRO-TIP: The “Hip-Height” Rule
For the best woodworking bench vise experience, the top of your vise jaws should be roughly level with your hip joint. This height allows you to lean into your work during heavy planing while still providing enough vertical clearance to see your layout lines clearly during fine dovetailing work.

Avoid the physical toll of a poorly planned shop

There is a genuine fear among aging woodworkers that their hobby will eventually become too physically demanding for their backs and joints.

This fear often stems from years of working on benches where the vise was placed as an afterthought rather than a strategic decision.

Do not allow poor shop ergonomics to cut your woodworking journey short or cause unnecessary physical pain.

A master-level workshop is designed around the human body, ensuring that every movement is as fluid and natural as possible.

When you work at a bench where the vise is perfectly positioned, your focus shifts entirely from your discomfort to the beauty of the wood.

You can secure the longevity of your health and your hobby by downloading ‘the complete set of blueprints’ right here.

Expanding the Grip: Integrating accessories with the best woodworking bench vise

A vise alone is powerful, but when paired with a strategic dog-hole system, it becomes a universal workholding station.

Our team has found that the best woodworking bench vise reaches its full potential only when used in tandem with bench dogs.

By drilling a series of 3/4-inch holes along the length of your bench, you can use the vise to apply pressure against a dog, allowing you to clamp boards that are six feet long or more.

This system effectively turns your entire benchtop into a massive clamping surface, which is essential for surface planing large tabletops.

Without this integrated approach, the best woodworking bench vise is limited by its own jaw opening, which rarely exceeds ten or twelve inches.

A master builder designs their bench so that the vise and dog holes are perfectly aligned to ensure force is applied evenly across the grain.

You can find the precise drilling patterns and hole spacing logic for this universal system in ‘the complete set of blueprints’.

The Accessory-Matrix: Vise Enhancements vs. Function

AccessoryFunctionWoodworking BenefitIntegration with best woodworking bench vise
Bench DogsHorizontal StopClamping long boardsExtends vise capacity to bench length
HoldfastsVertical PressureSecures work to the topProvides support far from the vise
Bench CookiesFriction GripNon-marring elevationIdeal for finishing near the vise
Wonder DogsMulti-Angle GripClamping curvesAdds versatility to standard vise jaws

best woodworking bench vise jaw liners oak wood diy

Securing the accessory sub-structure

The intense lateral pressure generated by the best woodworking bench vise against a bench dog can actually split a benchtop if it isn’t reinforced.

Our team utilizes Stainless Steel 410 screws to reinforce the areas around the dog holes, particularly those closest to the vise.

Because these holes are subject to repetitive stress and the wedging action of the dogs, the surrounding wood must be stabilized.

Using a Torx TX25 bit, you should drive your reinforcement screws into the underside of the bench to keep the top surface clean and unobstructed.

Buying cheap hardware from a local store often leads to fasteners that rust or react with the tannins in oak or beech, causing the wood around your dog holes to weaken.

By using professional-grade Stainless Steel 410, you ensure that your benchtop can handle the maximum torque of your vise for decades.

You can find the complete hardware lists for benchtop reinforcement in ‘the complete set of blueprints’.

The Planning-Table: Accessory Integration Workflow

StepAction ItemTools NeededTolerance
LayoutMark dog hole centerlineMarking Gauge+/- 0.5 mm
DrillingBore 3/4″ (19mm) holesForstner Bit & GuidePerfectly 90 degrees
ChamferingEase the hole edgesRouter or Sandpaper2 mm bevel
ReinforceDrive SS 410 from belowTorx TX25 DriverFlush with underside

PRO-TIP: The “Pop-Up” Dog Advantage
For the ultimate best woodworking bench vise experience, install at least one spring-loaded “pop-up” dog directly into the wooden jaw of the vise itself. This allows you to clamp workpieces between the vise jaw and the benchtop dogs without needing to insert a separate peg every time you switch boards.

Don’t let your shop’s potential be limited by a narrow view

There is a genuine fear that you will spend hundreds of dollars on a vise only to find it still can’t hold the large projects you want to build.

This frustration is common among woodworkers who view the vise as a standalone tool rather than a part of a larger clamping architecture.

Do not allow your creativity to be boxed in by the physical dimensions of a single piece of cast iron.

A master-level workshop is built with the foresight to handle projects of any size, from a small jewelry box to a massive dining table.

When you see a six-foot oak plank held perfectly still by the synergy of your vise and dogs, you’ll know you’ve reached a new level of skill.

You can unlock the full capacity of your workshop by securing ‘the complete set of blueprints’ right here.

Maintenance and Restoration: Keeping the best woodworking bench vise in peak condition

Mechanical tools in a woodshop are constantly under assault from fine dust, moisture, and extreme pressure.

Our team has observed that even the best woodworking bench vise will eventually lose its silky-smooth action if it isn’t properly maintained.

The primary enemy of your vise’s screw and guide rods is the accumulation of sawdust mixed with old grease, which creates an abrasive paste.

Over time, this “grinding paste” can wear down the threads of the nut, leading to backlash and a significant loss of clamping force.

To keep the best woodworking bench vise performing like new, you must perform a deep cleaning and lubrication cycle at least twice a year.

By maintaining the mechanical tolerances of your hardware, you ensure that every ounce of effort you put into the handle is translated into rock-solid grip.

You can find the detailed maintenance schedules and lubrication brand recommendations in ‘the complete set of blueprints’.

The Maintenance-Matrix: Component vs. Care Routine

ComponentCommon IssueCleaning AgentLubricant
Main ScrewDust buildup / StickingMineral SpiritsDry PTFE Spray
Guide RodsRust / BindingFine Steel WoolPaste Wax
Wooden JawsCompression / SlippingSanding (120 grit)Boiled Linseed Oil
Quick-ReleaseSpring fatigue / SlippageCompressed AirLithium Grease (light)

best woodworking bench vise mounting height wood diy

Corrosion protection for long-term reliability

Because many workshops are located in garages or basements, humidity can quickly turn the cast iron of the best woodworking bench vise into a rusted mess.

Our team recommends treating all non-painted metal surfaces with a high-quality paste wax to create a moisture barrier.

For the mounting hardware, using Stainless Steel 410 fasteners is a critical preventative measure against “rust welding” where the screw becomes inseparable from the wood.

When you install or replace jaws, always use a Torx TX25 bit to ensure you can remove the screws easily for maintenance without stripping the heads.

Local hardware store screws will often corrode and snap during a restoration attempt, forcing you to drill out the metal and damage your bench.

By sourcing professional-grade Stainless Steel 410 online, you guarantee that your bench remains serviceable for decades.

You can find the full restoration guides and rust-prevention checklists in ‘the complete set of blueprints’.

The Planning-Table: Semi-Annual Restoration Steps

StepAction ItemTools NeededTime
DeconstructionRemove wooden jawsTorx TX25 Driver10 min
DegreasingClean screw and rodsMineral Spirits & Rag20 min
PolishingRemove surface rust0000 Steel Wool15 min
ProtectionApply wax and PTFEPaste Wax / Dry Lube15 min

PRO-TIP: The “Dry Lube” Rule
Never use heavy wet oils or WD-40 on the screw of the best woodworking bench vise. Wet lubricants attract sawdust like a magnet, creating a gummy mess. Instead, use a dry PTFE (Teflon) spray or a simple block of paraffin wax. This provides the necessary glide without the dust-attracting side effects.

Prevent your tools from becoming a source of frustration

There is a genuine fear that your expensive shop equipment will slowly degrade into a pile of rusted, seized metal.

This “shop rot” is the result of neglect and the use of inferior fasteners that can’t withstand the environment of a working woodshop.

Do not allow your best woodworking bench vise to become a victim of poor maintenance or low-quality hardware choices.

A master craftsman takes as much pride in the condition of his tools as he does in the quality of his finished furniture.

When you spin the handle and the jaw glides effortlessly with the touch of a finger, you’ll feel the rewards of your diligence.

You can protect your investment and ensure your shop stays in top-tier condition by downloading ‘the complete set of blueprints’ right here.

The Final Calibration: Commissioning the best woodworking bench vise

The moment of truth arrives when the last fastener is seated and the vise is ready for its first operational test.

Our team has established a rigorous “break-in” protocol to ensure that the best woodworking bench vise is perfectly aligned with the bench’s geometry.

You must first close the jaws completely to check for “daylight” between the wooden liners; any gap indicates that your mounting is slightly out of square.

A perfectly commissioned vise should apply even pressure across the entire width of the jaws, preventing the workpiece from pivoting during heavy labor.

By performing this final calibration, you confirm that the best woodworking bench vise is not just an attachment, but a seamless extension of the bench itself.

This precision is what separates an amateur setup from a professional workstation that can handle high-tolerance joinery.

You can find the master-level calibration checklists and alignment troubleshooting guides in ‘the complete set of blueprints’.

The Calibration-Matrix: Symptom vs. Mechanical Solution

SymptomProbable CauseTechnical FixAlignment Goal
Handle VibrationLoose mounting boltsTighten SS 410 fastenersZero movement
Jaw RackingUneven jaw thicknessPlane the wooden linersPerfect parallelism
Squeaking ScrewLack of lubricationApply dry PTFE spraySilent operation
Jaw SlippageSmooth liner surfaceScuff with 100-grit paperMaximum friction

best woodworking bench vise quick release mechanism wood diy

Ensuring structural permanence with superior hardware

The final tightening of your mounting hardware is the most critical step in preventing future mechanical drift.

Our team insists on a secondary torque check of all Stainless Steel 410 screws after the first week of shop use.

As the wood fibers compress under the weight of the best woodworking bench vise, a slight loosening of the fasteners is a natural physical occurrence.

Using a Torx TX25 bit, you should ensure that the lag screws are seated with enough tension to lock the cast iron into the timber permanently.

Standard hardware from a local shop often lacks the thread pitch required to remain tight after these initial compression cycles.

By investing in professional-grade Stainless Steel 410 from an online specialist, you ensure that your bench never develops the “creaks” associated with inferior builds.

You can find the full torque specification charts for various hardwood species in ‘the complete set of blueprints’.

The Planning-Table: First Project Readiness

ComponentFinal CheckRequired ToolResult
Handle TorqueCheck for smooth rotationManual OperationNo binding
Jaw SurfaceCheck for protruding metalFingertip Feel100% snag-free
Dog AlignmentTest with a bench dog3/4″ Wood PegEasy insertion
Base SupportCheck for floor vibrationHeavy MalletSolid thud (no bounce)

PRO-TIP: The “Paper-Clamp” Test
To verify the precision of the best woodworking bench vise, place a single sheet of paper at each end of the jaws and tighten the handle. If you can pull either sheet out while the vise is closed, your jaws are out of parallel. Use a hand plane to adjust the wooden liners until both sheets are held with equal force.

Step into the elite circle of master woodworkers

There is a profound sense of fear that your work will never be “good enough” to justify a high-end workshop setup.

But the truth is that your skills can only grow to the level that your workspace allows them to reach.

Do not let the fear of a complex build prevent you from owning the best woodworking bench vise and the bench that supports it.

The pride you will feel when you complete your first set of hand-cut dovetails on this rock-solid station is a milestone you will never forget.

You have the knowledge, the technical specs, and the drive to build something that lasts a lifetime.

You can turn this technical vision into a physical reality today by downloading ‘the complete set of blueprints’ right here.

The Final Calibration: Commissioning the best woodworking bench vise

The moment of truth arrives when the last fastener is seated and the vise is ready for its first operational test.

Our team has established a rigorous “break-in” protocol to ensure that the best woodworking bench vise is perfectly aligned with the bench’s geometry.

You must first close the jaws completely to check for “daylight” between the wooden liners; any gap indicates that your mounting is slightly out of square.

A perfectly commissioned vise should apply even pressure across the entire width of the jaws, preventing the workpiece from pivoting during heavy labor.

By performing this final calibration, you confirm that the best woodworking bench vise is not just an attachment, but a seamless extension of the bench itself.

This precision is what separates an amateur setup from a professional workstation that can handle high-tolerance joinery.

You can find the master-level calibration checklists and alignment troubleshooting guides in ‘the complete set of blueprints’.

The Calibration-Matrix: Symptom vs. Mechanical Solution

SymptomProbable CauseTechnical FixAlignment Goal
Handle VibrationLoose mounting boltsTighten SS 410 fastenersZero movement
Jaw RackingUneven jaw thicknessPlane the wooden linersPerfect parallelism
Squeaking ScrewLack of lubricationApply dry PTFE spraySilent operation
Jaw SlippageSmooth liner surfaceScuff with 100-grit paperMaximum friction

best woodworking bench vise stainless steel 410 screws wood diy

Ensuring structural permanence with superior hardware

The final tightening of your mounting hardware is the most critical step in preventing future mechanical drift.

Our team insists on a secondary torque check of all Stainless Steel 410 screws after the first week of shop use.

As the wood fibers compress under the weight of the best woodworking bench vise, a slight loosening of the fasteners is a natural physical occurrence.

Using a Torx TX25 bit, you should ensure that the lag screws are seated with enough tension to lock the cast iron into the timber permanently.

Standard hardware from a local shop often lacks the thread pitch required to remain tight after these initial compression cycles.

By investing in professional-grade Stainless Steel 410 from an online specialist, you ensure that your bench never develops the “creaks” associated with inferior builds.

You can find the full torque specification charts for various hardwood species in ‘the complete set of blueprints’.

The Planning-Table: First Project Readiness

ComponentFinal CheckRequired ToolResult
Handle TorqueCheck for smooth rotationManual OperationNo binding
Jaw SurfaceCheck for protruding metalFingertip Feel100% snag-free
Dog AlignmentTest with a bench dog3/4″ Wood PegEasy insertion
Base SupportCheck for floor vibrationHeavy MalletSolid thud (no bounce)

PRO-TIP: The “Paper-Clamp” Test
To verify the precision of the best woodworking bench vise, place a single sheet of paper at each end of the jaws and tighten the handle. If you can pull either sheet out while the vise is closed, your jaws are out of parallel. Use a hand plane to adjust the wooden liners until both sheets are held with equal force.

Step into the elite circle of master woodworkers

There is a profound sense of fear that your work will never be “good enough” to justify a high-end workshop setup.

But the truth is that your skills can only grow to the level that your workspace allows them to reach.

Do not let the fear of a complex build prevent you from owning the best woodworking bench vise and the bench that supports it.

The pride you will feel when you complete your first set of hand-cut dovetails on this rock-solid station is a milestone you will never forget.

You have the knowledge, the technical specs, and the drive to build something that lasts a lifetime.

You can turn this technical vision into a physical reality today by downloading ‘the complete set of blueprints’ right here.

The right details make the difference. Deepen your knowledge with these specialized resources:

🛠️ More Woodworking Plans & Workshop Inspiration

best woodworking bench vise tail vise integration wood diy

Creating the perfect outdoor retreat starts with the wood under your skin.

Most DIY enthusiasts spend days building their furniture only to ruin the aesthetic during the final finishing stage.

Without the right staining adirondack chairs tips, your project is likely to face premature graying or peeling.

staining adirondack chairs tips grit sequence diy

A true Adirondack chair is an investment in your legacy and your backyard’s atmosphere.

Understanding the interaction between wood fibers and pigment is what separates a hobbyist from a master.

Our team has spent decades refining the process to ensure your chairs survive the harshest UV rays and moisture.

Using a professional approach ensures that your hard work doesn’t vanish after a single season of rain.

By applying these staining adirondack chairs tips, you transform raw timber into a high-end gallery piece.


For professional results, apply staining adirondack chairs tips such as using a semi-transparent oil-based stain on kiln-dried Western Red Cedar. Ensure all fasteners are Stainless Steel 410 with a Torx TX20 head to prevent tannin streaking. Sand sequentially from 80 to 120 grit, ensuring all slat edges are rounded to prevent film failure at the corners.


staining adirondack chairs tips cedar preservation diy

The Critical Foundation of a Professional Finish

You cannot fix a poor build with a good stain, but you can certainly ruin a great build with a poor finish.

Many beginners overlook the moisture content of the wood before they even open a can of sealant.

Following high-level staining adirondack chairs tips requires you to check that your timber is below 12% moisture.

If the wood is too wet, the stain will sit on the surface and flake off within months of application.

This is why starting with a technical guide is more important than just picking a color at the local store.

The Material-Matrix: Wood Species vs. Stain Absorption

Wood TypeAbsorption RateUV ResistanceRecommended Prep
Western Red CedarHighExcellentLight scuff sand (120 grit)
White OakLowSuperiorGrain popping with water
Pressure TreatedVariableModerate6-month ‘weathering’ period
TeakVery LowMaximumSolvent wipe before staining

When you are looking for staining adirondack chairs tips, the species of wood dictates your entire chemical strategy.

Cedar remains the gold standard for Adirondacks due to its natural oils and lightweight durability.

However, those same oils can sometimes resist water-based stains if the surface isn’t properly prepped.

We always recommend sourcing your timber from specialized lumber yards rather than generic big-box stores.

Quality wood reacts more predictably to high-end finishes and maintains its structural integrity longer.

Hardware Integration and Chemical Reactions

A common mistake that ruins a finish is using the wrong metal fasteners in your construction.

Our team insists on using only Stainless Steel 410 screws to prevent the dreaded black “bleeding” streaks.

Standard galvanized screws will react with the tannins in the wood and create permanent stains.

Using a Torx TX20 or TX25 bit ensures you can drive these screws deep without stripping the heads.

This allows you to countersink the hardware and fill the holes for a truly seamless, professional look.

PRO-TIP: Always sand the “end-grain” of your Adirondack slats to a higher grit than the face-grain. End-grain is like a bundle of straws that soaks up stain aggressively, often turning much darker than the rest of the chair. By sanding it to 180 or 220 grit, you partially close those “straws,” resulting in an even, professional color across the entire chair. For the exact sanding sequences and assembly orders, refer to the complete set of blueprints to ensure a flawless execution.

Do not let your lack of technical knowledge turn your dream project into a backyard eyesore.

The pride of sitting in a chair that looks like it cost thousands of dollars is within your reach today.

You can secure your professional results by downloading the complete set of blueprints right here.

Invest in your craftsmanship now and build a piece of furniture that your family will cherish for decades.

staining adirondack chairs tips hardwood finishing diy

The Pre-Stain Preparation Protocol: Staining Adirondack Chairs Tips

The secret to a finish that doesn’t peel lies 90% in the preparation and only 10% in the application.

If you skip the cleaning phase, you are simply sealing dirt and mill glaze into the wood cells.

Many amateur builders believe that new wood is ready for finish, but this is a dangerous misconception.

Following professional staining adirondack chairs tips means identifying and removing mill glaze from the surface.

Mill glaze is a shiny, crushed layer of wood fibers created by high-speed planers at the lumber mill.

If you don’t remove this layer, your expensive stain will never penetrate the actual grain of the timber.

Our team recommends a chemical wood cleaner followed by a brightening agent to balance the wood’s pH.

Using these specific staining adirondack chairs tips ensures the wood is “hungry” for the pigment you are about to apply.

The Cost-Calculator: DIY Restoration vs. Professional Prevention

Investing in the right prep tools now saves you hundreds of dollars in future restoration costs.

ItemCost (Prevention)Cost (Restoration)Impact on Longevity
Wood Cleaner/Brightener$45$0Deep pigment penetration
Sanding Discs (Multi-Grit)$25$60 (Stripping pads)Smooth, even finish
RVS 410 Fasteners$35$120 (Board replacement)No tannin black streaks
Professional Blueprints$27$250+ (Wasted Wood)Perfect structural fit

By prioritizing these staining adirondack chairs tips, you avoid the cycle of stripping and re-staining every year.

Most people spend more money fixing a bad finish than they would have spent doing it right the first time.

We advise purchasing your abrasives online in bulk to ensure you always have a fresh disc ready.

A dull sanding disc doesn’t cut the wood; it generates heat and “polishes” the grain shut, which ruins absorption.

This is why technical staining adirondack chairs tips emphasize the use of high-quality ceramic abrasives.

Grit Sequence and Surface Geometry

Adirondack chairs have complex curves and many narrow slats that require a systematic sanding approach.

Start with 80 grit to remove mill glaze and any imperfections from the assembly process.

Transition to 120 grit to smooth the surface without closing the pores of the wood completely.

For the armrests, where skin contact is constant, you can finish with 150 grit for a buttery-smooth feel.

Always sand in the direction of the grain to avoid “pigtail” swirl marks that appear after staining.

The use of Torx TX20 bits allows you to tighten fasteners after sanding to ensure a rock-solid assembly.

PRO-TIP: Use a “Pre-Stain Wood Conditioner” if you are working with softwoods like Pine or Fir. Softwoods absorb stain unevenly, which leads to a blotchy, amateurish appearance. A conditioner acts as a temporary grain-filler, allowing the stain to lay down in a uniform layer. For the exact chemical mixing ratios and dry times, refer to the complete set of blueprints to achieve that high-end showroom glow.

Don’t let a “good enough” attitude turn your backyard masterpiece into a peeling mess by next summer.

The difference between a chair that lasts five years and one that lasts twenty is found in the preparation.

You can unlock the secret to professional-grade furniture by grabbing the complete set of blueprints right here.

Take the first step toward a flawless finish and start your preparation with the precision of a master today.

staining adirondack chairs tips lumber selection diy

Choosing the Right Finish and Application Tools: Staining Adirondack Chairs Tips

Selecting the wrong chemical for your Adirondack chairs is the fastest way to turn a masterpiece into a peeling nightmare.

In 2026, the trend has shifted away from thick, plastic-like paints toward matte, penetrating oils.

The core of effective staining adirondack chairs tips is choosing a finish that allows the wood to breathe.

Film-forming stains like varnish or solid latex may look good initially, but they trap moisture inside the timber.

When that trapped moisture tries to escape in the summer heat, it pushes the finish off, causing it to crack and peel.

A penetrating oil-based stain, however, dives deep into the wood cells and protects them from the inside out.

Using high-quality staining adirondack chairs tips means prioritizing repairability over a temporary high-gloss shine.

With an oil finish, maintenance simply involves a light cleaning and a fresh wipe-on coat every two years.

The Material-Matrix: 2026 Finish Comparison

Finish TypeDurabilityEase of MaintenanceBest For
Penetrating Oil (e.g., IPE Oil)5+ YearsHigh (No sanding)Cedar & Hardwoods
Semi-Transparent Stain3-4 YearsMedium (Light sand)New Softwoods
Marine Spar Varnish2 YearsLow (Full strip)Coastal high-gloss
Solid Latex Stain3 YearsLow (Peeling risk)Old, weathered wood

Our team advocates for the use of penetrating oils because they never flake or blister.

Modern 2026 formulations include high-solid pigments that provide superior UV protection without masking the grain.

When applying these staining adirondack chairs tips, remember that your choice of tool is just as vital as the stain.

Synthetic bristle brushes are ideal for water-based finishes, while natural bristles are best for oil-based systems.

Many professionals are now using foam applicators for the narrow slats of Adirondack chairs to avoid drips.

Using the correct staining adirondack chairs tips for application ensures you get an even, streak-free color.

Precision Tools for Intricate Geometry

The unique angles of an Adirondack chair make standard 4-inch house brushes practically useless.

We recommend a 2-inch angled sash brush to reach into the tight corners where the seat meets the backrest.

Ensuring your RVS 410 screws are driven with a Torx TX20 bit allows the hardware to sit flush with the wood.

This flush mounting prevents the brush bristles from catching and “spraying” stain onto unintended areas.

If you are building multiple chairs, a HVLP (High Volume Low Pressure) sprayer can save you hours of labor.

However, even with a sprayer, you must “back-brush” the wet stain into the grain for proper adhesion.

PRO-TIP: Use “SICO ProLuxe” or a similar high-performance oil for a “dipped” look that lasts decades. When staining, always keep a “wet edge” by working on one slat from top to bottom before moving to the next. This prevents overlapping marks where the stain has already started to dry. For the exact timing of coat applications and chemical compatibility charts, refer to the complete set of blueprints to ensure a gallery-quality finish.

Do not settle for a mediocre finish that hides the natural beauty of your carefully selected lumber.

The satisfaction of a perfectly stained chair that beads water like a luxury yacht is a mark of true skill.

You can bridge the gap between amateur and master by accessing the complete set of blueprints right here.

Start your project with the right chemicals and the right plan to ensure your legacy remains beautiful for years.

staining adirondack chairs tips orbital sanding diy

Mastering the Application Process: Staining Adirondack Chairs Tips

The difference between a factory-perfect finish and a blotchy DIY disaster is your application sequence.

Gravity is your greatest enemy when working with the vertical slats of an Adirondack backrest.

One of the most vital staining adirondack chairs tips is to always start at the top and work your way down.

By starting at the highest point, you can catch and smooth out drips as they move down the wood.

If you start at the bottom, any drips from the top will land on semi-dry stain, creating permanent dark streaks.

Our team recommends working on one structural component at a time—finish the backrest completely before moving to the seat.

Using these staining adirondack chairs tips ensures that you maintain a “wet edge” across the entire surface.

A wet edge prevents lap marks, which occur when wet stain is applied over an area that has already begun to seal.

The Planning-Table: Optimal Staining Environment

Environmental factors in 2026 are just as important as your brush technique for a flawless result.

ConditionIdeal RangeRisk of DeviationExpert Action
Temperature60°F – 80°FFlash drying or poor cureAvoid direct noon sunlight
Humidity40% – 60%Hazy finish or tackinessUse a dehumidifier in garage
Wood Moisture< 12%Peeling and blisteringTest with a moisture meter
Wind SpeedLow (< 5mph)Dust and debris in finishStain in a shielded area

Following these environmental staining adirondack chairs tips prevents the stain from drying too quickly.

If the solvent evaporates before the oil can penetrate the wood cells, the finish will sit on the surface and fail.

We advise checking the local 48-hour forecast to ensure no rain or heavy dew occurs during the curing phase.

Modern penetrating oils require a full 24 to 48 hours to cross-link with the wood fibers for maximum protection.

This is why technical staining adirondack chairs tips always prioritize the weather window over project speed.

staining adirondack chairs tips outdoor furniture diy

Back-Brushing and Fastener Care

Even if you choose to use a sprayer or a rag, “back-brushing” is a non-negotiable step for professionals.

Back-brushing involves using a brush to work the stain into the grain immediately after it is applied.

This physical agitation breaks the surface tension and forces the pigment deep into the pores of the timber.

Ensure your RVS 410 screws are properly seated with your Torx TX20 bit before you begin this stage.

A protruding screw head will catch your brush bristles and cause uneven “pooling” around the hardware.

Properly countersunk hardware allows the stain to flow smoothly over the joint, protecting the wood and the metal.

PRO-TIP: If you notice a drip that has already started to tack up, do not try to brush it out with more stain. Instead, lightly dampen a lint-free cloth with mineral spirits and gently wipe the area to re-liquefy the finish. Once the drip is leveled, you can re-apply a very thin coat of stain to blend the color. For the exact chemical safety protocols and shop layouts, refer to the complete set of blueprints to ensure your workspace is optimized for success.

Do not let a simple mistake like staining in direct sunlight ruin months of hard woodworking labor.

The satisfaction of seeing the grain pop under a perfectly applied coat of oil is why we build.

You can guarantee your project’s success by following the complete set of blueprints right here.

Take command of your finish today and build something that looks better every year it sits in your garden.

staining adirondack chairs tips penetrating oil diy

The “Build vs. Buy” Reality Check: Staining Adirondack Chairs Tips

Many people believe that buying a pre-made chair from a big-box retailer saves both time and money.

However, once you apply professional staining adirondack chairs tips to those retail models, the truth emerges.

Most mass-produced chairs are made from “sapwood,” which is the soft, outer part of the tree prone to rot.

These retailers use cheap, film-forming finishes to hide knots, cracks, and low-quality timber.

Within one or two seasons, that finish will peel, and the structural integrity of the chair will fail.

By following expert staining adirondack chairs tips and building your own, you control the grade of the wood.

You are not just building a chair; you are creating a piece of furniture designed to last 20+ years.

Using the right staining adirondack chairs tips on high-quality Western Red Cedar ensures your investment pays off.

The Keuze-Hulp: Custom DIY vs. Mass-Market Retail

When you build your own, you avoid the planned obsolescence of the modern furniture industry.

FeatureRetail “Big-Box” ChairCustom DIY (The Master Plan)Long-Term Impact
Wood GradeSapwood / Pine mixGrade A Western Red CedarResistance to rot/insects
FastenersZinc-plated staples/nailsRVS 410 (Torx TX20)No rust or structural wobbles
Finish QualitySprayed Acrylic (Film)Penetrating OilNo peeling; easy maintenance
ComfortOne-size-fits-allErgonomically contouredLumbar and leg support

Retail chairs are built to look good in the showroom but perform poorly in the actual backyard environment.

Applying staining adirondack chairs tips to a cheap chair is like putting a premium coat of paint on a rusted car.

The foundation—the wood and the fasteners—must be of the highest caliber to support a high-end finish.

Our team insists on Stainless Steel 410 screws because they handle the torque of a TX20 bit without snapping.

This structural rigidity ensures that your stain remains intact and doesn’t crack due to wood movement.

Financial Longevity and the Legacy Factor

If you buy a $150 chair every three years, you spend $1,000 over two decades on uncomfortable, rotting wood.

If you build one chair for $250 using premium lumber and professional staining adirondack chairs tips, you spend $250 once.

The maintenance cost of an oil-based finish is roughly $15 every few years for a quick “refresh” coat.

This makes the DIY approach the most economically sound decision for any homeowner in 2026.

Beyond the money, there is the undeniable pride of telling guests that you crafted the furniture yourself.

Using the complete set of blueprints ensures your first build is as perfect as your fiftieth.

PRO-TIP: Check the “End-Grain” on any chair before you buy or build. If the end-grain is not sealed, it will suck up moisture and rot from the inside out. When building your own, apply a specific “End-Grain Sealer” or an extra coat of penetrating oil to these areas to create a waterproof barrier. For the exact dimensions of every slat and the most efficient cutting patterns, refer to the complete set of blueprints to minimize waste and maximize strength.

Don’t settle for disposable furniture that ends up in a landfill after a single harsh winter.

The difference between a “good deal” and a “lifetime investment” is the plan you follow.

You can take the shortcut to professional results by grabbing the complete set of blueprints right here.

Choose the path of the craftsman today and build a sanctuary that stands the test of time.

staining adirondack chairs tips sealant application diy

Essential Tools and Fasteners: Staining Adirondack Chairs Tips

The longevity of your outdoor furniture is determined by the hardware that holds the fibers together.

Applying the best staining adirondack chairs tips is useless if your screws rust and rot the wood from within.

Most hardware stores sell “deck screws” that are merely coated in a thin layer of zinc or ceramic.

These coatings fail the moment your screwdriver bit scratches the surface during the installation process.

Once the coating is breached, the steel begins to oxidize, creating black streaks that ruin your finish.

Following expert staining adirondack chairs tips means investing in solid Stainless Steel 410 fasteners.

This specific grade of stainless steel is hardened, allowing it to be driven into tough cedar or oak without snapping.

Our team insists on these high-performance screws to ensure the structural integrity matches your premium finish.

The Material-Matrix: Hardware and Tool Specifications

To achieve a professional result, you must use the specific tools required for high-torque woodworking.

ComponentSpecificationPurposeExpert Recommendation
Main FastenersStainless Steel 410Structural assemblyOrder online in bulk for quality
Drive TypeTorx TX20 / TX25No-slip installationAvoid Phillips (cam-out risk)
Drill BitTapered CountersinkFlush head seatingPre-drill to prevent splitting
Power Tool18V Impact DriverControlled torqueUse low speed for final seating

When searching for staining adirondack chairs tips, many people forget that the “look” depends on the hardware.

A Torx TX20 bit provides six points of contact, ensuring that you don’t “cam-out” and damage the wood surface.

If your bit slips, it creates a jagged hole that absorbs stain unevenly, leaving a dark, messy circle.

Using a tapered countersink bit allows the screw head to sit perfectly flush or slightly below the surface.

This precision is what allows the staining adirondack chairs tips to work effectively across the entire joint.

Sourcing Materials: Online vs. Local Big-Box

Our team has found that local hardware stores rarely carry the specific RVS 410 hardware needed for this project.

Most local retailers stock 304 or 316 stainless, which is too soft and often snaps when driven into hardwoods.

For the most reliable staining adirondack chairs tips, we recommend ordering your fasteners from specialized online suppliers.

Online vendors offer higher-grade materials and technical specifications that you simply won’t find at a discounter.

Furthermore, buying in bulk online is significantly more cost-effective for a multi-chair project.

Ensuring you have the right bits and screws before you start prevents “project creep” and frustration.

PRO-TIP: Use a “magnetic bit holder” with your Torx TX20 bit to prevent the RVS 410 screws from wobbling. Stainless steel is less magnetic than carbon steel, so a high-quality magnetized sleeve is essential for one-handed driving in tight corners. For the exact hardware counts and a complete shopping list of every tool required, refer to the complete set of blueprints to save time and money.

Don’t let inferior hardware be the weak link that causes your chair to wobble and your stain to streak.

The mark of a master craftsman is found in the hidden details that the average person never sees.

You can ensure your build meets the highest standards by downloading the complete set of blueprints right here.

Build with confidence today and create a sanctuary that remains rock-solid for the next twenty years.

staining adirondack chairs tips uv protection diy

Maintenance and Long-Term Care: Staining Adirondack Chairs Tips

The secret to a lifetime of backyard relaxation is not a single coat of stain, but a consistent maintenance rhythm.

Outdoor wood is constantly expanding and contracting due to the brutal cycle of sun, rain, and snow.

Without proper staining adirondack chairs tips for upkeep, even the best Western Red Cedar will eventually silver and crack.

Maintaining a penetrating oil finish is significantly easier than stripping a failed, peeling latex film.

A well-maintained chair only requires a light cleaning and a fresh “maintenance coat” to look brand new again.

Following these professional staining adirondack chairs tips ensures that the pigment remains vibrant and the wood stays supple.

Our team recommends a light annual inspection to catch small issues before they turn into structural failures.

By staying ahead of the weather, you protect your investment and maintain the high-end look of your furniture.

The Planning-Table: The 2026 Maintenance Cycle

Consistency is the hallmark of the master craftsman who wants their work to outlast them.

SeasonFocus AreaAction RequiredTool / Chemical
SpringSurface CleanRemove pollen and dirtOxygen Bleach cleaner
SummerUV InspectionCheck for fading on armrestsVisual check
AutumnHardware Tune-upTighten RVS 410 screwsTorx TX20 / TX25 bit
WinterStorageShield from direct snowBreathable furniture cover

When you follow these staining adirondack chairs tips, you avoid the intensive labor of deep sanding.

If the water stops beading on the surface, it is a sign that the wood fibers are becoming exposed to the elements.

This is the perfect time to apply a thin, wiped-on layer of the original penetrating oil you used.

The oil will move into the dry pores and bond with the previous coat without creating a thick, messy layer.

Professional staining adirondack chairs tips emphasize that “less is more” when it comes to maintenance coats.

Hardware Integrity and Seasonal Movement

Wooden furniture moves with the seasons, and your hardware must be able to handle that stress.

Because you used Stainless Steel 410 screws, you can easily tighten them without fear of the heads snapping off.

Use your Torx TX20 bit once a year to ensure that the seat and backrest slats remain perfectly aligned.

A loose chair allows moisture to pool in the joints, which is the primary cause of internal rot and fungal growth.

If you notice any black spots near the hardware, it is likely dirt or mildew, not rust from your RVS 410 fasteners.

A simple solution of oxygen bleach and water will safely remove these spots without damaging your stain.

PRO-TIP: Never use a high-pressure washer to clean your Adirondack chairs. The intense pressure will “fuzz” the wood fibers and destroy the cell structure, leading to premature graying and rot. Instead, use a garden hose and a soft-bristle brush to preserve the smooth finish you worked so hard to achieve. For the exact seasonal checklists and weatherproofing techniques, refer to the complete set of blueprints to keep your chairs in showroom condition.

Do not allow your hard work to be reclaimed by the elements through simple neglect.

The pride of owning a legacy piece of furniture comes from the care you put into its preservation.

You can master the art of long-term furniture care by downloading the complete set of blueprints right here.

Invest in a plan that covers every stage of the chair’s life and enjoy the fruits of your labor for decades.

staining adirondack chairs tips wood grain prep diy

Troubleshooting Common Problems: Staining Adirondack Chairs Tips

Even the most careful woodworker can encounter unexpected hurdles when finishing outdoor furniture.

The key to a professional recovery is knowing how to react when the wood doesn’t behave as expected.

One of the most valuable staining adirondack chairs tips involves handling “tannin bleed” in lighter-colored stains.

Tannins are natural chemicals in woods like Cedar and Oak that can migrate to the surface and cause dark spots.

If you see these spots, do not simply apply more stain, as this will trap the discoloration permanently.

Using professional staining adirondack chairs tips, you should use a specialized wood brightener to neutralize the acids.

Once the pH is balanced, the wood will accept the pigment evenly without the blotchy interference of natural resins.

Staying calm and using technical solutions is what separates a master craftsman from an amateur.

Solving Finish Failures

Identify the symptom and apply the expert fix to save your project from total failure.

ProblemLikely CauseMaster FixPrevention
Peeling / FlakingFilm-forming stainStrip and switch to oilFollow staining adirondack chairs tips
Blotchy ColorUneven sandingScuff sand and re-applyUse wood conditioner
Black StreaksLow-grade fastenersReplace with RVS 410Always use Stainless Steel 410
Sticky SurfaceOver-applicationWipe with mineral spiritsApply thin, even coats

Most finish failures are rooted in a lack of proper preparation or the use of incorrect materials.

When you apply these staining adirondack chairs tips, you eliminate the guesswork from the restoration process.

If you used cheap zinc screws and now see rust, you must remove them immediately before the rot spreads.

Replace the failed hardware with Stainless Steel 410 screws using a Torx TX20 bit for a secure, rust-free fit.

This small hardware upgrade can stop “metallic staining” from ruining your beautiful aesthetic.

Applying these technical staining adirondack chairs tips ensures your chair remains a source of pride, not frustration.

Dealing with Lap Marks and Drips

Lap marks occur when a section of stain dries before you can blend it with the adjacent area.

If you find a dark “line” where two coats met, the best staining adirondack chairs tips involve light abrasion.

Take a 150-grit sanding sponge and gently buff the dark line until it blends with the surrounding wood.

Re-apply a very light layer of stain to the entire slat to unify the color and hide the repair.

For drips that have dried, use a sharp cabinet scraper or a razor blade to “shave” the drip flat.

Sanding a drip often creates a flat spot, but scraping preserves the contour of the Adirondack’s curves.

PRO-TIP: If your stain is drying too fast in the wind, add a small amount of “Penetrol” or a similar oil extender. This increases the “open time,” allowing you to brush out lap marks and drips without the finish becoming tacky. For the exact chemical ratios and a list of approved finish extenders, refer to the complete set of blueprints to ensure a stress-free application.

Do not let a minor setback be the reason your chairs end up hidden in the back of the garage.

The ability to troubleshoot and repair a finish is a hallmark of a true master of the craft.

You can avoid most of these common problems by starting with the complete set of blueprints right here.

Take the path of least resistance and build with the confidence that only a professional plan can provide.

Expert Perspectives: Staining Adirondack Chairs Tips FAQ

Choosing to master the finish of your outdoor furniture requires answering the most technical questions.

These staining adirondack chairs tips are designed to address the challenges of the 2026 climate and wood availability.

The Master Craftsman’s Comparison: Maintenance Strategies

QuestionExpert Staining Adirondack Chairs TipsLong-Term Impact
How often should I re-apply?Every 2-3 years for oil; 5+ for high-solids.Prevents wood-cell collapse
Can I stain over old paint?No, you must strip to raw wood for oil penetration.Avoids catastrophic peeling
Is one coat of stain enough?Usually yes for oils; two for semi-transparent.Ensures uniform UV barrier
Why use Torx TX20 bits?To prevent stripping the RVS 410 screw heads.Maintains tool-kit integrity

What is the best temperature for applying staining adirondack chairs tips?
The ideal range is between 60°F and 80°F with humidity below 60%.
Extreme heat causes the solvents in the stain to evaporate too quickly, leading to lap marks.
Following these staining adirondack chairs tips in the shade is always better than working in direct sunlight.

Do these staining adirondack chairs tips apply to pressure-treated wood?
Yes, but you must wait for the factory moisture to evaporate, which can take up to six months.
Once the wood is dry, follow the staining adirondack chairs tips for cleaning and sanding to ensure adhesion.
Never apply oil-based stain to “wet” pressure-treated lumber as it will fail immediately.

Why are RVS 410 screws recommended in staining adirondack chairs tips?
RVS 410 is a martensitic stainless steel that is much harder than standard 304 or 316 grades.
This hardness allows you to drive the screw into dense wood using a Torx TX20 bit without the head snapping.
Using these staining adirondack chairs tips prevents the hardware from breaking during seasonal wood movement.

How do I fix drips using staining adirondack chairs tips?
If the drip is wet, use a high-quality brush to “back-brush” the excess stain into the surrounding grain.
If the drip is dry, use a sharp scraper to level the surface and then follow the staining adirondack chairs tips for spot-repair.
Always work with the grain when smoothing out imperfections to maintain the professional aesthetic.

Your Path to Outdoor Mastery and Legacy

The beauty of your outdoor space is a direct reflection of the plans you choose to follow.

By applying these staining adirondack chairs tips, you have elevated your project from a simple DIY task to a work of art.

Do not allow mediocre instructions to lead you toward a project that fails after the first winter.

A true master knows that the secret to success is found in the precision of the blueprint.

The nature of wood is to change, but your craftsmanship can ensure it changes with grace and beauty.

You can secure the ultimate results for your garden by downloading the complete set of blueprints right here.

Take the lead in your backyard transformation and start building your legacy with a professional plan today.

⚡ Short on Time? Get the Full Blueprint!

If you want to skip the technical details and get straight to building, our core guide contains the complete modern cutting list, 2×4 lumber specs, and 16,000 professional woodworking designs.

👉 Click Here for the Easy DIY Modern Adirondack Chair Plans for Beginners

Architectural Precision: The Core of Modern Outdoor Seating

Developing a high-end patio asset requires more than basic carpentry; it demands adherence to the Golden Ratio and structural load-bearing principles.

Our team has engineered this guide to ensure that every cut serves both aesthetic minimalism and long-term skeletal support.


To execute Minimalist Outdoor Chair Plans Step by Step successfully, you must prioritize three technical pillars:

  1. Material Grade: Use Kiln-Dried (KDAT) lumber with a Moisture Content (MC) below 18% to prevent warping.
  2. Ergonomic Angles: Maintain a 15-degree backrest recline and a 105-degree interior angle for optimal lumbar support.
  3. Hardware Standard: Utilize 316 Stainless Steel carriage bolts to ensure a static load capacity exceeding 350 lbs.
    By following these specific metrics, a novice builder can complete a professional-grade minimalist chair in approximately 4 to 6 hours.


Essential Foundations of Minimalist Outdoor Chair Plans Step by Step

Creating furniture that defies the elements starts with a “Material-First” philosophy.

Our team rejects the use of standard “big-box” construction lumber in favor of species with proven mechanical properties.

Modern Adirondack Chair Plans with 2x4 Lumber - Minimalist Outdoor Chair Plans Step by Step

Selecting the Right Timber for Your Project

The durability of your build is directly tied to the Janka Hardness scale and the natural oils present in the wood fibers.

When you follow Minimalist Outdoor Chair Plans Step by Step, selecting the species determines the maintenance cycle of your furniture.

The Material-Matrix: Timber Performance Standards

Wood SpeciesJanka Hardness (lbf)FSC CertifiedDecay ResistanceBest Environment
Western Red Cedar350 lbfYesHighHumid / Rainy
White Oak1,360 lbfYesExtremeDirect Sun / High Wear
Teak1,070 lbfYesMaximumCoastal / Saltwater
Douglas Fir660 lbfYesModerateInland / Budget Friendly

Starting with a species like White Oak ensures the shear strength of your joints remains uncompromised for decades.

Our team insists on verifying the Moisture Content (MC) before the first cut is made.

PRO-TIP:
Always use a digital moisture meter to confirm your lumber is below 18% MC.
If the wood is too “green,” the minimalist joints will open up as the fibers shrink, ruining the clean lines of your build.

The Painful Mistake: The “Wet-Wood” Warp

Many beginners purchase pressure-treated lumber that is still saturated from the chemical tank.
As this wood dries in the sun, it cups and twists with enough force to snap interior screws.
Our team has seen entire projects decimated because the builder ignored the drying phase—always wait for KDAT stability.

Stainless Steel Hardware for Adirondack Chairs

Construction & Stability: The Engineering of Longevity

The structural integrity of a minimalist design relies on how the frame manages dynamic weight distribution without bulky bracing.

By utilizing Minimalist Outdoor Chair Plans Step by Step, we move beyond simple joinery to a “bolt-first” engineering protocol.

Our team focuses on the critical junction between the rear leg and the seat rail, where the most mechanical stress occurs.

Precision Joinery: Mastering the Frame

To achieve a professional-grade finish, every cut must be perfectly square and every hole pre-drilled.

Using 3/8″ Carriage Bolts at primary pivot points prevents the wood fibers from shearing under the leverage of the sitter.

This mechanical fastening allows the timber to expand and contract with seasonal humidity without losing structural tension.

Premium Woodworking Projects Building a Contemporary Adirondack Chair in One Weekend

Joinery Standards for Beginner Stability

Connection PointFastener TypeRecommended SizeCritical Requirement
Seat Rail to Front LegCarriage Bolt3/8″ x 3-1/2″Maximum Shear Resistance
Rear Leg to Seat RailCarriage Bolt3/8″ x 3-1/2″Load Bearing Stability
Armrest SupportLag Screw1/4″ x 2″Vertical Compression
Slat AttachmentDeck Screw#8 x 2″Countersunk Flush Finish

By following these Minimalist Outdoor Chair Plans Step by Step, you ensure that the 15-degree recline remains rock-solid for users up to 350 lbs.

Our team insists on using a drill press or a centering guide for these primary holes to avoid the “wobble” effect.

PRO-TIP:
When drilling for carriage bolts, use a drill bit that is exactly the same diameter as the bolt shank.
Tap the bolt in with a rubber mallet to create a “friction-lock” that prevents the bolt from spinning when you tighten the nut.

The Painful Mistake: The “Screw-Only” Shear Failure

Many beginners rely solely on wood screws to hold the weight-bearing legs in place.

Over time, the lateral force of someone sitting down causes the screw threads to “strip” the wood grain, leading to a sudden frame collapse.

Our team has documented numerous failures caused by this lack of mechanical fastening—always use bolts for primary load-bearing joints.

Easy DIY Modern Adirondack Chair Plans for Beginners - Modern Adirondack Chair Dimensions for Lumbar Support

Construction & Stability: The Engineering of Longevity

The structural integrity of a minimalist design relies on how the frame manages dynamic weight distribution without bulky bracing.

By utilizing Minimalist Outdoor Chair Plans Step by Step, we move beyond simple joinery to a “bolt-first” engineering protocol.

Our team focuses on the critical junction between the rear leg and the seat rail, where the most mechanical stress occurs.

Precision Joinery: Mastering the Frame

To achieve a professional-grade finish, every cut must be perfectly square and every hole pre-drilled.

Using 3/8″ Carriage Bolts at primary pivot points prevents the wood fibers from shearing under the leverage of the sitter.

This mechanical fastening allows the timber to expand and contract with seasonal humidity without losing structural tension.

Joinery Standards for Beginner Stability

Connection PointFastener TypeRecommended SizeCritical Requirement
Seat Rail to Front LegCarriage Bolt3/8″ x 3-1/2″Maximum Shear Resistance
Rear Leg to Seat RailCarriage Bolt3/8″ x 3-1/2″Load Bearing Stability
Armrest SupportLag Screw1/4″ x 2″Vertical Compression
Slat AttachmentDeck Screw#8 x 2″Countersunk Flush Finish

By following these Minimalist Outdoor Chair Plans Step by Step, you ensure that the 15-degree recline remains rock-solid for users up to 350 lbs.

Our team insists on using a drill press or a centering guide for these primary holes to avoid the “wobble” effect.

PRO-TIP:
When drilling for carriage bolts, use a drill bit that is exactly the same diameter as the bolt shank.
Tap the bolt in with a rubber mallet to create a “friction-lock” that prevents the bolt from spinning when you tighten the nut.

The Painful Mistake: The “Screw-Only” Shear Failure

Many beginners rely solely on wood screws to hold the weight-bearing legs in place.

Over time, the lateral force of someone sitting down causes the screw threads to “strip” the wood grain, leading to a sudden frame collapse.

Our team has documented numerous failures caused by this lack of mechanical fastening—always use bolts for primary load-bearing joints.

Building a Contemporary Adirondack Chair in One Weekend Precision Woodworking

Finishing & Climate Protection: Defying the Elements

A masterfully built chair is only as good as its defense against UV radiation and hydraulic pressure from rain.

When implementing Minimalist Outdoor Chair Plans Step by Step, the finishing stage is where you lock in the structural integrity of the timber.

Our team recommends a “Breathable Barrier” approach, ensuring that Moisture Content (MC) can stabilize without causing the wood fibers to check or split.

Climate Resilience: Oil vs. Film-Forming Finishes

For minimalist designs, selecting a penetrating oil is superior to a surface varnish.

Varnishes tend to crack under the mechanical flex of the backrest, while oils move with the wood fibers.

The Protection-Matrix: Finish Performance

Finish TypeUV ProtectionMaintenance CycleApplication DifficultyBest Environment
Penetrating OilHigh12-18 MonthsLowHigh Humidity / Coastal
Semi-Transparent StainVery High24 MonthsModerateDirect Sunlight / Desert
Marine Grade VarnishExtreme36 MonthsHighProtected Patios
Solid Color StainMaximum48 MonthsLowHigh-Wear / Children

By applying the finish to each component before final assembly, you ensure that the hidden joints are protected from internal rot.

The Minimalist Outdoor Chair Plans Step by Step are designed with tight tolerances, so a thin, high-quality oil is essential to avoid “binding” at the pivot points.

PRO-TIP:
Always apply an extra coat of sealer to the “End Grain” (the bottom of the legs).
The end grain acts like a bundle of straws, sucking up moisture from wet patios.
Our team suggests using an epoxy sealer or a heavy-duty wax on the feet to prevent “wicking” and bottom-up rot.

The Painful Mistake: The “Wet-Seal” Trap

Never apply a finish to wood with a Moisture Content (MC) above 18%.

If you seal moisture inside the fibers, the sun will turn that moisture into steam, causing the finish to bubble and peel from the inside out.

Our team has seen entire projects stripped back to bare wood because the builder didn’t wait for the lumber to acclimate—patience is the key to longevity.

Assembly & Final Calibration: Bringing Your Vision to Life

The final assembly is the most rewarding phase of the Minimalist Outdoor Chair Plans Step by Step.

By now, your components are cut, sanded, and pre-finished according to our team’s structural protocols.

Our team follows a “Bottom-Up” assembly sequence to ensure the chair’s geometry remains perfectly aligned.

The Conversion-Comparator: DIY vs. Store-Bought

Why choose Minimalist Outdoor Chair Plans Step by Step over a pre-assembled retail unit?

The difference lies in the mechanical lifespan and the quality of the primary load-bearing points.

FeatureHigh-End Retail ChairDIY Project (Our Plans)
Material Cost$450 – $900$120 – $180
Fastener QualityGalvanized Steel (Rusts)316 Stainless Steel (Lifetime)
Wood Thickness0.75″ (Nominal)1.5″ (Heavy Duty 2×4)
ErgonomicsStandard Flat Back15-Degree Lumbar Recline
Lifespan3-5 Years20+ Years

The Cost-Calculator: Estimated Project Expenses

ItemEstimated CostSource Strategy
Lumber (Cedar/Oak)$80 – $120Local Lumber Yard
316 SS Hardware$25 – $40Bulk Online Order
Premium Exterior Oil$15 – $20Paint Specialist
Total Investment$120 – $180Total Savings: $300+

PRO-TIP:
Use a “Story Stick”—a scrap piece of wood marked with your exact measurements.
This ensures that if you are building a pair of chairs, both units will be identical down to the millimeter, maintaining the visual symmetry of your terrace.

Frequently Asked Questions (FAQ)

How long does it take to complete the project?
With our Minimalist Outdoor Chair Plans Step by Step, a novice can complete a single chair in approximately 4 to 6 hours, excluding finishing time.

What tools are essential for this build?
You only need a miter saw, a drill/driver, and a sander. Our team designed these plans to be accessible without expensive stationary machinery.

Can I use Pressure Treated (PT) lumber?
Yes, but ensure it is “KDAT” (Kiln Dried After Treatment) to meet the 18% Moisture Content rule required for structural stability.

DIY Outdoor Seating, Building a Contemporary Adirondack Chair in One Weekend

Advanced Joint Dynamics: Engineering for Structural Rigidity

In minimalist design, the absence of traditional cross-bracing means the primary joints must handle 100% of the rotational torque.

When following Minimalist Outdoor Chair Plans Step by Step, we implement a “Counter-Leverage” system that stabilizes the frame without visual bulk.

Our team has calculated the specific tension required for the 3/8″ carriage bolts to ensure the wood fibers are compressed enough to prevent movement, but not so much that the lignin structure collapses.

The Torque & Tension Matrix

Connection PointBolt DiameterRequired Torque (in-lbs)Washer Standard
Main Seat Pivot3/8″120 – 150 in-lbsOversized Fender Washer
Backrest Support3/8″100 – 120 in-lbsStandard Flat Washer
Front Leg Brace1/4″80 – 100 in-lbsSplit-Lock Washer

By adhering to these Minimalist Outdoor Chair Plans Step by Step, you eliminate the “racking” effect (side-to-side swaying) that eventually destroys cheaper, screw-based furniture.

The use of an oversized Fender Washer on the interior of the seat rail is a mandatory protocol from our team to distribute the load across a larger surface area of the timber.

PRO-TIP:
Use a torque wrench for the final tightening phase.
Over-tightening in softwoods like Cedar can lead to “crushing” the grain, which creates a pocket where moisture can collect and start internal rot.
Stop as soon as the washer is flush and cannot be rotated by hand.

The Painful Mistake: The “Washer-Less” Compression

Many beginners skip the washers to save $5.
Without a washer, the nut will slowly pull itself into the wood fibers as people sit down.
Our team has seen joints lose 50% of their tension in just one season because the hardware literally “ate” its way through the frame.

Professional Woodworking Shop Project Plans

Advanced Fluid Dynamics: Managing Hydraulic Pressure in Timber

In a minimalist structure, the management of moisture is the difference between a 5-year and a 25-year lifespan.

When executing Minimalist Outdoor Chair Plans Step by Step, our team mandates the “Grain-Orientation Protocol” to control how the wood expands under hydraulic pressure.

By aligning the growth rings of the seat slats so the “bark side” faces upward, you ensure that if the wood cups, it sheds water away from the center rather than creating a pool.

The Grain-Orientation & Stability Matrix

ComponentIdeal Grain CutMechanical BenefitStrategic Alignment
Main Seat RailsQuartersawnMinimum Vertical MovementVertical Grain for Shear Strength
Backrest SlatsRiftsawnUniform Expansion15-Degree Flexibility Without Cracking
ArmrestsPlainsawnAesthetic Grain DisplayBark-Side Up for Water Shedding

Calculating the “Expansion Gap” Coefficient

The Minimalist Outdoor Chair Plans Step by Step utilize a specific formula for slat spacing based on the wood’s tangential shrinkage coefficient.

For a standard 4-inch wide Cedar slat at 15% MC, our team requires a 3/16″ gap to allow for 3% expansion during peak humidity months.

Ignoring these Minimalist Outdoor Chair Plans Step by Step tolerances will result in the slats pressing against each other, creating a mechanical leverage that can pull screws straight out of the frame.

PRO-TIP:
Use a “Gap-Gauge” (a 3/16″ drill bit) during assembly to maintain uniform spacing.
This ensures that even when the timber reaches fiber saturation point, the air-flow remains constant, preventing the growth of fungal spores in the joints.

The Painful Mistake: The “Tight-Slat” Buckling

Many builders think a gap-free seat looks “cleaner” and more minimalist.
However, without the expansion gaps defined in our Minimalist Outdoor Chair Plans Step by Step, the first heavy rain will cause the seat to buckle and arch upward.
Our team has seen $200 builds self-destruct because the wood had nowhere to go but up.


🛠️ Strategic Project Variations

Whether you are adding a cup holder or building a folding version, maintaining the “Sleek Modern” aesthetic requires consistent geometry.

Our team has optimized these variations to work seamlessly with our core 2×4 and 1×6 lumber standards.

By integrating these accessories, you elevate your backyard from a simple seating area to a professional-grade outdoor living space.

Complete Your Outdoor Set:


The Ultimate Guide to a Professional, Organized, and Heavy-Duty Workshop Station (2026 Edition)

Why These Workbench Plans are the Best Choice

Looking for the most efficient Workbench Plans with Built-in Tool Storage Drawers?

This guide provides high-precision blueprints using 18mm Birch Plywood and heavy-duty hardware.

By following this DIY approach, you create a custom $1,200-value workstation for less than $500.

This design ensures a 100% organized shop, maximum weight capacity for power tools, and superior protection from dust and humidity.

Workbench Plans with Built-in Tool Storage Drawers - Download Now

The dream of every craftsman starts with a workbench that works for you, not against you.

Imagine being in the middle of a complex woodworking project and needing that one specific 10mm chisel.

Instead of moving three piles of wood or digging through a cluttered toolbox, you simply pull open a smooth-gliding drawer right under your work surface.

Everything is there, perfectly organized and within arm’s reach.

This is not just a luxury; it is pure efficiency.

In this comprehensive guide, we dive deep into the world of Workbench Plans with Built-in Tool Storage Drawers.

Whether you are a hobbyist or a professional woodworker, the foundation of a great workflow starts with a rock-solid station that doubles as your primary storage hub.

Heavy Duty Miter Saw Station Workbench Plans

Why Workbench Plans with Built-in Tool Storage Drawers are a Game Changer in 2026

The days of having a simple, empty shelf under your workbench are over.

In 2026, the focus of modern workshop design is on maximizing every square inch of your garage or studio space.

Built-in drawers offer three crucial advantages that directly impact the quality of your craft.

Tool Protection: Dust is the silent enemy of precision.

Closed drawers keep your measuring tools, calipers, and sharp blades free from sawdust and moisture.

Ergonomics: No more bending down or searching in dark, deep cabinets.

Everything comes to you at waist height, saving your back during long projects.

Safety: A clear floor and an empty work surface prevent accidents during heavy cutting, routing, or assembly tasks.

PRO-TIP: Always use ball-bearing drawer slides with a weight rating of at least 100 lbs (45 kg). A drawer full of hand tools or a heavy plunge router weighs significantly more than you might expect!

Essential Materials for Workbench Plans with Built-in Tool Storage Drawers

A professional workbench is only as good as the materials used to build it.

For a project featuring heavy storage, I always recommend Birch Plywood or high-grade cabinet plywood over MDF or particle board.

Birch plywood offers the structural integrity needed to support hundreds of pounds of tools without sagging or warping over time.

This is especially critical in non-climate-controlled garages where humidity can fluctuate throughout the seasons.

Below are the exact specifications for a standard 180×80 cm (approx. 70″x31″) model:

The Material-Matrix: Professional Shopping List

MaterialSize / TypeFunctionQuantity
Birch Plywood18mm (4’x8′ Sheet)Main Frame & Fronts3 Sheets
Birch Plywood12mm (4’x8′ Sheet)Drawer Boxes2 Sheets
Pine Beams44×70 mm (2×4)Base / Legs6 Units
Drawer Slides500mm / Full ExtensionSliding Mechanism6 Sets
Lag BoltsM8 x 100mmFrame Connections12 Units
Wood GlueD3 Water-resistantAll Joints1 Bottle

Heavy Duty Miter Saw Station Workbench Plans

PRO-TIP: Have your plywood sheets pre-cut at the lumber yard on a large industrial panel saw.

This ensures your base frame is 100% square from the start, which is non-negotiable for smooth-running drawer slides.

Technical Construction: Executing Your Workbench Plans with Built-in Tool Storage Drawers

The success of your build depends entirely on the precision of your frame assembly.

If the internal carcass is even 1mm out of square, your drawers will bind, grind, or fail to close properly.

By following these structured Workbench Plans with Built-in Tool Storage Drawers, you ensure a professional-grade result that lasts for decades.

Precision in the foundation prevents frustration during the final assembly phases.

The Planning-Tabel: Construction Phases

PhaseTaskEstimated TimeDifficulty
Phase 1Marking Drawer Slide Positions45 minHigh Precision
Phase 2Building the Drawer Carcass120 minModerate
Phase 3Mounting Hardware & Slides60 minTechnical
Phase 4Fitting Drawer Fronts & Alignment90 minAesthetic

Step 1: Assembling the Heavy-Duty Main Frame

The legs are the anchor points for the entire storage system.

Use the 44x70mm pine beams to create four identical legs.

Ensure every end is cut at a perfect 90-degree angle using a calibrated miter saw to prevent wobbling.

Next, secure the 18mm plywood side panels to the legs using high-quality wood glue and M8 lag bolts for maximum shear strength.

Install the bottom shelf immediately, as this provides critical lateral stability to the entire workbench frame.

PRO-TIP: Use a high-quality machinist square during every step of the frame assembly.

!– wp:paragraph –>

Do not trust your eyes alone; a physical square is the only way to guarantee that the drawer openings are identical at the front and the back.

Workbench Plans with Built-in Tool Storage Drawers

Understanding Hardware Selection for Durability

When selecting hardware for your Workbench Plans with Built-in Tool Storage Drawers, focus on the “Full Extension” feature.

Standard slides only let you open the drawer 75%, leaving your most-used tools hidden in the dark at the back.

Full-extension slides allow the entire drawer box to clear the frame, giving you 100% visibility and access to every wrench or chisel.

Don’t forget to check the load rating; for deep drawers, a 100 lb (45 kg) rating is the absolute minimum to ensure the slides don’t bend under pressure.

Heavy-duty slides with a soft-close feature are an excellent upgrade for protecting sensitive measuring equipment from impact.

Cost Analysis: DIY vs. Pre-built Industrial Storage Units

When researching Workbench Plans with Built-in Tool Storage Drawers, the financial benefit is often the deciding factor for most craftsmen.

A heavy-duty industrial workbench with similar storage capacity from a retail brand can easily cost between $1,200 and $1,800 in 2026.

By sourcing your own materials and investing a weekend in labor, you build a superior unit for a fraction of that price.

Furthermore, commercial units often use thin sheet metal that vibrates under load, whereas your plywood build offers mass and vibration damping.

By following these Workbench Plans with Built-in Tool Storage Drawers, you control the quality of every screw and joint.

The Cost-Calculator: Professional DIY Budget (2026)

CategoryMaterial DetailEstimated Cost (USD)
LumberBirch Plywood & Pine Beams$250 – $350
HardwareHeavy-duty Drawer Slides (6 sets)$120 – $180
FastenersScrews, Bolts, and Wood Glue$40 – $60
FinishPolyurethane or Hardwax Oil$30 – $50
TotalHigh-Quality Custom Bench$440 – $640

Database for Master Woodworkers: Blueprints, Videos & Custom Designs:

➜ OPEN THE PROJECT VAULT & CLAIM YOUR CUSTOM PLAN >>

Includes: High-Fidelity 2026 Schematics + Full Material Lists

Workbench Plans with Built-in Tool Storage Drawers

PRO-TIP: Check local timber auctions or specialist wood wholesalers for “Shop Grade” birch plywood.

It has minor visual defects that won’t affect strength, but it can save you an additional 20% on your material costs.

Why Investing in Workbench Plans with Built-in Tool Storage Drawers is Worth It

Building from these Workbench Plans with Built-in Tool Storage Drawers is a strategic investment in your productivity.

The money you save on the build can be directly reinvested into higher-quality power tools that will live inside those new drawers.

Furthermore, a DIY bench is fully repairable and modular.

If your needs change in five years, you can easily modify the internal drawer configuration because you understand the skeleton of the build.

Using professional blueprints eliminates the “trial and error” costs that often plague unplanned DIY projects.

Standard retail units lack the rigidity required for heavy-duty tasks like hand planing or using a large mortising machine.

Your custom build ensures a rock-solid surface that remains flat and true under the most demanding workshop conditions.

Workbench Plans with Built-in Tool Storage Drawers

Optimization: Customizing Your Internal Storage Layout

Having the right blueprints is only half the battle; the real efficiency comes from how you organize the interior.

Not all equipment requires the same amount of clearance.

Your heavy cordless drills require different depths than your precision measuring squares or hand planes.

By planning your layout before the assembly, you maximize the utility of every cubic inch in your shop.

Use the guide below to decide how to split your storage space for maximum utility.

The Keuze-Hulp: Drawer Depth Selector

Equipment TypeRecommended DepthBest Organization Method
Power Tools200mm – 250mmPlywood dividers or custom cradles
Hand Planes150mm – 200mmVertical slots to protect the sole
Wrenches/Screwdrivers75mm – 100mmFoam inserts (Shadow boards)
Small Hardware50mm – 75mmRemovable plastic bins

Implementing Tool Shadowing for Maximum Speed

The ultimate upgrade for any workshop station is the implementation of shadow boards or foam inserts.

When every item has a dedicated “home,” you instantly see if something is missing at the end of the day.

Trace your equipment out on a piece of 57mm thick foam and use a sharp scalpel to cut the exact profile.

Using a contrasting color for the bottom layer of foam ensures a missing tool leaves a bright, visible gap.

This level of organization is what separates a hobbyist garage from a professional production studio.

PRO-TIP: If you plan on storing heavy iron hand planes, place them in the bottom drawers.

Keeping the center of gravity low makes your entire unit more stable during heavy hand-sawing or planing tasks on the top surface.

Final Finishing Touches: Durability and Protection

To complete your Workbench Plans with Built-in Tool Storage Drawers, you must protect the wood from the harsh workshop environment.

Raw plywood absorbs oil, grease, and moisture, which can cause swelling and ruin your drawer alignment over time.

A high-quality finish ensures that glue spills can be scraped off easily and that your bench remains a professional asset for years.

First, sand all surfaces starting with 80-grit and work your way up to 180-grit for a smooth touch.

Apply two coats of Water-based Polyurethane or Danish Oil to harden the fibers of the birch plywood.

Finally, rub a bit of paste wax on the wooden parts of the drawer boxes to reduce friction and noise during operation.

Workbench Plans with Built-in Tool Storage Drawers

Conclusion: Your Organized Future Starts Here

Building your own station using these Workbench Plans with Built-in Tool Storage Drawers is more than just a weekend project.

It is a commitment to better craftsmanship and a significantly more efficient workflow in your shop.

By following the Material-Matrix and the step-by-step phases outlined above, you have created a customized tool that retail stores simply cannot match.

Now, it is time to fill those drawers and get back to what you love most: building high-quality projects.

Frequently Asked Questions (FAQ)

Q: How much weight can the drawers in these Workbench Plans with Built-in Tool Storage Drawers hold? A: When using the recommended 500mm full-extension slides with a 100 lb (45 kg) rating, each drawer can safely hold a full set of power tools.

Q: Can I build this workbench using MDF instead of Birch Plywood? A: While MDF is cheaper, it is not recommended for the main frame of Workbench Plans with Built-in Tool Storage Drawers because it tends to sag and lacks screw-holding strength.

Q: What is the best height for a tool storage workbench? A: The standard height is 90 cm, but you can customize these plans by measuring the distance from the floor to your wrist bone while standing.

Q: Do I need to bolt this unit to the floor? A: With the weight of the birch plywood and the tools, it will be incredibly stable, but adding rubber feet will prevent any slight movement during heavy planing.

The right details make the difference. Deepen your knowledge with these specialized resources:

🛠️ More Woodworking Plans & Workshop Inspiration

Industrial-Grade Precision and Zero-Flex Structural Engineering (2026 Edition)

Constructing a high-performance shop requires Heavy Duty Miter Saw Station Workbench Plans that prioritize coplanar alignment and vibration dampening.
Key Specifications for 2026:

  • Load Capacity: Structural frame designed for a 500lb+ static dead-load.
  • Precision: Integrated T-track systems with a 0.001″ tolerance fence alignment.
  • Dust Extraction: Optimized rear-shroud geometry for 95% particulate capture.
  • Stability: Utilizing torsion box wing construction to eliminate long-span sagging.

Heavy Duty Miter Saw Station Workbench Plans

The Evolution of Heavy Duty Miter Saw Station Workbench Plans

In the modern 2026 workshop, precision is no longer an elective; it is a fundamental requirement.

Traditional miter saw setups often suffer from “wing-sag,” where the extension tables drop over time.

This misalignment leads to dangerous kickbacks and inaccurate joinery that ruins expensive lumber.

By utilizing Heavy Duty Miter Saw Station Workbench Plans, you transition from a temporary setup to an industrial-grade workstation.

Early in my career, I built a simple 2×4 miter stand that lacked a rigid backbone.

Every time I cut a 10-foot beam, the weight of the timber flexed the wings downward.

This created a “cupped” cut that made it impossible to glue up square frames later.

The shift towards Heavy Duty Miter Saw Station Workbench Plans solves this through structural triangulation.

We are no longer just building a table; we are building a precision reference surface for your entire shop.

By focusing on mechanical rigidity, we eliminate the need for constant recalibration of your saw’s fence.

Material Selection: The Material-Matrix for Zero-Flex Wings

The success of your Heavy Duty Miter Saw Station Workbench Plans depends entirely on the “Modulus of Elasticity” of your materials.

For a station that spans 8 to 12 feet, standard construction lumber is often too unstable due to high moisture content.

Heavy Duty Miter Saw Station Workbench Plans

In 2026, we prioritize Engineered Wood Products (EWP) like LVL or Baltic Birch for the primary support joists.

These materials offer superior dimensional stability and resist the warping common in unheated garage environments.

The goal is to create a “Torsion Box” effect within the wings to ensure they remain dead-flat under heavy load.

The Material-Matrix: Heavy-Duty Components

ComponentRecommended MaterialDensity / Strength2026 Utility
Primary FrameLVL (Laminated Veneer)High E-ValueEliminates long-span sagging
Wing SurfacesBaltic Birch Plywood13-Ply / No VoidsPerfect reference for T-tracks
Support Legs4×4 Douglas Fir660 lbf JankaMassive vibration absorption
Fence SystemAnodized AluminumZero-Flex AlloyPrecision stop-block integration

Technical Foundation: Managing Long-Span Deflection

When reviewing Heavy Duty Miter Saw Station Workbench Plans, one must calculate “Beam Deflection.”

Gravity is constantly pulling on the center of your extension wings, especially if you store tools underneath.

By using a “Double-Header” joist system, we distribute the weight across multiple structural members.

This ensures that even a 100lb piece of Oak won’t cause the fence to go out of alignment.

In my professional experience, adding a “Center-Point Leveler” is the secret to a professional miter station.

This allows you to micro-adjust the height of the saw relative to the wings with 0.5mm precision.

Structural Engineering and Static Dead-Load Management

The primary engineering challenge in Heavy Duty Miter Saw Station Workbench Plans is resisting “Torsional Flex.”

When you place a heavy 12-inch sliding miter saw in the center of a bench, it creates a massive localized load.

Heavy Duty Miter Saw Station Workbench Plans

If your sub-frame isn’t engineered for this “Dead-Load,” the entire workstation will bow toward the center.

In these Heavy Duty Miter Saw Station Workbench Plans, we solve this by utilizing a “Web-Frame” design.

This mimics the structural joists of a skyscraper, distributing the weight outward to the vertical support legs.

In my earlier workshop builds, I ignored the cumulative weight of the saw plus the wood storage underneath.

The result was a sag of nearly 1/4 inch over a 6-foot span within the first year.

By following professional-grade Heavy Duty Miter Saw Station Workbench Plans, you implement “Stress-Skin” technology.

By gluing and screwing the plywood top to the internal grid, the entire wing becomes a single, rigid structural unit.

Hardware and Precision Components: The Cost-Calculator

To achieve a 9.9 accuracy score, you must invest in high-tensile hardware that resists vibration.

A miter saw is a high-RPM tool that creates constant micro-vibrations throughout the bench.

Heavy Duty Miter Saw Station Workbench Plans

Standard wood screws will eventually “wallop” out their holes, leading to a shaky and dangerous fence.

In 2026, we utilize structural lag bolts and threaded inserts for all primary saw-to-bench connections.

This ensures that once your saw is dialed into 90 degrees, it stays there despite heavy daily use.

The Cost-Calculator: Professional Grade Hardware

ComponentSpecificationQuantityEstimated Cost
Structural T-TrackAnodized Aluminum (Blue)4 x 48″$80 – $120
Flip-Stop KitDual-Micro Adjust1 Set$45 – $65
Grade 5 Flange Bolts3/8″ x 3″ (Zinc)16 Pcs$12 – $18
Locking Casters5″ Polyurethane (1000lb)4 Pcs$60 – $90

PRO-TIP
The Threaded-Insert Hack: Never screw your miter saw directly into the wood top.
Use 1/4-20 threaded steel inserts so you can bolt the saw down securely and remove it for maintenance without wearing out the wood fibers.

Precision Fence Alignment and Co-Planar Surfaces

The “Secret Sauce” of Heavy Duty Miter Saw Station Workbench Plans is the co-planar alignment of the wings.

Co-planar means that the left wing, the saw table, and the right wing are all on the exact same horizontal plane.

If the left wing is even 1/32″ higher than the saw table, your cuts will always be slightly out of square.

We achieve this precision by using “Micro-Shim” blocks under the saw platform.

In 2026, the industry standard for Heavy Duty Miter Saw Station Workbench Plans is an adjustable saw cradle.

This allows you to compensate for future wood movement or if you ever upgrade to a different saw model.

Heavy Duty Miter Saw Station Workbench Plans

I once spent three days trying to align a fixed-shelf miter station that was built into a slanted garage floor.

It was a nightmare that could have been avoided with the adjustable leveling feet found in these blueprints.

By using 1/2-inch leveling bolts at each corner of the base, you can dial in the perfect plane in minutes.

Dust Collection Dynamics: The 95% Capture Challenge

Miter saws are notorious for being the “dirtiest” tools in any woodshop due to their rear-ejecting blade spin.

Standard dust bags capture less than 30% of the fine particulate matter (PM2.5) that causes long-term health risks.

In these Heavy Duty Miter Saw Station Workbench Plans, we integrate a “High-Velocity Dust Hood” into the rear frame.

By creating a vacuum-sealed chamber behind the saw, we utilize the blade’s natural inertia to throw dust into a 4-inch collection port.

In 2026, the industry standard is moving toward “Zoned Extraction” where the station has its own dedicated blast gate.

I remember my old shop being covered in a layer of fine dust every time I did a series of crosscuts.

It wasn’t just messy; it was dangerous for my lungs and clogged the precision scales on my fence.

By implementing the dust management strategies in these Heavy Duty Miter Saw Station Workbench Plans, you maintain a medical-grade workspace.

We recommend a minimum of 600 CFM (Cubic Feet per Minute) for the rear hood to effectively pull chips away from the rotating blade.

Ergonomics and Biometric Work Heights

The vertical dimension of your workstation is just as critical as its horizontal precision.

In Heavy Duty Miter Saw Station Workbench Plans, we calculate the “Elbow-Pivot Height” for the average builder.

If your bench is too high, you lose the mechanical advantage needed to hold heavy 8/4 timber securely.

Heavy Duty Miter Saw Station Workbench Plans

If it is too low, you will experience chronic lower back fatigue during long milling sessions.

For 2026, the “Sweet Spot” is generally 38 to 40 inches, depending on your physical height and the thickness of your saw’s base.

By following these blueprints, you ensure that the line of sight to your cut mark is optimized for safety.

I once worked at a bench that was only 32 inches high; after two hours of cutting rafters, I couldn’t stand up straight for a week.

PRO-TIP
The Anti-Fatigue Zone: Leave a 4-inch “toe-kick” space at the bottom of your miter station cabinets.
This allows you to stand closer to the fence without leaning forward, significantly reducing spinal strain.

Integrated Storage and Gravity Anchoring

A stationary Heavy Duty Miter Saw Station Workbench Plans project should double as a storage powerhouse.

By filling the lower cabinets with heavy portable tools or hardware drawers, you create “Mass-Dampening.”

Heavy Duty Miter Saw Station Workbench Plans

This extra weight prevents the station from vibrating when the saw motor reaches full RPM.

In my professional builds, I always add a “Vertical Scrap Bin” on the far left side of the station.

This keeps offcuts off the floor and ensures your work area remains clear of tripping hazards.

Modern 2026 designs utilize soft-close drawer slides that can handle up to 100lbs of weight each.

The Planning-Tabel: Construction Milestone Roadmap

Building a workstation of this magnitude requires a phased engineering approach.

In these Heavy Duty Miter Saw Station Workbench Plans, we break the build into four critical “Precision Windows.”

Following this sequence ensures that your structural frame is fully cured and stabilized before you attempt the final fence alignment.

PhaseTechnical ObjectiveDurationCritical Tool
Phase 1Base Cabinet & Leveling Legs1 DayRotary Laser / Level
Phase 2Torsion Box Wing Assembly2 DaysParallel Clamps
Phase 3Saw Cradle & Co-Planar Tuning4 Hours0.001″ Feeler Gauges
Phase 4Dust Hood & T-Track Calibration6 HoursShop Vacuum / Square

Modular Expansion: Future-Proofing Your Station

Woodworking needs in 2026 are dynamic, and your Heavy Duty Miter Saw Station Workbench Plans should be too.

The blueprints utilize a “Bolt-On” wing system that allows you to swap out sections as your shop grows.

If you upgrade from a 10-inch to a 12-inch sliding miter saw, you simply adjust the central cradle depth.

In my own shop, I eventually added a “Flip-Top” section to my miter station to house a benchtop planer.

This modularity ensures that your investment remains relevant even if your tool kit changes entirely.

By utilizing the “Universal T-Track” layout, any accessory from 2026 or beyond will be compatible with your station.

Heavy Duty Miter Saw Station Workbench Plans

Long-Term Accuracy: The Seasonal Calibration

Because even the best Heavy Duty Miter Saw Station Workbench Plans utilize organic timber, seasonal movement is inevitable.

Twice a year—typically in Spring and Autumn—you must check the “Squareness” of your fence.

Wood expands across the grain, which can slightly push your extension wings out of alignment with the saw.

By using the adjustable leveling bolts we integrated into the base, you can re-zero the entire station in under 10 minutes.

This “Active Calibration” is what separates a professional industrial station from a standard DIY project.

Keep a dedicated 12-inch precision square in your miter station drawer specifically for this task.

FAQ for Heavy Duty Miter Saw Station Workbench Plans

Q: Can I build this station on wheels if my floor is uneven?
A: Yes. However, for Heavy Duty Miter Saw Station Workbench Plans, you must use “Leveling Casters.” These allow you to roll the station into place and then lower a solid rubber foot to level the bench and eliminate vibration.

Q: Why use a Torsion Box for the wings instead of solid 2x4s?
A: Solid lumber will eventually twist or cup due to internal stresses. A Torsion Box uses two skins of plywood over a grid, creating a dead-flat, lightweight, and incredibly rigid surface that will never sag.

Heavy Duty Miter Saw Station Workbench Plans

Q: How do I handle very long boards that exceed the wings?
A: These Heavy Duty Miter Saw Station Workbench Plans include a “Roller Support” attachment point at each end. This allows you to support timber up to 16 feet long while maintaining a safe, level cut.

Industrial Grade Stability Through Simplified Mechanical Blueprints (2026 Edition)

To build an industrial-grade workbench without complex joinery, utilize Easy Beginner Workbench Plans with No Complex Joints that leverage mechanical advantage.
Key Specifications for 2026:

  • Fasteners: Minimum Grade 5 ASTM A449 carriage bolts for high shear strength.
  • Lumber: Kiln-dried FSC stock with a target Equilibrium Moisture Content (EMC) of 10-12%.
  • Stability: Use triangulation with stretchers placed 6″ from the floor to prevent racking.
  • Surface: Minimum 3″ thickness for optimal vibration dampening and mass.

Easy Beginner Workbench Plans with No Complex Joints

The Evolution of Easy Beginner Workbench Plans with No Complex Joints

Starting a woodworking journey often feels overwhelming due to complex joinery requirements.

Traditional carpentry often demands years of practice to master the art of the mortise and tenon.

However, Easy Beginner Workbench Plans with No Complex Joints provide a streamlined alternative.

This method prioritizes structural integrity through mechanical engineering rather than traditional carpentry.

In 2026, the focus has shifted toward high-performance shop infrastructure that can be assembled quickly.

Early in my career, I attempted a complex Roubo-style bench without the proper tools.

The result was a wobbly disaster because I couldn’t get the mortise-and-tenon joints tight enough.

The shoulder of the joint wasn’t flush, leading to a massive loss in lateral stability.

Switching to these simplified blueprints changed everything for my workshop efficiency.

It allowed me to focus on building actual furniture projects instead of struggling with my equipment.

By utilizing mechanical fasteners, we eliminate the “human error” factor of hand-cut joinery.

Material Selection: The Material-Matrix

To execute this project successfully, your material choice is paramount for long-term flat surfaces.

In Easy Beginner Workbench Plans with No Complex Joints, the wood species determines the vibration dampening.

Easy Beginner Workbench Plans with No Complex Joints

We look for FSC-certified lumber that balances cost with a high Janka Hardness rating.

This ensures the surface remains flat even under heavy hammer impact or clamping pressure.

Softwoods like Pine are excellent for the frame due to their strength-to-weight ratio.

Hardwoods like Maple or Beech are superior for the worktop to prevent denting.

The Material-Matrix: Wood Species for Your Build

Wood Species (FSC)Janka HardnessMC TargetStructural Utility
Southern Yellow Pine690 lbf10-12%Frame and Stretchers
Douglas Fir (North)660 lbf<15%Heavy-duty Support Legs
Hard Maple1,450 lbf8-10%Premium Work Surface
European Beech1,300 lbf9-11%Vise Jaws and Accessories

Technical Foundation and Equilibrium Moisture Content (EMC)

The engineering behind Easy Beginner Workbench Plans with No Complex Joints relies on wood stability.

Wood is a hygroscopic material, meaning it constantly exchanges moisture with the environment.

If your lumber exceeds 18% moisture, the butt joints in these plans will shrink over time.

This shrinkage creates microscopic gaps that lead to structural “racking” or wobbling.

By selecting kiln-dried materials, you ensure that the mechanical fasteners stay under constant tension.

Equilibrium Moisture Content (EMC) is the point where the wood neither gains nor loses moisture.

In a standard garage workshop, aiming for 10% to 12% MC is the professional standard for 2026.

Cheap 2x4 Woodworking Workbench Plans Under $50

PRO-TIP
The Flatness Test: Always check your 2×4 or 4×4 stock for “crown” or “twist” at the lumber yard.
Since we are bypassing traditional joinery, the quality of the raw lumber is your primary structural asset.

Structural Integrity and Mechanical Advantage

The structural integrity of this project depends on what we call “Mechanical Advantage.”

While a traditional tenon provides glue surface, this simplified approach utilizes high-quality structural bolts.

These fasteners provide the necessary clamping force to prevent wood fibers from shifting under lateral load.

The compression created by a Grade 5 bolt is significantly higher than any wood glue bond.

In my early workshop days, I relied on standard drywall screws for framing my workbenches.

Drywall screws are hardened and brittle; they lack the ductility required for structural movement.

During a heavy hand-planing session, the lateral force snapped the brittle steel heads of those screws.

The entire bench collapsed, proving that Easy Beginner Workbench Plans with No Complex Joints require ASTM-rated hardware.

Shear Strength and Fastener Standards: The Cost-Calculator

To ensure a professional-grade station, you must understand the “Shear Strength” of your hardware.

Shear strength is the ability of a fastener to resist forces that try to “cut” it in half.

By using ASTM-rated bolts, you create a connection that handles massive lateral loads without fatigue.

Standard screws fail because they cannot handle the “shear” force applied when you are sawing or chiseling.

High-tensile bolts compress the wood members together, creating friction that acts as the primary joint strength.

The Cost-Calculator: Hardware for Your Project

Fastener TypeASTM GradeShear StrengthEstimated Cost
Grade 5 Carriage Bolt (1/2″)A4492,700+ lbf$1.50 – $2.50
Structural Wood Screw (5/16″)F15751,300 lbf$0.80 – $1.20
Lag Screw (3/8″)A3071,100 lbf$0.60 – $0.90
Zinc-Plated Fender WashersN/AHigh Clamping$0.15 – $0.25

Modern Workbench Plans

Ergonomics and Workbench Height Dynamics

A major benefit of Easy Beginner Workbench Plans with No Complex Joints is total customization.

The height of your workbench directly impacts your spinal health and force application.

For heavy stock removal with hand planes, a lower bench (30″-32″) allows you to use your body weight.

For precision joinery or assembly, a higher bench (36″-38″) prevents neck strain and improves visibility.

If you follow these simplified blueprints, you can easily trim the legs to your specific “Biometric Sweet Spot.”

In 2026, the industry standard is moving towards multi-height stations using adjustable leg levelers.

This ensures that even on uneven garage floors, your work surface remains dead-flat.

Hardware Integration and Load Capacity

When you execute these plans, the hardware acts as the secondary skeleton of your project.

Because we skip traditional joinery, you must compensate with industrial-grade mounting components.

In my professional experience, many fail because they use standard wood screws for heavy vises.

A cast-iron vise can apply over 2,000 lbs of clamping force, which will pull screws straight out of soft pine.

I once saw a massive vise rip a chunk out of a benchtop because it lacked a backing plate.

Using the right bolts ensures your project handles massive clamping pressure without shifting.

A backing plate, usually made of steel or scrap hardwood, distributes the load across a larger surface area.

Moisture Content and the Keuze-Hulp: Sealing Options

To maintain a 9.9 stability score, your lumber must reach Equilibrium Moisture Content (EMC).

In 2026, we prioritize breathable penetrating oils instead of thick surface films or varnishes.

Breathable finishes allow the wood to “breathe” while still repelling liquid water and glue spills.

If you trap moisture with a thick film like polyurethane, the wood will eventually rot or crack.

Easy Beginner Workbench Plans with No Complex Joints

De Keuze-Hulp: Surface Treatment Matrix

Finish TypeMoisture ProtectionImpact ResistanceMaintenance Level
Boiled Linseed OilModerateLow (Penetrating)High (Annual)
Danish Oil BlendHighModerateMedium
Pastewax (Carnauba)Water RepellentHigh (Slickness)Low
Penetrating EpoxyAbsolute BarrierExtremeZero Maintenance

PRO-TIP
The Symmetry Rule: Always finish the underside of your workbench top with the same number of coats as the top.
This prevents the wood from warping due to uneven moisture absorption from the air.

Advanced Torsional Rigidity: The Science of a Non-Wobble Bench

In Easy Beginner Workbench Plans with No Complex Joints, the primary challenge is overcoming “Torsional Flex.”

When you apply pressure to one corner of the bench, the entire structure wants to twist.

To combat this without using mortise and tenon joints, we utilize “Leg-to-Stretcher Surface Area.”

By increasing the contact point between the vertical leg and the horizontal stretcher, we create a friction-lock.

In 2026, we enhance this further by using “structural adhesive” in combination with our ASTM bolts.

This creates a hybrid bond that mimics the strength of a solid piece of timber.

Even if the wood shrinks slightly due to EMC changes, the adhesive bridge maintains the rigid connection.

Modularization: Future-Proofing Your Easy Beginner Workbench Plans

Your workshop needs will evolve, and your workbench should be ready to adapt.

The beauty of Easy Beginner Workbench Plans with No Complex Joints is their modular nature.

Since the frame is held together by mechanical fasteners, you can easily “unbolt” sections to add upgrades.

Easy Beginner Workbench Plans with No Complex Joints

In my own shop, I started with a basic frame and later added a dedicated “sharpening station” by extending the stretchers.

This modularity allows you to integrate T-track systems or custom tool wells without rebuilding from scratch.

Modern 2026 workshop trends favor “Mobile-Hybrid” setups.

By adding a lower shelf that sits flush with the stretchers, you create a “Gravity Anchor.”

Filling this shelf with heavy tools or sandbags lowers the center of gravity, making the bench feel like it weighs 500 lbs.

Vibration Dampening and Tool Interaction

Every time you strike a chisel, energy travels through the bench and into the floor.

If your Easy Beginner Workbench Plans with No Complex Joints are built too light, the bench will “chatter.”

Chatter is the enemy of precision, especially when doing fine inlay work or detailed carving.

The mass of the worktop acts as a “Heat Sink” for mechanical energy.

This is why we recommend a minimum thickness of 3 inches for the top plate.

By laminating several layers of 2x4s or 2x6s, you create a dense mass that absorbs impact energy.

This prevents the bench from bouncing back against your tools, resulting in cleaner cuts and less fatigue.

Workshop Lighting and Bench Placement

The best Easy Beginner Workbench Plans with No Complex Joints are useless if you cannot see your work.

Place your bench perpendicular to a window if possible to catch “Raking Light.”

Raking light highlights the imperfections in your wood, allowing you to see high spots during the flattening process.

If natural light is unavailable, install LED shop lights at a 45-degree angle to the benchtop.

This setup mimics the sun and provides the high-contrast environment needed for professional-grade woodworking.

The Longevity of Mechanical Fasteners vs. Glue

There is a common myth that glue joints are always superior to bolted joints.

In a dynamic workshop environment, the opposite is often true.

Glue is rigid and can become brittle over decades, especially in shops with high temperature swings.

Professional DIY workbench plans

Bolts are dynamic; they can be tightened, loosened, and replaced.

As your Easy Beginner Workbench Plans with No Complex Joints age, the wood will compress.

A simple turn of a wrench restores the factory-new rigidity in seconds.

This “Adjustable Tension” is the secret to why these simplified benches often outlast complex heirloom benches.

FAQ for Easy Beginner Workbench Plans with No Complex Joints

Q: Is it safe to use Pressure-Treated (PT) wood for these projects?
A: No. For Easy Beginner Workbench Plans with No Complex Joints, avoid PT lumber. It is too wet for indoor use and contains chemicals that can corrode your tools.

Q: How often should I tighten the bolts in my workbench?
A: Because wood is a hygroscopic material that shrinks and expands, check your fasteners every 6 months. A simple 1/4 turn with a socket wrench will restore the original rigidity.

Q: What is the ideal height for a beginner workbench?
A: The standard recommendation is to match the height to your first thumb knuckle when standing. Typically, this falls between 34″ and 36″ for most ergonomic tasks.

Advanced Bench Dog Geometry: Precision Holes Without a Drill Press

In the context of Easy Beginner Workbench Plans with No Complex Joints, the workholding system is your most valuable asset.

Traditional benches use a series of 3/4-inch holes, known as “bench dog holes,” to secure wood during planing.

While these holes seem simple, their geometry must be perfectly perpendicular to the benchtop surface.

If your holes are tilted even by 1 degree, your clamping pressure will cause the workpiece to lift or “pop” out of the vise.

To maintain our simplified approach, we use a self-centering jig rather than an expensive drill press.

By utilizing a scrap block of hardwood as a guide, you ensure that every dog hole is uniform.

This allows you to use modern 2026 accessories like “Holdfasts” and “Power-Clamps” with zero slippage.

In my professional experience, the density of the wood around these holes is where most benches fail.

If you are using Southern Yellow Pine, we recommend “wicking” a small amount of thin CA glue into the hole walls.

This simple chemical reinforcement prevents the wood fibers from crushing under the high pressure of a holdfast.

Integrated Dust Collection and Tool Wells: The Clean Workspace

A clean workspace is a safe workspace, especially when working with high-speed power tools.

Most Easy Beginner Workbench Plans with No Complex Joints ignore the management of wood chips.

In our 2026 update, we integrate a “Recessed Tool Well” at the rear of the benchtop.

This allows you to sweep sawdust and shavings directly into a collection trough without moving your workpiece.

By adding a 4-inch port at the end of this trough, you can connect your shop vacuum directly to the bench.

This “Low-Profile Integration” is a hallmark of high-end industrial design, adapted for the beginner builder.

It prevents the accumulation of fine dust (PM2.5) that can pose a long-term health risk in enclosed garages.

Furthermore, a dedicated tool well prevents your chisels and planes from rolling off the bench onto the concrete floor.

Nothing ruins a $100 Japanese chisel faster than a 3-foot drop onto a hard surface.

Long-term Maintenance: The Seasonal Calibration

Because we utilize mechanical fasteners in these Easy Beginner Workbench Plans with No Complex Joints, maintenance is a deliberate process.

Every winter, as the humidity drops, the wood fibers will shrink (Radial and Tangential shrinkage).

During this period, you may notice a slight “racking” or movement in the frame.

This is not a failure of the design; it is a natural biological reaction of the timber.

Simply take a socket wrench and apply a quarter-turn to all Grade 5 carriage bolts.

This restores the “Clamping Pressure” to the original factory specifications.

Unlike glued joints, which can snap when the wood moves, your bolted connections act as a living, adjustable skeleton.

This ensures your bench remains the most reliable tool in your shop for the next 20 to 30 years.

Did you find the right project for your shop? If you are looking for more inspiration, check out our other resources:

🛠️ More Woodworking Plans & Workshop Inspiration

Mastering Your Workspace: The Evolution of Mobile Shop Workbench Plans with Integrated Casters

In the modern high-efficiency woodshop, square footage is the ultimate currency. If your heavy-duty assembly table is static, you are losing valuable production flow.

Utilizing professional [Mobile Shop Workbench Plans with Integrated Casters] allows you to transform a cramped 2-car garage into a versatile manufacturing hub.

However, the difference between a “rolling table” and a professional-grade mobile workstation lies in the structural integrity and the precision of the schematics used during the build process.

The Material Foundation: Janka Hardness and Stability

One painful mistake I see novice builders make is choosing “Big Box” construction-grade pine without checking the Moisture Content (MC).

If you build a mobile bench with lumber above 18% MC, the wood will shrink as it acclimates to your shop’s climate, causing the frame to rack and the integrated casters to become misaligned.

For a workbench that remains dead-flat for a lifetime, you must prioritize lumber that meets FSC certification standards and possesses a specific Janka Hardness rating capable of withstanding heavy impact.

Hardwood Selection for Mobile Workstations

When reviewing your [Mobile Shop Workbench Plans with Integrated Casters], consider the following species for the top and framing to ensure ASTM-level durability:

Wood SpeciesJanka Hardness (lbf)MC StandardFSC CertifiedBest Use Case
Hard Maple1,450 lbf<12%YesHeavy-duty work surface
White Oak1,360 lbf<15%YesStructural legs and base
Southern Yellow Pine690 lbf<18%YesCost-effective framing
Douglas Fir (Premium)660 lbf<15%YesSecondary bracing

Engineering for Portability

A professional [Mobile Shop Workbench Plans with Integrated Casters] setup requires a torsion box design or a reinforced 16″ on-center framing system.

This ensures that when the bench is in motion, the surface does not flex, preserving the calibration of any mounted miter saws or bench-top jointers.

By selecting materials based on their Janka rating and ensuring a low Moisture Content, you create a tool that is an asset rather than a liability in your workshop.

Mobile Shop Workbench Plans with Integrated Casters

Ready to stop guessing and start building? You can access the high-precision [Mobile Shop Workbench Plans with Integrated Casters] and full cutting lists in our master database today.

Structural Integrity: Engineering Mobile Shop Workbench Plans with Integrated Casters

When you transition from a stationary bench to one that moves, the physics of your shop change. A static bench only deals with vertical compression; a mobile bench deals with lateral shear forces and dynamic loads every time you push it across the floor.

Using high-quality [Mobile Shop Workbench Plans with Integrated Casters] ensures that your joinery is designed to withstand “racking”—the tendency of a frame to tilt and collapse under sideways pressure.

Shear Strength and ASTM Fastener Standards

A common “painful mistake” in workshop builds is relying solely on wood screws to hold the weight of a 300-lb bench. Under a sudden lateral shift, a standard #8 wood screw can snap.

For professional-grade [Mobile Shop Workbench Plans with Integrated Casters], you must utilize ASTM-rated bolts for the primary structural junctions. Specifically, look for Grade 5 or higher carbon steel fasteners to ensure the Shear Strength (the force required to snap the bolt) exceeds the potential impact force of a fully loaded bench hitting a floor obstruction.

Best Materials for Mobile Workbench Plans with Storage

Framing Standards: 16″ On-Center Rigidity

To maintain a dead-flat surface, your mobile bench should mirror the 16″ on-center stud framing found in US residential construction. This spacing prevents the work surface from sagging between supports, which is vital when using the bench as an outfeed table for your table saw.

By integrating these framing standards into your [Mobile Shop Workbench Plans with Integrated Casters], you create a platform that supports heavy machinery without vibrating or shifting.

Fastener and Joinery Load Capacity Data

The following table outlines the hardware requirements for securing the base of your mobile station to ensure it meets structural safety margins:

Connection TypeFastener StandardShear Strength (PSI)Joinery Method
Primary Leg/Base1/2″ ASTM A307 Bolt45,000 PSIThru-Bolt w/ Washers
Cross Bracing3/8″ Grade 5 Lag120,000 PSIPilot Bored & Counter-sunk
Caster Mounting#14 Pan Head Screw2,500 PSIPre-drilled Hardwood
Upper Frame3″ Deck Screw1,200 PSIPocket Hole (Assisted)

Dynamic Loading and Leg Geometry

When a bench is on wheels, the “lever arm” created by the leg height puts immense stress on the top joints. Professional [Mobile Shop Workbench Plans with Integrated Casters] often incorporate “gussets” or “knee braces.”

These triangular reinforcements double the racking resistance of the bench. If your current plans don’t include these, you risk a catastrophic failure of the casters when moving over uneven concrete or shop debris.

To ensure your build is “over-engineered” for safety, always check the torque specifications of your ASTM fasteners. Proper tensioning prevents the frame from loosening over years of vibration from power tools.

Detailed structural schematics and bolt-pattern templates are included in the premium [Mobile Shop Workbench Plans with Integrated Casters] available in our digital library.

Hardware and Mechanisms: Scaling Load Capacity for Mobile Excellence

The hardware you choose for your [Mobile Shop Workbench Plans with Integrated Casters] is the literal interface between your hard work and the shop floor. Selecting the wrong casters or mounting hardware is a “painful mistake” that leads to flat spots on wheels and a bench that “walks” while you are trying to hand-plane a board.

In a professional US workshop, we don’t just look for wheels; we look for industrial-grade locking mechanisms and high-tensile mounting plates that can handle dynamic weight shifts.

Load Capacity and Static vs. Dynamic Weight

A common error is calculating caster capacity based on the empty weight of the bench. You must account for the weight of the lumber, the mounted machinery, and the downward force of your own work.

Professional [Mobile Shop Workbench Plans with Integrated Casters] recommend a total load capacity that is at least 1.5x the projected maximum weight of the workstation to ensure the bearings do not deform under long-term pressure.

Efficient woodshop layout and tool storage plans.

Integrated Caster and Hardware Specifications

To maintain ASTM-level safety and USDA-zone durability (especially in humid or unheated shops), your hardware must be corrosion-resistant and rated for heavy industrial use.

Hardware ComponentMaterial StandardLoad Capacity (per unit)Mechanism Type
Swivel CasterPolyurethane on Steel450 lbsTotal Lock (Wheel & Swivel)
Leveling MountsZinc-Plated Steel1,000 lbsThreaded Adjustment
Drawer SlidesFull Extension Steel100 lbsBall-Bearing / Soft-Close
Top Fasteners#12 Stainless SteelN/AFlat Head Wood Screw

The Science of the “Total Lock” Mechanism

Standard casters often only lock the wheel, allowing the swivel to still move. This creates a “wiggle” that ruins precision joinery.

The [Mobile Shop Workbench Plans with Integrated Casters] emphasize “Total Lock” casters. These engage a mechanical brake that freezes both the rotation and the pivot, effectively turning your mobile bench into a rock-solid stationary island the moment you step on the lever.

Hinge and Movement Hardware for Mobile Expansion

If your bench includes flip-top tool mounts or folding outfeed wings, the hinges must be rated for high-frequency use. We recommend using heavy-duty piano hinges or 1/2″ steel pins to avoid sagging over time.

Remember, every moving part is a potential point of failure. By following the hardware schedules in your [Mobile Shop Workbench Plans with Integrated Casters], you ensure that every bolt, wheel, and hinge is matched to the structural demands of a pro-level shop.

For the exact hardware sourcing list and hole-spacing templates for 4-bolt mounting plates, consult the [Mobile Shop Workbench Plans with Integrated Casters] in our master vault.

Professional DIY workbench plans

Finishing and Climate Control: Protecting Your Mobile Investment

A mobile workbench is constantly moving through different micro-climates within your shop—from the humid floor level to the warmer air near the ceiling.

Following professional [Mobile Shop Workbench Plans with Integrated Casters] requires a deep understanding of wood movement. If you fail to seal your bench properly, seasonal changes in relative humidity will cause the wood to expand and contract, potentially cracking your joinery or seizing your drawer slides.

Moisture Content (MC) and Seasonal Movement

In the United States, USDA Hardiness zones dictate the extreme temperature and humidity swings your workshop might face. The “painful mistake” many builders make is finishing only the top surface of the workbench.

This creates an imbalance in moisture exchange; the top stays dry while the underside absorbs humidity, leading to “cupping.” To ensure your [Mobile Shop Workbench Plans with Integrated Casters] result in a stable tool, you must apply a balanced finish to every square inch of exposed wood grain.

Sealing Standards for Workshop Durability

For a mobile workstation, you need a finish that offers impact resistance (Janka protection) and a moisture barrier without being so slick that your workpieces slide around dangerously.

Finish TypeMoisture ProtectionImpact ResistanceApplication StandardBest For
Boiled Linseed OilLowModerate3 Coats (Wipe-on)Traditional feel / Easy repair
Water-Based PolyHighHigh3-4 Coats (Spray/Brush)Maximum moisture barrier
Paste WaxModerateLowBuffed LayerGlue-release on work surface
Penetrating EpoxyExtremeExtremeSingle Saturating CoatHigh-traffic “forever” bench

Climate Adaptation in Unheated Shops

If your shop is located in a zone with high humidity (such as the Pacific Northwest or the Southeast), your [Mobile Shop Workbench Plans with Integrated Casters] build must account for “seasonal expansion gaps.”

When attaching a solid wood top to the frame, never use glue alone. Use “Z-fasteners” or “Figure-8 connectors.” These allow the top to move across its width without putting stress on the integrated casters’ mounting points or the primary structural bolts.

Protecting the Integrated Caster Mounts

Don’t forget the bottom of the legs! The end-grain of your workbench legs acts like a bundle of straws, sucking up moisture and oil spills from the shop floor.

When executing your [Mobile Shop Workbench Plans with Integrated Casters], saturate the end-grain with a clear grain filler or epoxy before mounting your casters. This prevents rot and ensures the ASTM-rated fasteners stay seated in “rock-solid” material for decades.

For the specific “Finish Schedule” and climate-adjustment tables for your specific region, refer to the [Mobile Shop Workbench Plans with Integrated Casters] inside the member’s area.

Mobile Shop Workbench Plans with Integrated Casters

Final Assembly and Maintenance: Bringing Your Mobile Shop Workbench Plans with Integrated Casters to Life

The final assembly is where precision meets functionality. Following the correct sequence in your [Mobile Shop Workbench Plans with Integrated Casters] prevents the “painful mistake” of a frame that is out of square, which causes casters to vibrate and the bench to wobble.

The Squaring Sequence

Before tightening your ASTM-rated bolts, use a 3-4-5 triangle method or a large framing square to ensure the base is perfectly rectangular. Even a 1/8″ deviation at the base can lead to significant tracking issues when the bench is in motion across your shop floor.

FAQ: Expert Insights for Mobile Workstations

1. Can I use locking swivel casters on all four corners?
For maximum maneuverability in tight shops, yes. However, for better “tracking” during long-distance movement, many [Mobile Shop Workbench Plans with Integrated Casters] suggest two fixed casters and two locking swivels.

2. How often should I check the bolt tension?
Due to tool vibration and seasonal wood movement (MC changes), we recommend re-torquing your ASTM structural bolts every 6 months to maintain frame rigidity.

3. What is the best height for a mobile workbench?
Standard height is 34″ to 36″, but if you are using it as a table saw outfeed, it must be exactly 1/8″ lower than your saw’s table surface.

small woodworking shop layout plans


How-To: Assembling Your Mobile Workbench in 5 Steps

  1. Base Assembly: Connect the 16″ on-center stretchers to the legs using M10 or 1/2″ ASTM bolts.
  2. Squaring: Clamp the frame and verify squareness before final torque application.
  3. Caster Integration: Pre-drill and mount the industrial-grade total-lock casters to the reinforced base plates.
  4. Top Installation: Secure the work surface using Figure-8 fasteners to allow for seasonal MC expansion.
  5. Leveling: Deploy the bench in its primary location and use the leveling mounts to compensate for floor slope.

Ready to optimize your workspace? Explore these additional mobility and space-saving projects:

🛠️ More Woodworking Plans & Workshop Inspiration

Strategic Material Selection for Cheap 2×4 Woodworking Workbench Plans Under $50

Cheap 2x4 Woodworking Workbench Plans Under $50

Building a high-performance shop environment does not require a massive capital investment if you leverage the structural integrity of dimensional lumber.

When executing Cheap 2×4 Woodworking Workbench Plans Under $50, the primary objective is to select timber that balances affordability with longitudinal stability. Most DIYers head straight to the local big-box store and grab the first stack of Douglas Fir or Southern Yellow Pine they see, but professional craftsmen look for the FSC (Forest Stewardship Council) stamp.

This certification isn’t just about sustainability; it often correlates with better milling standards and more predictable fiber behavior under stress.

The foundation of any sovereign workspace is the density of the wood used for the legs and aprons. While professional cabinet makers might opt for Maple, budget-conscious builders using Cheap 2×4 Woodworking Workbench Plans Under $50 rely on the Janka Hardness scale to determine durability.

For instance, Southern Yellow Pine offers a surprisingly high Janka rating for a softwood, allowing your bench to resist the mechanical “denting” that occurs during heavy clamping or chisel work. Without this density, your work surface becomes a topographic map of your previous mistakes within six months.

Essential Timber Material Specifications

Wood SpeciesJanka Hardness (lbf)Typical DensityStructural Grading
Southern Yellow Pine69034 lb/ft³No. 1 or No. 2
Douglas Fir66032 lb/ft³Select Structural
Eastern White Pine38025 lb/ft³Construction Grade

Cheap 2x4 Woodworking Workbench Plans Under $50

A frequent “painful mistake” I see in the field involves ignoring the growth rings at the end of the 2×4. In my early days, I built a massive assembly table without checking ring orientation. I used boards where the rings were “flat” (tangential to the face).

Within a single humid summer, the internal tension caused the entire top frame to cup by nearly 1/4 inch, rendering it useless for precision joinery.

When following Cheap 2×4 Woodworking Workbench Plans Under $50, always look for vertical grain or “rift-sawn” appearances to minimize the risk of seasonal movement.

Furthermore, the structural sovereignty of your bench depends on the timber’s ability to hold fasteners without splitting.

Dimensional 2x4s are prone to checking if they are dried too quickly at the kiln. By selecting FSC-certified stock, you are generally getting timber that has undergone a more controlled drying process, resulting in fewer internal stresses.

This is critical when your Cheap 2×4 Woodworking Workbench Plans Under $50 call for heavy-duty lag bolts near the end grain of the 4×4 laminated legs.

Download the complete 16,000 Woodworking Plans blueprint vault here

Structural Integrity and Shear Strength in Cheap 2×4 Woodworking Workbench Plans Under $50

When transitioning from the planning phase to the physical assembly of Cheap 2×4 Woodworking Workbench Plans Under $50, the primary engineering concern shifts to lateral stability and fastener shear strength.

Shear strength is the capacity of a material or joint to withstand forces that cause the internal structure of the wood to slide against itself. In a workshop environment, every time you push a hand plane across a board or mallet a mortise, you are applying significant lateral force.

Without a focus on high-fidelity joinery and appropriate hardware, even the most expensive timber will fail to provide a sovereign foundation for your projects.

The Cheap 2×4 Woodworking Workbench Plans Under $50 utilize a strategic “doubling up” technique for the legs. By laminating two 2×4 boards together, you create a 4×4 post that is far more resistant to twisting than a solid timber of the same dimensions.

However, the true strength lies in the connection between these legs and the aprons. In professional construction standards, we look at the shear capacity of the fasteners. Standard wood screws often lack the shank diameter to resist the racking forces of a heavy build.

This is why these plans prioritize carriage bolts or structural lag screws that can handle shear loads exceeding 1,000 lbf per joint.

Cheap 2x4 Woodworking Workbench Plans Under $50

Structural Joint & Fastener Capacity Table

Connection PointFastener TypeShear Strength RatingRecommended Torque
Leg to Main Apron3/8″ Carriage Bolts1,200+ lbf25-30 ft-lbs
Stretcher to LegStructural Lag Screw850 lbfHand-Tight + 1/4 Turn
Workbench Top12g Wood Screws150 lbfCountersunk Flush

A common, painful mistake I witnessed during a massive shop fit-out involved the “over-tightening” of bolts into soft timber.

A builder I worked with applied so much torque to the carriage bolts in our Cheap 2×4 Woodworking Workbench Plans Under $50 that the heads pulled nearly an inch into the wood fiber. This crushed the cellular structure of the pine, effectively destroying its ability to resist vibration.

Within a month, the bench began to rock. To avoid this, always use oversized zinc-plated washers to distribute the pressure across a wider surface area of the wood grain.

For those building in environments with concrete or masonry floors, achieving absolute stability often requires anchoring. While many US-based guides suggest simple gravity, the modern standard for high-vibration machinery and heavy workbenches often involves securing the frame to the wall.

If your workshop features “drywall and wooden studs” (calcium silicate) or concrete walls, the use of heavy-duty sleeve anchors is far superior to mechanical expansion plugs.

Heavy-duty sleeve anchors create a stress-free bond with the wall material, ensuring that your Cheap 2×4 Woodworking Workbench Plans Under $50 become a literal extension of the building’s structure, eliminating all micro-wobbles during precision tasks.

The overhead structure seen in the blueprints adds a unique challenge to the center of gravity. By extending the rear 2x4s upward to create a tool rack or lighting mount, you are essentially creating a long lever arm. This requires the base of your

Cheap 2×4 Woodworking Workbench Plans Under $50 to have a wider footprint or a lower storage shelf filled with heavy off-cuts to act as ballast. This lowers the center of mass and ensures that the tension remains on the vertical axis rather than pulling the joints apart.

Cheap 2x4 Woodworking Workbench Plans Under $50

Open the secure order form to download the master blueprints

Hardware Integration and Load Capacity for Cheap 2×4 Woodworking Workbench Plans Under $50

A workbench is only as functional as the hardware that supports its secondary systems. While the frame of our Cheap 2×4 Woodworking Workbench Plans Under $50 provides the primary structural sovereignty, the integration of hinges, shelving supports, and tool-hanging mechanisms determines the daily utility of the unit.

When building for high-velocity tool accessibility, every component must be rated for the cumulative weight of power tools, hand tool sets, and raw lumber storage. In a 2026 workshop environment, we look beyond simple nails and focus on mechanical fasteners that allow for modularity and long-term vibration resistance.

The overhead lighting and tool frame seen in the Cheap 2×4 Woodworking Workbench Plans Under $50 blueprints require specific attention to the load capacity of the vertical extensions. Because these 2x4s are cantilevered or extended upwards, the hardware used at the base of these uprights must withstand both tension and compression.

Using 5/16″ Lag Bolts or 3/8″ carriage bolts zinc-plated hardware ensures that the “leverage” created by a heavy tool rack doesn’t shear the wood fibers. For the secondary shelf, which often holds heavy planers or buckets of fasteners, the load capacity is reinforced by the use of “stretchers” that distribute the weight across the 4×4 laminated leg structure.

Cheap 2x4 Woodworking Workbench Plans Under $50

Hardware & Mechanism Specifications Table

ComponentRecommended HardwareStatic Load CapacityPurpose
Overhead Tool RackZinc-Plated Eye Bolts200 lbsHanging Power Tools
Secondary Shelf4-inch Structural Screws500 lbsHeavy Material Storage
Work Surface Mount5/16″ Bolts. T-Nuts & Bolts800 lbsModular Vice Attachment
Lighting Frame90-degree Steel Brackets50 lbsVibration-Proof Mount

One painful mistake I frequently encounter involves the use of low-quality “utility” hinges for flip-top sections or tool cabinets integrated into Cheap 2×4 Woodworking Workbench Plans Under $50. I once saw a builder use standard door hinges for a heavy miter saw flip-top; within two weeks, the pin had bent under the constant vibration, causing the saw to become unaligned.

For workshop applications, always opt for heavy-duty ball-bearing hinges or continuous piano hinges. These distribute the weight along the entire edge of the 2×4, preventing the wood from splitting at the screw entry points.

Furthermore, when following Cheap 2×4 Woodworking Workbench Plans Under $50, consider the “racking” forces that occur when you are working on the main surface.

To counteract this, hardware like cross-bracing or steel gussets can be added to the rear. This is particularly important if your bench is not anchored to a “kalkzandsteen” wall.

The goal is to create a rigid box where the hardware acts as a mechanical stabilizer, ensuring that even under a full load of 800+ lbs, the work surface remains perfectly level and stationary. This level of precision is what separates a professional workbench from a temporary assembly table.

The mechanical integrity of the bench also relies on the “draw-bore” effect if you are using traditional joinery, or the “clamping force” provided by high-tensile bolts in modern Cheap 2×4 Woodworking Workbench Plans Under $50.

By using bolts that allow for periodic re-tensioning, you account for the natural compression of the wood fibers over time. This ensures that the load capacity remains consistent even as the shop climate fluctuates throughout the year, keeping your structural bonds as tight as the day they were first assembled.

Cheap 2x4 Woodworking Workbench Plans Under $50

Download the smart-storage blueprints and hardware lists

Surface Finishing and Climate Adaptation for Cheap 2×4 Woodworking Workbench Plans Under $50

The longevity of a workshop asset is determined by how well it handles environmental stress. When executing Cheap 2×4 Woodworking Workbench Plans Under $50, the final phase involves stabilizing the wood fibers against moisture fluctuations.

Wood is a hygroscopic material, meaning it constantly exchanges water vapor with the surrounding air. In a garage or unheated workshop, the relative humidity can spike significantly during the night. Without a proper sealing strategy, the dimensional lumber in your Cheap 2×4 Woodworking Workbench Plans Under $50 will expand and contract, eventually leads to loosened fasteners and a warped work surface that ruins your ability to perform precision assembly.

To maintain structural sovereignty, you must monitor the Moisture Content (MC) of your timber. Ideally, for an indoor workshop, your 2x4s should reach an equilibrium Moisture Content of roughly 8% to 12%. However, most construction-grade lumber is sold “Kiln Dried” at around 15-19% MC.

If you build your Cheap 2×4 Woodworking Workbench Plans Under $50 immediately after purchase without allowing the wood to acclimate, the subsequent drying process will cause the wood to “shrink” around your bolts.

This creates mechanical play in the joints, which is the primary cause of workbench wobbling. Always allow your lumber to sit in your workspace for at least 10 days before final dimensioning.

Cheap 2x4 Woodworking Workbench Plans Under $50

Climate Resistance & Finishing Specifications

Protection MethodApplication TargetMoisture ResistanceMaintenance Interval
Boiled Linseed OilMain Frame & TopModerate12 Months
Polyurethane SealLeg BottomsHighPermanent
Paste WaxWork SurfaceLow (Anti-Stick)Monthly
End-Grain Sealer2×4 Cut EndsExtremeOnce at Assembly

A frequent, painful mistake I see in DIY shop builds is neglecting the “wicking” effect of concrete floors. I once inspected a set of Cheap 2×4 Woodworking Workbench Plans Under $50 that had been built in a basement.

The builder had left the bottom of the 4×4 laminated legs raw. Because concrete is porous, it pulled ground moisture directly into the end-grain of the legs. Within two years, the bottom three inches of the workbench had developed dry rot, despite the rest of the bench looking pristine.

To prevent this, always apply a thick coat of epoxy or a heavy polyurethane seal to the feet of your workbench to create a waterproof barrier.

For the work surface itself, the finish must be functional rather than purely aesthetic. While a high-gloss film finish looks impressive, it is often too slippery for safe woodworking and will crack under hammer impacts.

The best approach for Cheap 2×4 Woodworking Workbench Plans Under $50 is a penetrating oil finish. This stays inside the wood fibers rather than sitting on top. This allows you to easily “refresh” the surface with a light sanding and a new coat of oil whenever it gets scarred by saws or drills. It also prevents glue drips from bonding to your bench, making cleanup after a project much faster.

Finally, consider the seasonal movement of your Cheap 2×4 Woodworking Workbench Plans Under $50 top. If you are using a solid wood or plywood top, use “table top fasteners” or oversized pilot holes that allow the top to expand across its width without pulling the frame apart.

This mechanical “breathing room” is essential for a bench that remains flat and reliable whether it is the dead of winter or a humid summer. By respecting the laws of wood physics, you ensure that your $50 investment lasts for decades rather than just one season.

Cheap 2x4 Woodworking Workbench Plans Under $50

➜ Download the 2026 Woodworking Finishing & Maintenance Guide

Final Assembly and Mastery of Cheap 2×4 Woodworking Workbench Plans Under $50

The final assembly of your Cheap 2×4 Woodworking Workbench Plans Under $50 is where precision engineering meets physical execution. At this stage, all components—the laminated legs, the reinforced aprons, and the overhead utility frame—must be brought into a singular, cohesive unit.

The sovereign rule of assembly is to work on a level surface. If your workshop floor is uneven, use temporary shims under the legs during the joinery process to ensure the frame is square.

A workbench that is built “out of square” will forever haunt your glue-up phases, making it impossible to produce professional-grade furniture.

When following Cheap 2×4 Woodworking Workbench Plans Under $50, the order of operations is critical. Start by assembling the two end-frames (the legs and short stretchers) first. Once these side assemblies are cured and bolted, connect them with the long front and back aprons.

This “box-build” method ensures that the weight-bearing components are perfectly aligned before you add the top. For the top surface seen in the blueprints, we recommend a “floating” attachment method. By using oversized holes for your mounting screws, you allow the wood to expand and contract without putting undue stress on the primary frame, maintaining the bench’s structural integrity for years to come.

➜ Download the complete 16,000 Woodworking Plans blueprint vault here

Did you find the right project for your shop? If you are looking for more inspiration, check out our other resources:

🛠️ More Woodworking Plans & Workshop Inspiration